Honda Fit: Transmission Range Switch Replacement (A/T)
-
Raise the vehicle on a lift, or apply the parking brake, block the rear wheels, and raise the front of the vehicle. Make sure it is securely supported.
-
Shift to N.
-
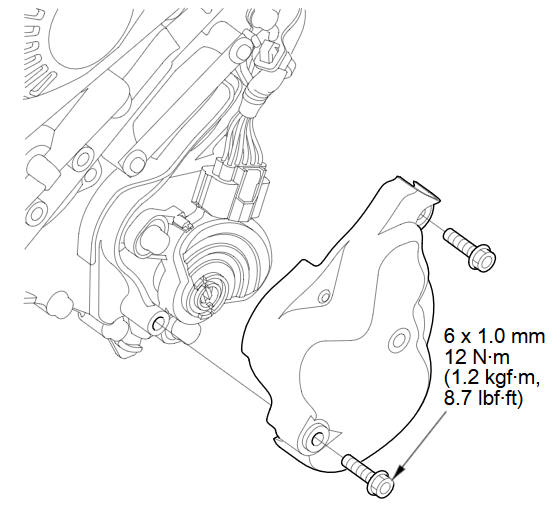
Remove the transmission range switch cover.
-
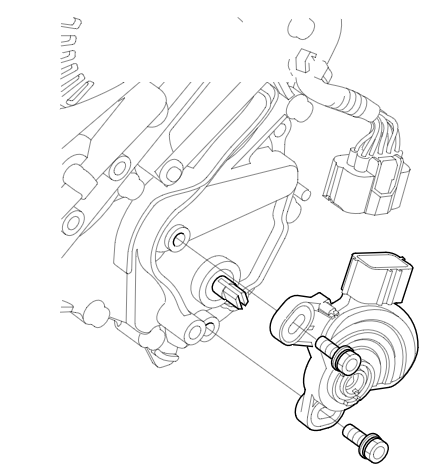
Remove the transmission range switch.
-
Make sure the shift position is in N. If necessary, put the shift lever into N.
NOTE: Do not use the selector control shaft to adjust the shift position. If the control shaft tips are squeezed together it will cause a faulty signal or position due to play between the selector control shaft and switch.
-
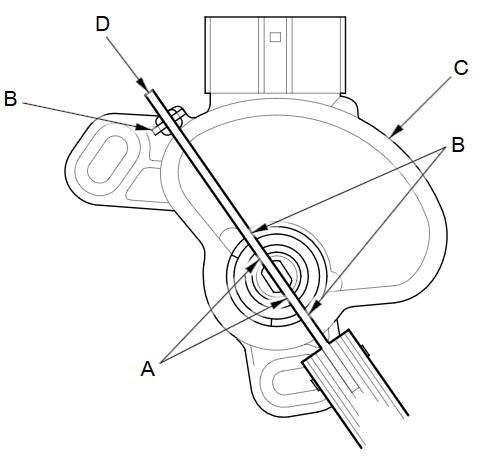
Align the cutouts (A) on the rotary-frame with the neutral positioning cutouts (B) on the transmission range switch (C), then put a 2.0 mm (0.08 in) feeler gauge blade (D) in the cutouts to hold the switch in the N position.
NOTE: Be sure to use a 2.0 mm (0.08 in) blade or equivalent to hold the switch in the N position.
-
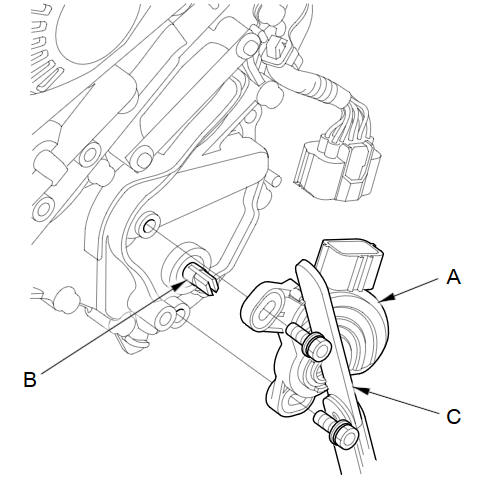
Install the transmission range switch (A) gently on the selector control shaft (B) while holding it in the N position with the 2.0 mm (0.08 in) blade (C).
-
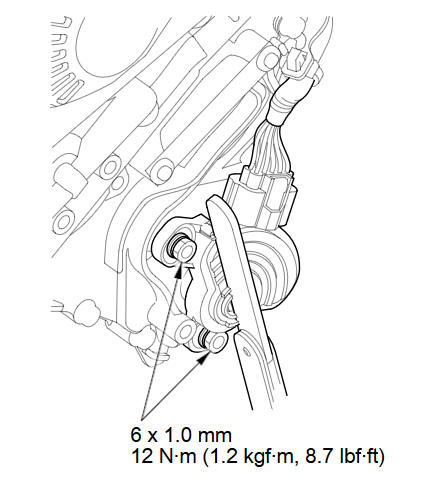
Tighten the bolts on the transmission range switch while you continue to hold the N position. Do not move the transmission range switch when tightening the bolts. Remove the feeler gauge.
-
Check the connectors for rust, dirt, or oil, clean or repair if necessary, then connect the connector securely.
-
Turn the ignition switch to ON (II). Move the shift lever through all positions, and check the transmission range switch synchronization with the A/T gear position indicator.
-
Check that the engine starts in P and N, and does not start in any other shift lever position.
-
Check that the back-up lights come on when the shift lever is in R.
-
Allow the front wheels to rotate freely, then start the engine, and check the shift lever operation.
-
Install the transmission range switch cover.
See also:
Intersection
DEST button
►DEST Menu 2►Intersection
Select the intersection of two streets as the destination. The state or
province for
your current location is displayed at the top of the screen ...
Receiving a Call
1. Press the (Pick-Up) button
to
answer a call and display the
Calling screen.
2. Press the (Hang-Up) button
to
terminate the call.
The following options are available during a call:
â ...
Remote Transmitter
On Sport model
LOCK - Press this button once to lock all doors and the tailgate. Some
exterior lights will flash once. When you push LOCK twice within 5 seconds, the
horn will sound to verify t ...
Categories
