Honda Fit: Pressure Plate Inspection and Removal
-
Remove the transmission.
-
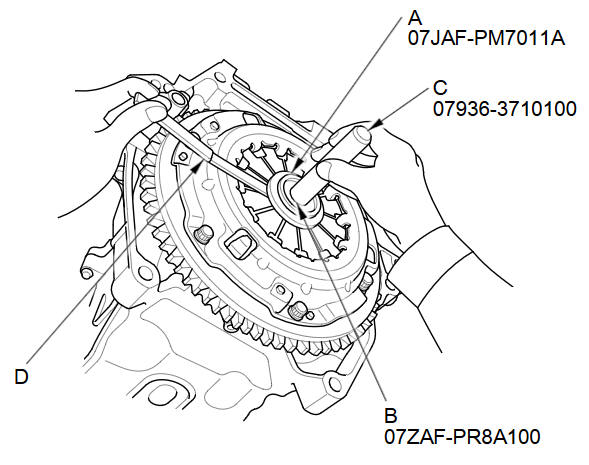
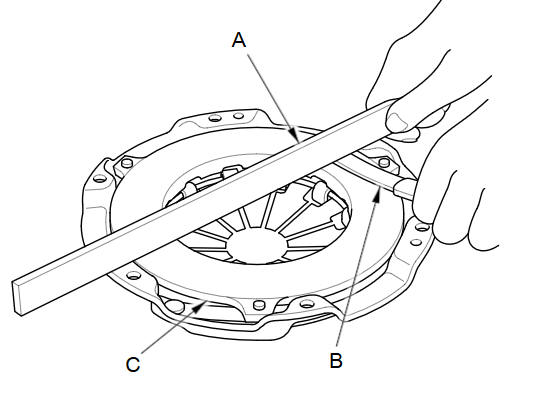
Check the evenness of the height of the diaphragm spring fingers using the clutch alignment disc (A), clutch alignment shaft (B), remover handle (C), and a feeler gauge (D). If the height difference is more than the service limit, replace the pressure plate.
Standard (New):
0.6 mm (0.024 in) max.
Service Limit:
1.0 mm (0.039 in)
-
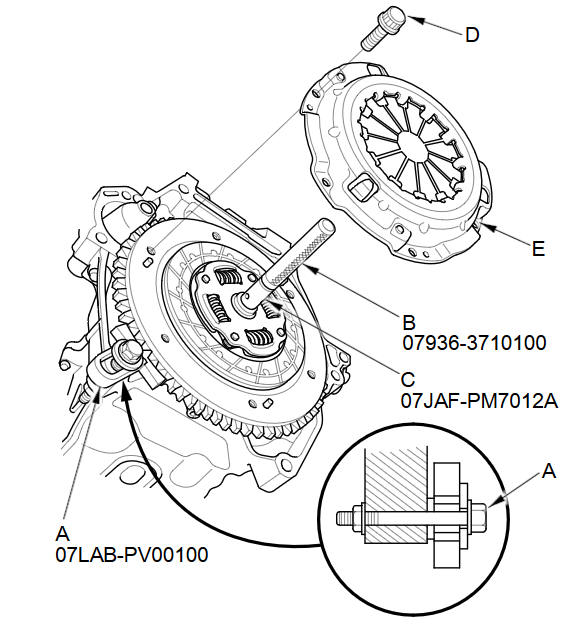
Install the ring gear holder (A), the remover handle (B), and the clutch alignment shaft (C).
-
To prevent warping, unscrew the pressure plate mounting bolts (D) in a crisscross pattern in several steps, then remove the pressure plate (E).
-
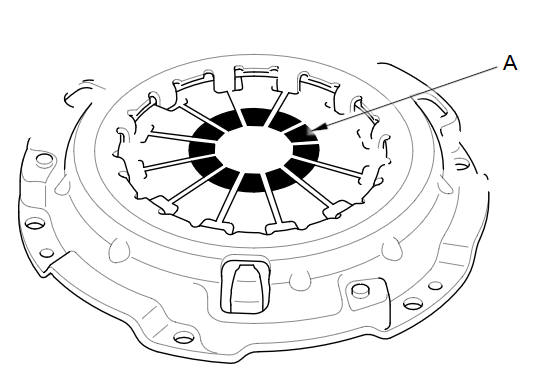
Inspect the fingers of the diaphragm spring (A) for wear at the release bearing contact area.
-
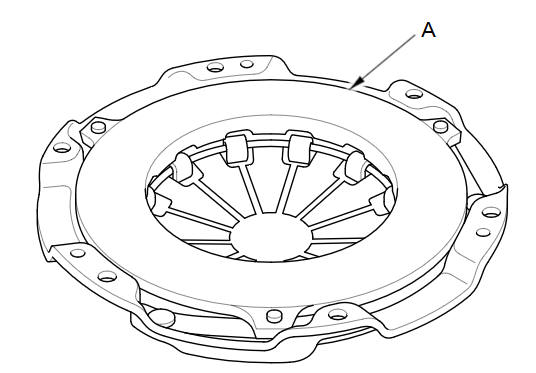
Inspect the pressure plate (A) surface for wear, cracks, and burning.
-
Inspect for warpage using a precision straight edge (A) and a feeler gauge (B). Measure across the pressure plate (C). If the measurement is greater than the service limit, replace the pressure plate.
Standard (New):
0.03 mm (0.001 in) max.
Service Limit:
0.15mm (0.005 in)
See also:
Lights
Headlight Aiming
The headlights were properly aimed when your vehicle was new. If you regularly
carry heavy items in the cargo area, readjustment may be required. Adjustments should
be done by yo ...
Throttle Body Removal/Installation
caution
Do not insert your fingers into the installed throttle body when you
turn the ignition switch to ON (II) or while the ignition switch is in
ON (II). If you d ...
A/T System Description - Hydraulic Controls (A/T)
Hydraulic ControlsThe valve body includes the main valve body,
the regulator valve body, and the servo body. The ATF pump is driven by
splines on the end of the torque converter which is atta ...
Categories
