
Honda Fit: Secondary Shaft 2nd Gear Axial Clearance Inspection (A/T)
-
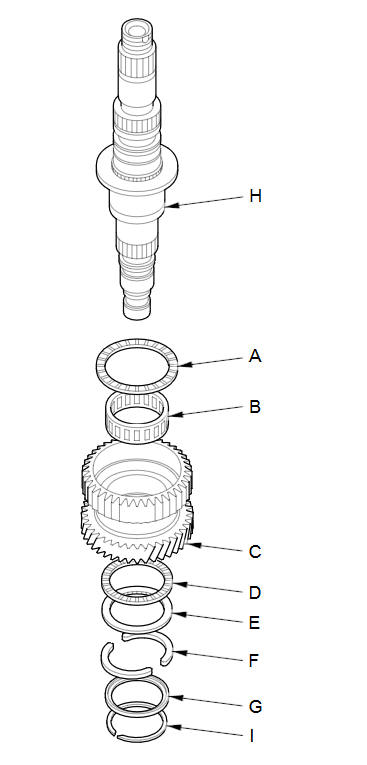
Install the thrust needle bearing (A), the needle bearing (B), 2nd gear (C), the thrust needle bearing (D), the 43 x 54.5 mm thrust washer (E), the 39 mm cotters (F), and the cotter retainer (G) on the secondary shaft (H), then secure them with the snap ring (I).
-
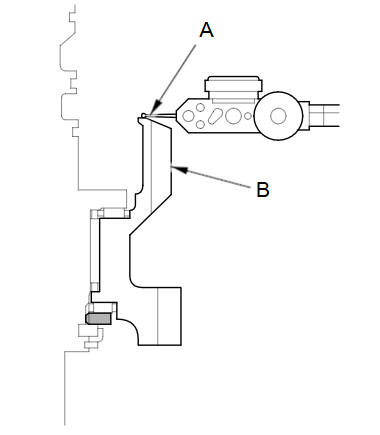
Set the dial indicator (A) on 2nd gear (B).
-
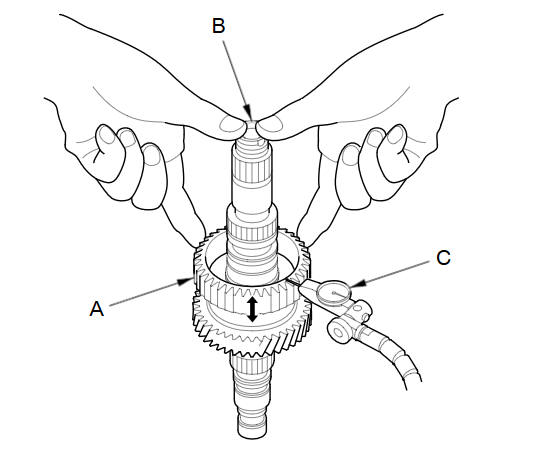
Lift 2nd gear (A) up while holding the secondary shaft (B), and use the dial indicator (C) to read the 2nd gear axial clearance.
-
Measure the 2nd gear axial clearance in at least three places while turning 2nd gear. Use the average as the actual clearance.
Standard:
0.04пјЌ0.12 mm (0.002пјЌ0.005 in)
-
If the clearance is out of standard, remove the 43 x 54.5 mm thrust washer and measure its thickness.
-
Select and install a new thrust washer, then recheck.
THRUST WASHER, 43 x 54.5 mm
No.
Thickness
1
2.900 mm (0.114 in)
2
2.925 mm (0.115 in)
3
2.950 mm (0.116 in)
4
2.975 mm (0.117 in)
5
3.000 mm (0.118 in)
6
3.025 mm (0.119 in)
7
3.050 mm (0.120 in)
8
3.075 mm (0.121 in)
9
3.100 mm (0.122 in)
10
3.125 mm (0.123 in)
11
3.150 mm (0.124 in)
12
3.175 mm (0.125 in)
13
3.200 mm (0.126 in)
-
After replacing the thrust washer, make sure the clearance is within standard.
-
Disassemble the installed parts from the secondary shaft.
See also:
Armrest
■Using the Driver’s Seat Armrest*
Pull down the armrest. ...
About Your Seat Belts
Seat belts are the single most effective safety device because they keep you
connected to the vehicle so that you can take advantage of many built-in safety
features. They also help keep you from be ...
Adding Waypoints
Add up to four waypoints (pit stops) along the route to your destination.
Waypoints allow you to stop for gas or food, for
example, and then continue on to your
destination.
Press the MAP/GUID ...
Categories
