Honda Fit: ATF Replacement (A/T)
NOTE: Keep all foreign particles out of the transmission.
-
Warm up the engine to normal operating temperature (the radiator fan comes on), and turn the engine off.
-
Raise the vehicle on a lift, or apply the parking brake, block both rear wheels, and raise the front of the vehicle. Make sure it is securely supported.
-
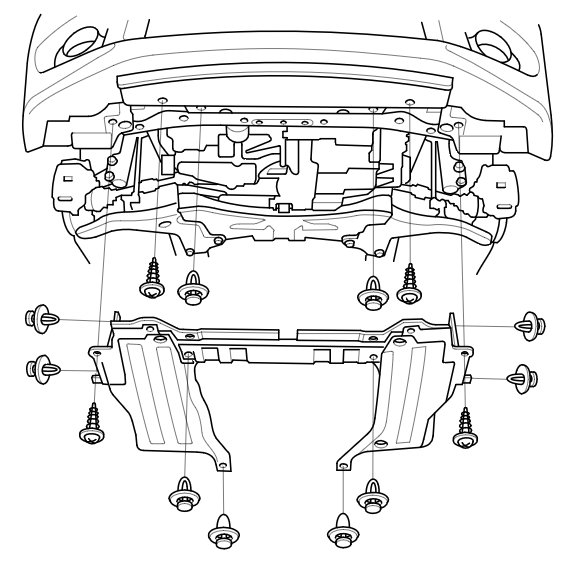
Remove the splash shield.
-
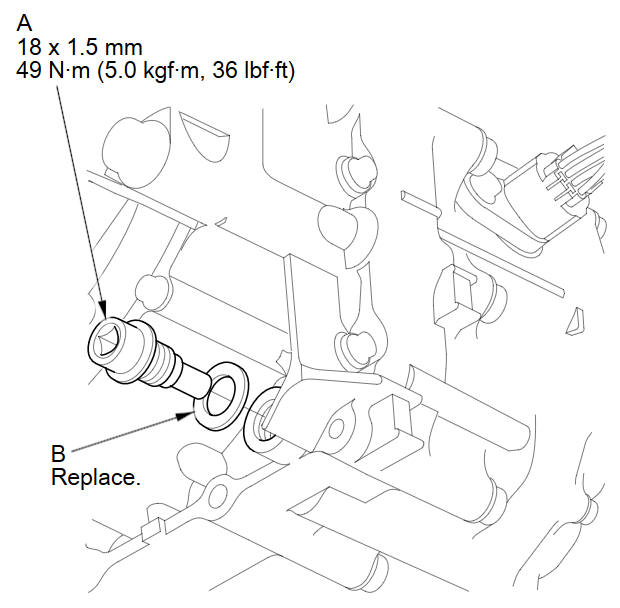
Remove the drain plug (A), and drain the automatic transmission fluid (ATF).
NOTE: If a cooler cleaning is done, refer to ATF cooler cleaning.
-
Reinstall the drain plug with a new sealing washer (B).
-
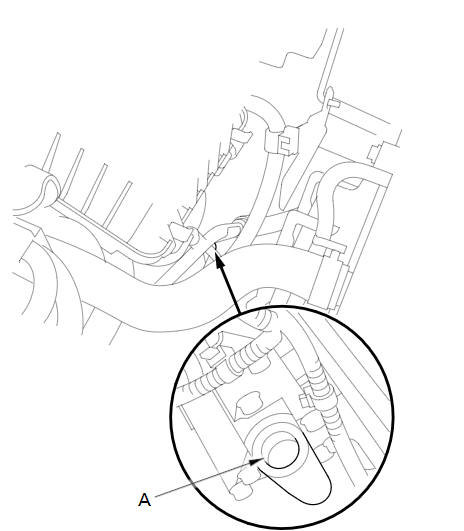
Remove the dipstick, and refill the transmission with the recommended fluid into the dipstick guide opening (A). Always use Honda ATF DW-1 Automatic Transmission Fluid (ATF). Using a non-Honda ATF can affect shift quality.
Automatic Transmission Fluid Capacity:
2.5 L (2.6 US qt) at change
5.85 L (6.18 US qt) at overhaul
-
Insert the dipstick back into the transmission.
-
Check the ATF level.
-
Install the splash shield.
-
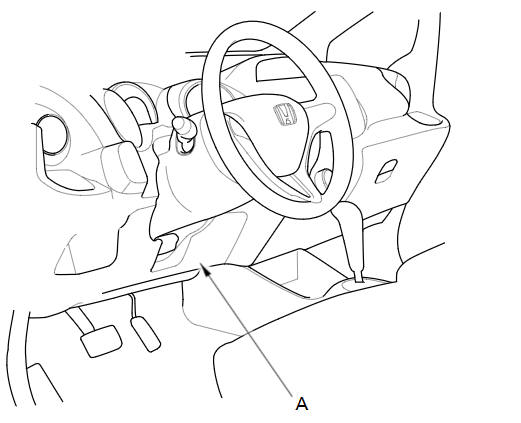
Connect the HDS to the DLC (A).
-
Turn the ignition switch to ON (II), and go to the system selection menu on the HDS. If the HDS does not communicate with the PCM, troubleshoot the DLC circuit.
-
Select BODY ELECTRICAL with the HDS.
-
Select ADJUSTMENT in the GAUGE MENU with the HDS.
-
Select RESET in the MAINTENANCE MINDER with the HDS.
-
Select MAINTENANCE SUB ITEM 3 Reset, and reset the ATF life with the HDS.
See also:
Transmission End Cover Park Lever Stop Inspection and Adjustment (A/T)
Set the park lever in the P position.
Measure the center-to-center distance (A) between the park pawl shaft (B)
and the park lever roller pin (C).
Sta ...
A/C System Evacuation (With A/C)
Special Tools Required
Compact Electronic Vacuum Gauge Robinair ROB14777, commercially available
*This tool is available through the Honda Tool and Equipment Program; call
888-424-6857
...
Driving Guidelines
On Sport model
Your vehicle is designed to give you optimum handling and performance on well-maintained
roads. As part of this design, your vehicle has a minimum of ground clearance.
• Use cauti ...
Categories
