Honda Fit: Throttle Body Cleaning
 |
|
Do not insert your fingers into the installed throttle body when you turn the ignition switch to ON (II) or while the ignition switch is in ON (II). If you do, you will seriously injure your fingers if the throttle valve is activated. |
-
Make sure the ignition switch is turned to LOCK (0).
-
Check for damage to the air cleaner. If the air cleaner is damaged, replace it.
-
Remove the throttle body.
-
Clean off the carbon from the throttle valve and inside the throttle body with a paper towel soaked in throttle plate cleaner.
NOTE:
-
Always remove the throttle body to clean it.
-
Be careful not to pinch your fingers.
-
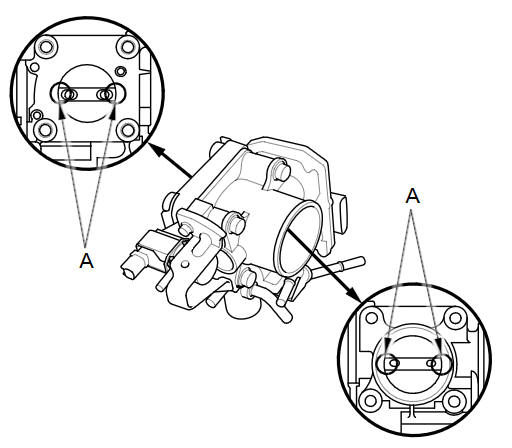
To avoid removing the molybdenum coating, do not clean the bearing area of the throttle shaft (A).
-
Do not spray throttle plate cleaner directly on the throttle body.
-
Use Honda genuine throttle plate cleaner.
-
-
Reinstall the throttle body.
-
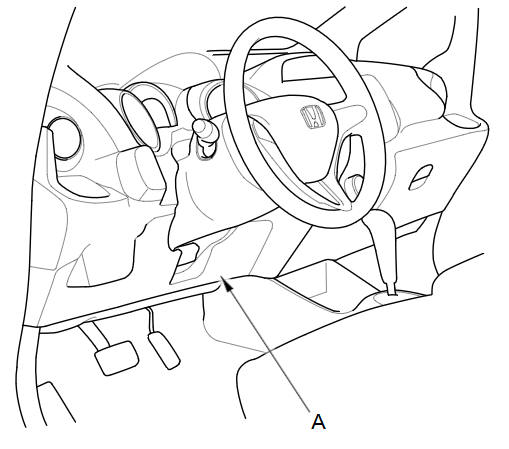
Connect the HDS to the data link connector (DLC) (A) located under the driver's side of the dashboard.
-
Turn the ignition switch to ON (II).
-
Reset the ECM/PCM with the HDS.
-
Select the ETCS TEST in the INSPECTION MENU with the HDS.
-
Select the TP POSITION CHECK, then clear the throttle position (TP) learned value.
-
Turn the ignition switch to LOCK (0).
-
Turn the ignition switch to ON (II), and wait 2 seconds without pressing the accelerator pedal.
-
Do the ECM/PCM idle learn procedure.
See also:
Fuel and Emissions System Description - Electronic Throttle Control System
Electronic Throttle Control System
The throttle is electronically controlled by the electronic throttle
control system (ETCS). Refer to the system diagram to see a functional
layout of the ...
Map Scale Commands
Display north up
Display heading up
Display zoom in
Display zoom out
Display (specify scale):
1/20 mile (80 m) scale
1/8 mile (200 m) scale
1/4 mile (400 m) scale
1/2 mile (800 m) scale
1 mil ...
Modifications
Do not modify your vehicle or use non-Honda components that can affect its
handling, stability, and reliability.
Overall vehicle performance can be affected. Always make sure all equipment is
pro ...
Categories
