Honda Fit: Cam Chain Removal
NOTE: Keep the cam chain away from magnetic fields.
-
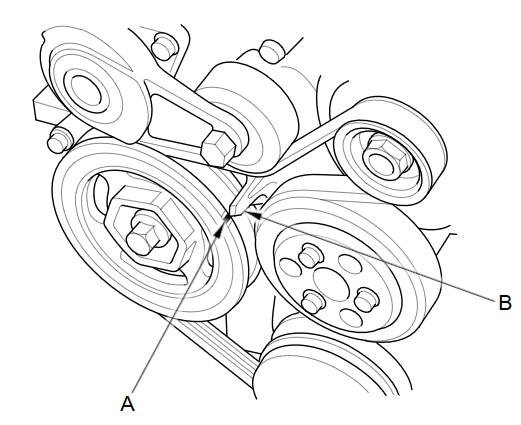
Turn the crankshaft pulley so its top dead center (TDC) mark (A) lines up with the pointer (B).
-
Remove the cylinder head cover.
-
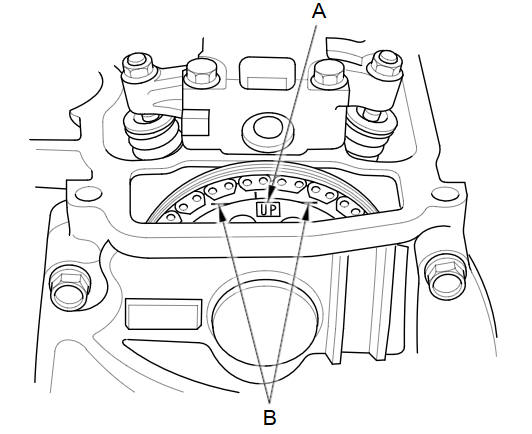
Check the No. 1 piston at TDC. The UP'' mark (A) on the camshaft sprocket should be at the top, and the TDC grooves (B) on the camshaft sprocket should line up with the top edge of the head.
-
Remove the right front wheel.
-
Remove the splash shield.
-
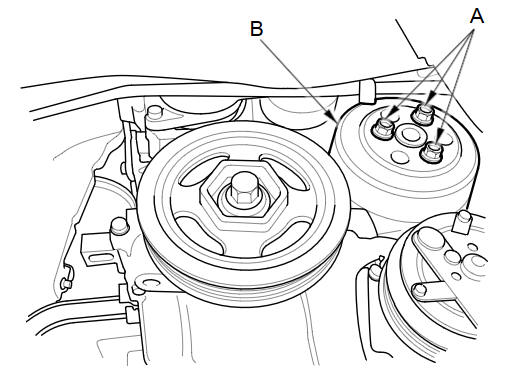
Loosen the water pump pulley mounting bolts (A).
-
Remove the drive belt.
-
Remove the water pump pulley (B).
-
Remove the crankshaft pulley.
-
Remove the drive belt auto-tensioner.
-
Support the engine with a jack and a wood block under the oil pan.
-
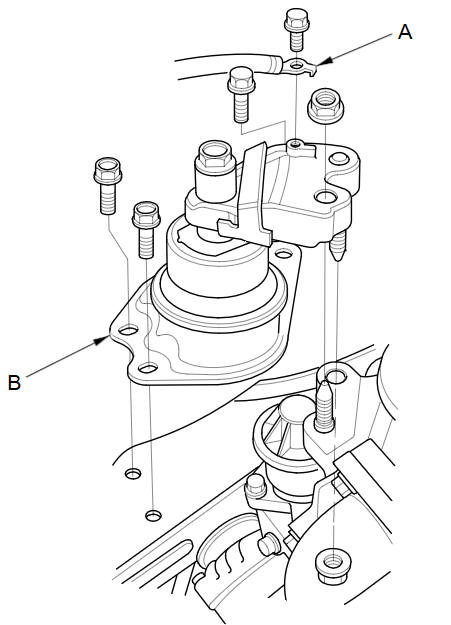
Remove the ground cable (A), then remove the side engine mount/bracket assembly (B).
-
Remove the cam chain case.
-
Measure the cam chain separation. If the distance is less than the service limit, replace the cam chain and cam chain tensioner.
Standard Distance: 19 mm (0.75 in)
Service Limit: 15 mm (0.59 in)
-
Apply new engine oil to the sliding surface of the cam chain tensioner slider (A).
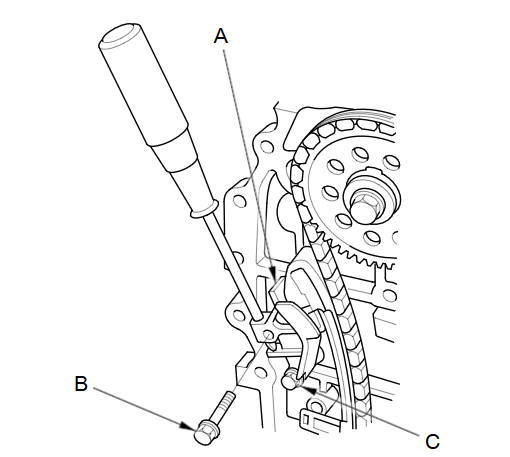
-
Hold the cam chain tensioner slider with a screwdriver, then remove the upper bolt (B), and loosen the lower bolt (C).
-
Remove the cam chain tensioner slider.

-
Remove the cam chain tensioner (A) and the cam chain guide (B).
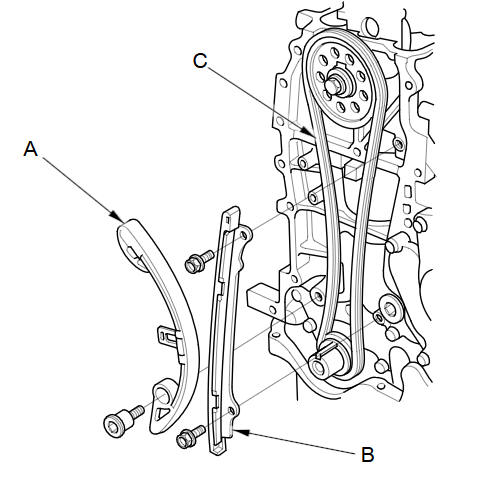
-
Remove the cam chain (C).
See also:
Remote Transmitter Care
Replacing the Battery
If the indicator does not come on when the button is pressed, replace the
battery.
Battery type: CR1616
1. Unscrew the cover with a small Phillipshead
screwdriver.
υ ...
With navigation
@font-face{font-family:
"Honda_SymbolMarkeng";src:url(/statics/ho_prod_2/txt/Honda_SymbolMark_enu3.txt);}@font-face{ ...
Obtaining Navigation Update Data
Honda is continually expanding the scope
of the navigation system. Navigation
system software upgrades may be made
available periodically, usually in the fall of
each year.
To purchase an updat ...
Categories
