Honda Fit: Block and Piston Inspection
-
Remove the crankshaft and the pistons.
-
Check the piston for distortion or cracks.
-
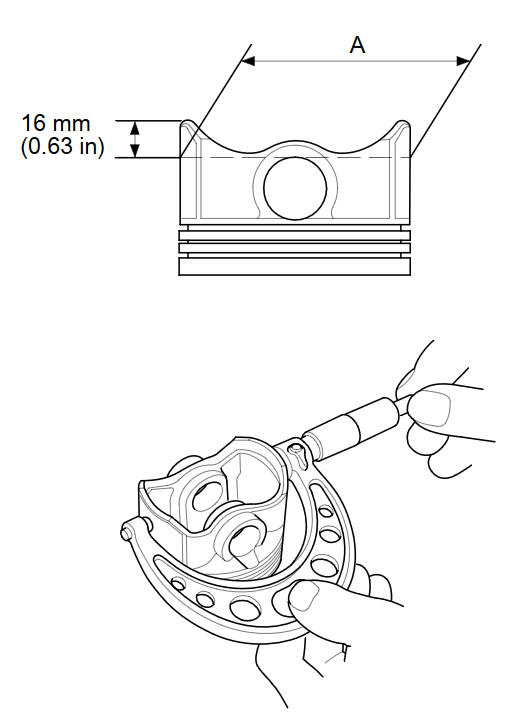
Measure the piston skirt diameter (A) at a point 16 mm (0.63 in) from the bottom of the skirt.
Piston Diameter
Standard (New):
72.980пјЌ72.990 mm (2.87322пјЌ2.87362 in)
Service Limit:
72.97 mm (2.8728 in)
Oversize Piston Diameter
0.25:
73.230пјЌ73.240 mm (2.88307пјЌ2.88346 in)
-
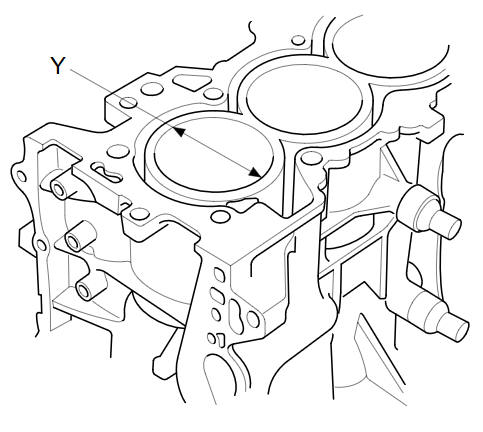
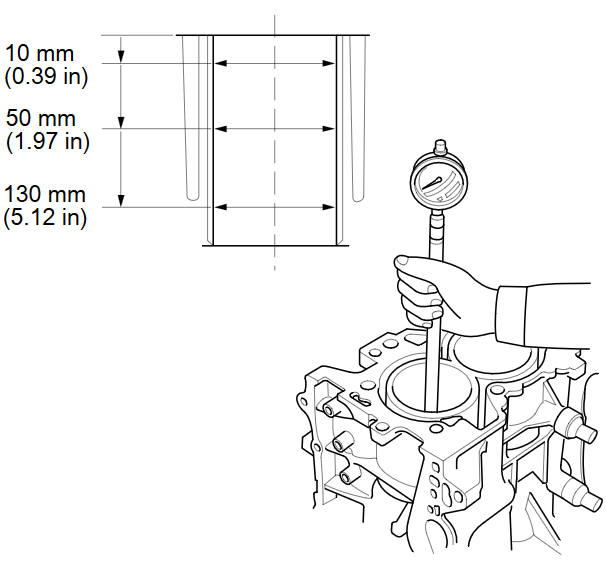
Measure wear and taper in direction Y at three levels in each cylinder as shown. If measurements in any cylinder are beyond the oversize bore service limit, replace the engine block. If the engine block is to be rebored, refer to step 7 after reboring.
Cylinder Bore Size
Standard (New):
73.000пјЌ73.015 mm (2.87401пјЌ2.87460 in)
Service Limit:
73.065 mm (2.87657 in)
Oversize
0.25:
73.250пјЌ73.265 mm (2.88385пјЌ2.88444 in)
Reboring limit:
0.25 mm (0.0098 in) max.
Bore Taper
Limit:
(Difference between first and third measurement) 0.05 mm (0.0020 in)
-
Scored or scratched cylinder bores must be honed.
-
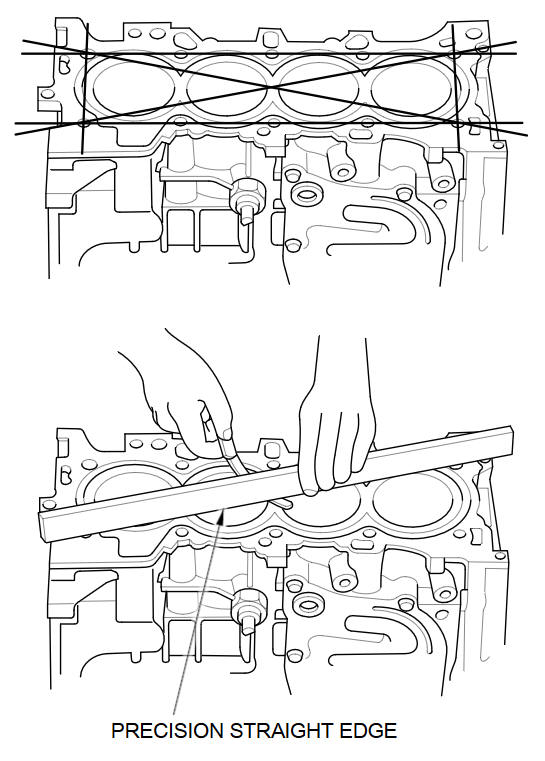
Check the top of the engine block for warpage. Measure along the edges and across the center as shown.
Engine Block Warpage
Standard (New):
0.07 mm (0.002 in) max.
-
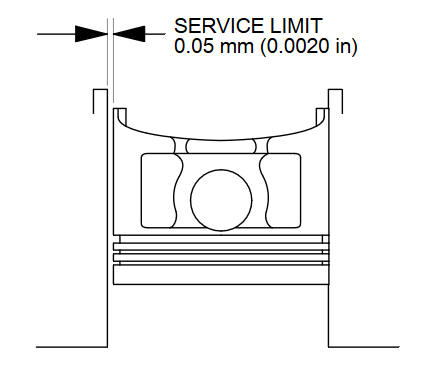
Calculate the difference between the cylinder bore diameter and the piston diameter. If the clearance is near or exceeds the service limit, inspect the piston and engine block for excessive wear.
Piston-to-Cylinder Clearance
Standard (New):
0.010пјЌ0.035 mm (0.00039пјЌ0.00138 in)
Service Limit:
0.05 mm (0.0020 in)
See also:
Controls
This chapter explains how to operate the various controls necessary for
driving. ...
Fuse Locations
INTERIOR FUSE BOX
UNDER-HOOD FUSE BOXES
Primary Fuse Box
Secondary Fuse Box (On the battery)
...
Drive Belt Inspection
Inspect the belt for cracks or damage. If the belt is cracked or damaged,
replace it.
Check that the position of the auto-tensioner indicator (A) is within the
standard range ( ...
Categories
