Honda Fit: Radiator Replacement
-
Raise the vehicle on the lift.
-
Drain the engine coolant.
-
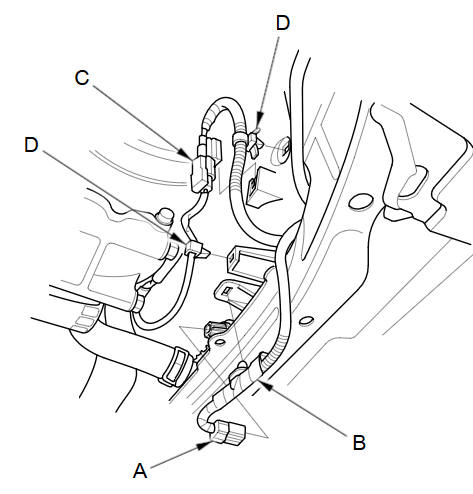
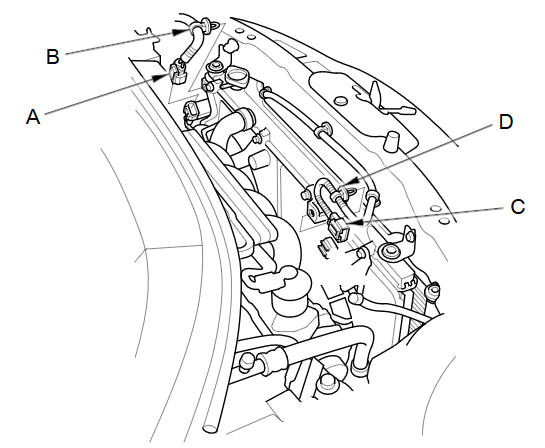
Disconnect the ECT sensor 2 connector (A), then remove the harness clamp (B).
-
With A/C: Remove the A/C compressor clutch connector (C) from the clamp, then remove the harness clamps (D).
-
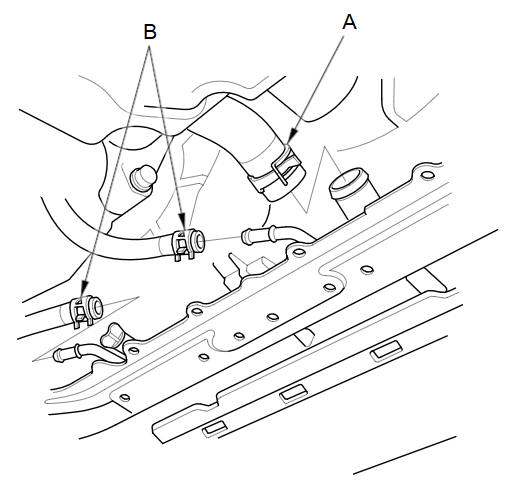
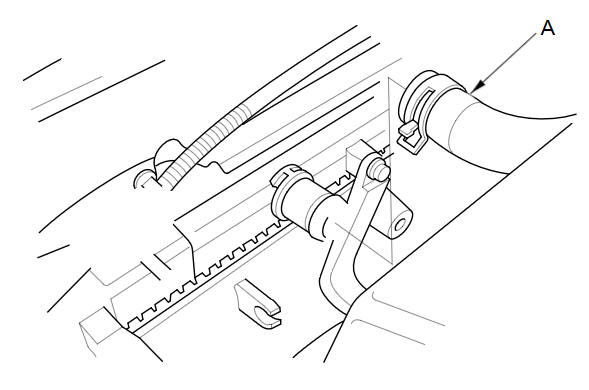
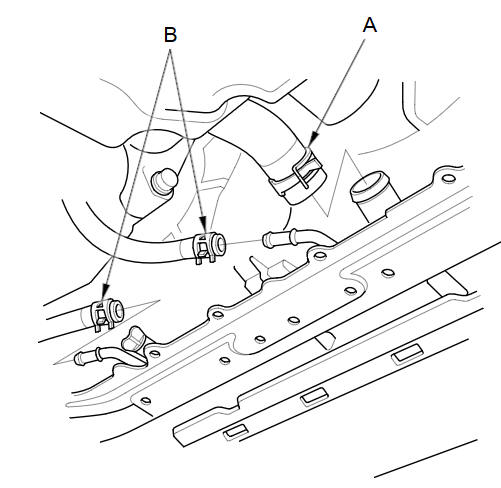
Disconnect the lower radiator hose (A).
-
A/T model: Disconnect the ATF cooler hoses (B), then plug the hose and line.
-
Lower the vehicle on the lift.
-
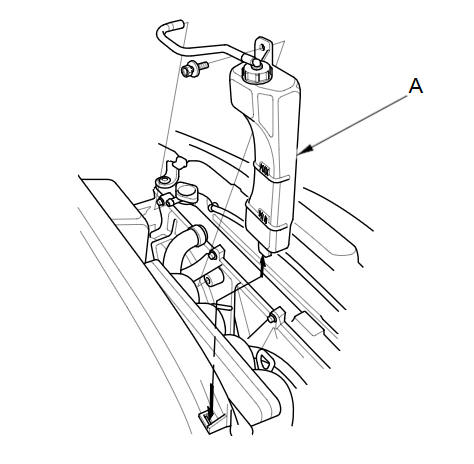
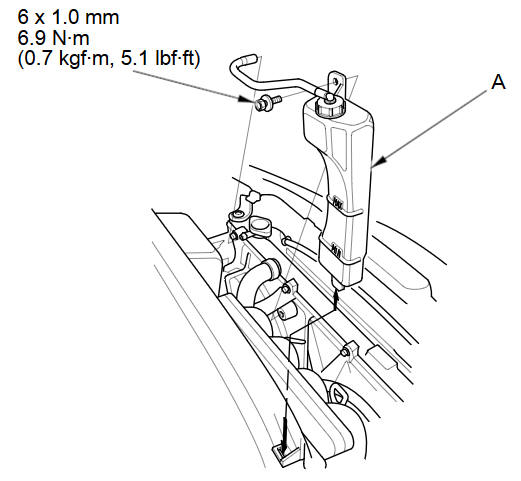
Remove the coolant reservoir (A).
-
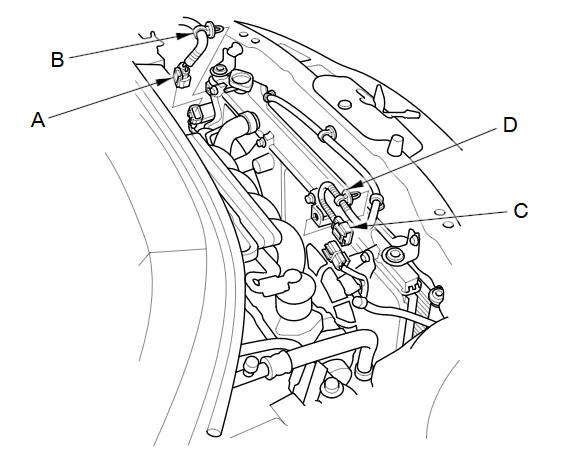
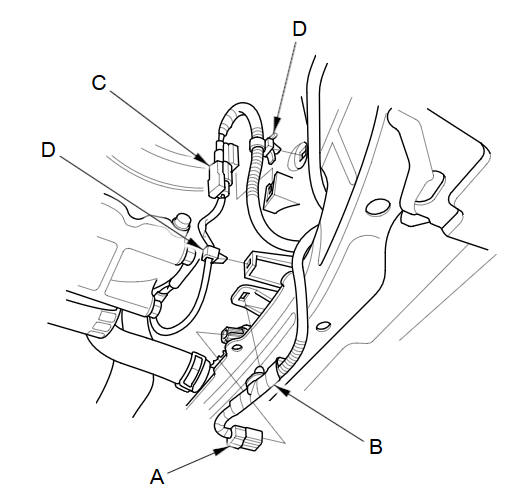
Disconnect the radiator fan motor connector (A), then remove the harness clamp (B).
-
With A/C: Disconnect the A/C condenser fan motor connector (C), then remove the harness clamp (D).
-
Disconnect the upper radiator hose (A).

-
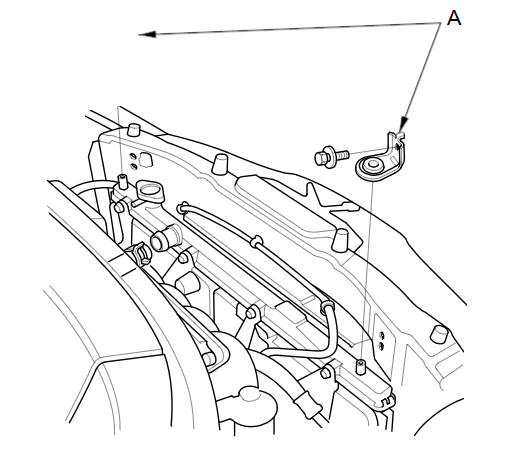
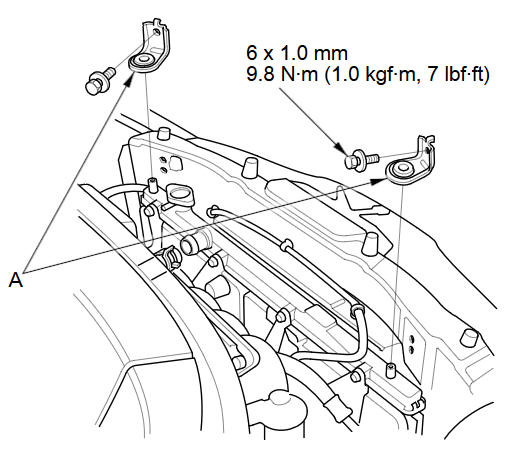
Remove the radiator upper brackets (A).
-
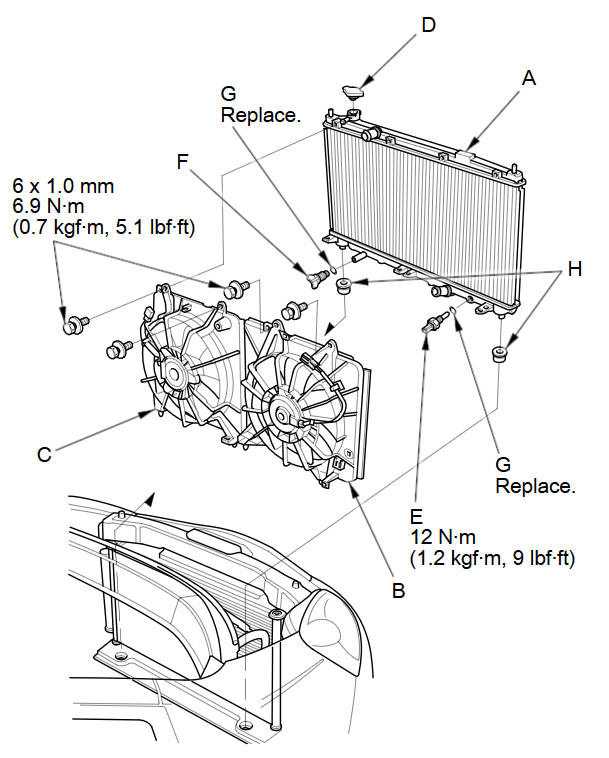
Pull up the radiator (A).
-
With A/C: Remove the A/C condenser fan shroud assembly (B).
-
Remove the radiator fan shroud assembly (C), the radiator cap (D), the ECT sensor 2 (E), and the drain plug (F).
-
Reassemble the radiator with new O-rings (G).
-
Install the radiator. Make sure the lower cushions (H) are set securely.
-
Install the radiator upper brackets (A).
-
Connect the upper radiator hose (A).
-
Connect the radiator fan motor connector (A), then install the harness clamp (B).
-
With A/C: Connect the A/C condenser fan motor connector (C), then install the harness clamp (D).
-
Install the coolant reservoir (A).
-
Raise the vehicle on the lift.
-
Connect the lower radiator hose (A).
-
A/T model: Remove the plug from the hose and the line, then connect the ATF cooler hoses (B).
-
Connect the ECT sensor 2 connector (A), then install the harness clamp (B).
-
With A/C: Install the A/C compressor clutch connector (C) to the clamp, then install the harness clamps (D).
-
Lower the vehicle on the lift.
-
Refill the radiator with engine coolant, and bleed the air from the cooling system.
-
Clean up any spilled engine coolant.
See also:
Engine Does Not Start
Checking the Engine
If the engine does not start, turn the ignition switch to START
and check the
starter.
If you must start the vehicle immediately, use an
assisting vehicle to jump start it. ...
Brake System Indicator
Brake System Indicator (Red)
The brake system indicator (red) normally comes on when you turn the ignition
switch to the ON (II) position, and as a reminder to check the parking brake. It
will ...
Categories
