Honda Fit: M/T Differential Thrust Clearance Adjustment (M/T)
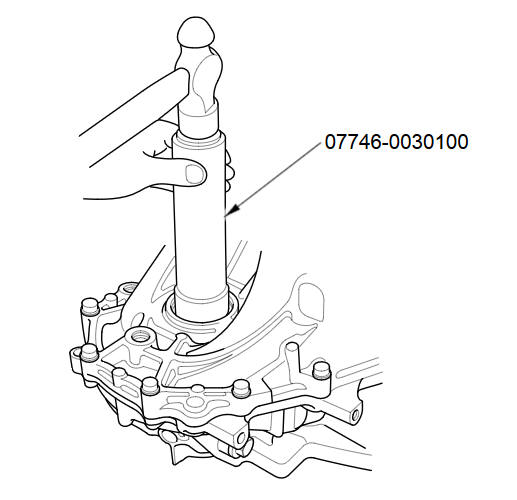
- Driver Handle, 40 mm I.D. 07746-0030100
-
Remove the left driveshaft side oil seal from the transmission housing.
-
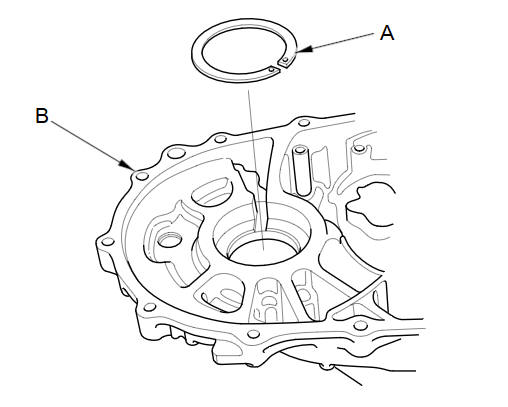
If you remove the 80 mm shim (A) from the transmission housing (B), reinstall the same sized shim. That's the same size as the one you removed.
-
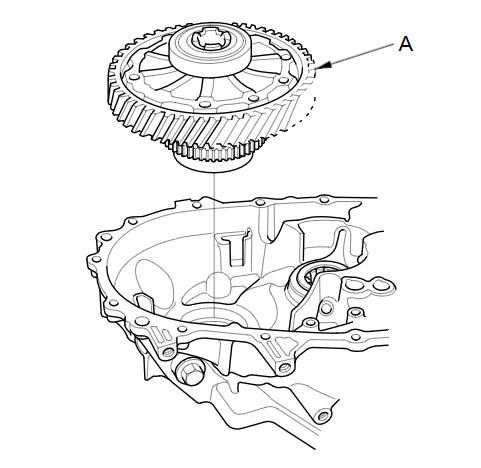
Install the differential assembly (A) into the clutch housing.
-
Install the transmission housing onto the clutch housing, then tighten the 8 mm flange bolts in a crisscross pattern in several steps.
Specified Torque:
8 x 1.25 mm
27 N·m (2.8 kgf·m, 20 lbf·ft)
-
Use the 40 mm driver handle to bottom the differential assembly in the clutch housing.
-
Measure the clearance between the 80 mm shim and the bearing outer race in transmission housing.
Standard:
0.01-0.1 mm (0.0004-0.004 in)
-
If the clearance exceeds the standard, select a new 80 mm shim from the following table. If the clearance measured in step 6 is within the standard, go to step 10.
80 mm Shim:
Type
Thickness
A
1.00 mm (0.0394 in)
B
1.10 mm (0.0433 in)
C
1.20 mm (0.0472 in)
D
1.30 mm (0.0512 in)
E
1.40 mm (0.0551 in)
F
1.50 mm (0.0591 in)
G
1.60 mm (0.0630 in)
H
1.70 mm (0.0669 in)
J
1.80 mm (0.0709 in)
K
1.05 mm (0.0413 in)
L
1.15 mm (0.0453 in)
M
1.25 mm (0.0492 in)
N
1.35 mm (0.0531 in)
P
1.45 mm (0.0571 in)
Q
1.55 mm (0.0610 in)
R
1.65 mm (0.0650 in)
S
1.75 mm (0.0689 in)
-
Remove the bolts and the transmission housing.
-
Replace the thrust shim selected in step 7, then recheck the clearance.
-
Install a new left driveshaft side oil seal.
-
Reinstall the transmission housing.
See also:
Cable Reel Replacement
Removal
Make sure the front wheels are aligned straight ahead.
Do the battery terminal disconnection procedure,
then wait at least 3 minutes before starting work.
...
iPod® Commands
iPod play
iPod play track # (#: 1 to 30)
iPod skip forward
iPod skip back
iPod track shuffle*
iPod album shuffle*
iPod track repeat*
iPod normal play (cancels repeat or
shuffle
* These comman ...
Correct Vehicle Position
INFO button
► Setup ►Other
►Vehicle
Manually adjust the current position of the vehicle as displayed on the map
screen if
the position appears to be incorrect.
1. Put the v ...
Categories
