Honda Fit: Clutch Clearance Inspection (A/T)
Special Tools Required
- Clutch Compressor Attachment 07ZAE-PRP0100
-
Inspect the clutch piston, the discs, the plates, and the end-plate for wear and damage, and inspect the clutch wave-plate phase difference, if necessary.
-
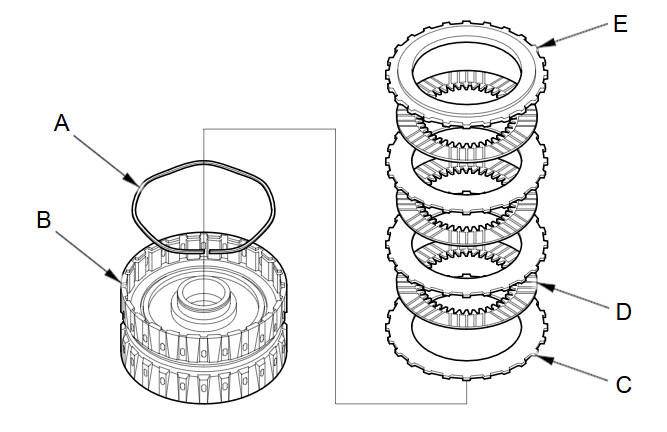
Install the clutch piston in the clutch drum. Do not install the O-rings on the clutch piston during inspection.
-
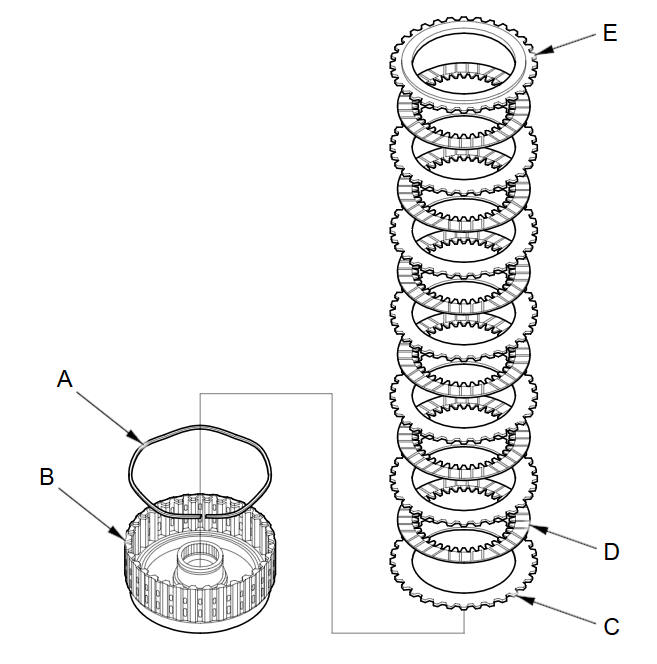
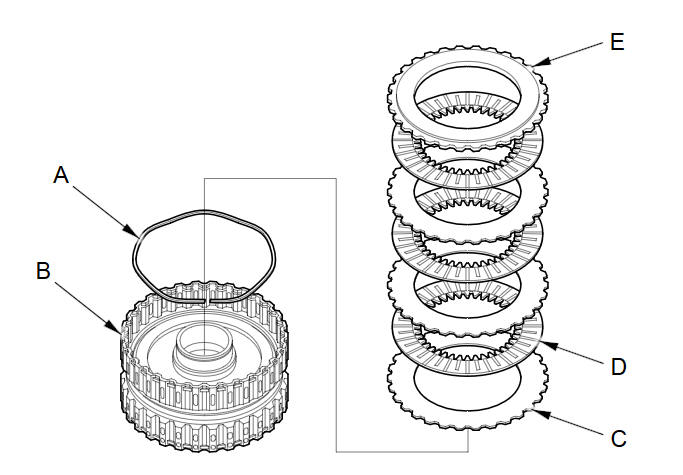
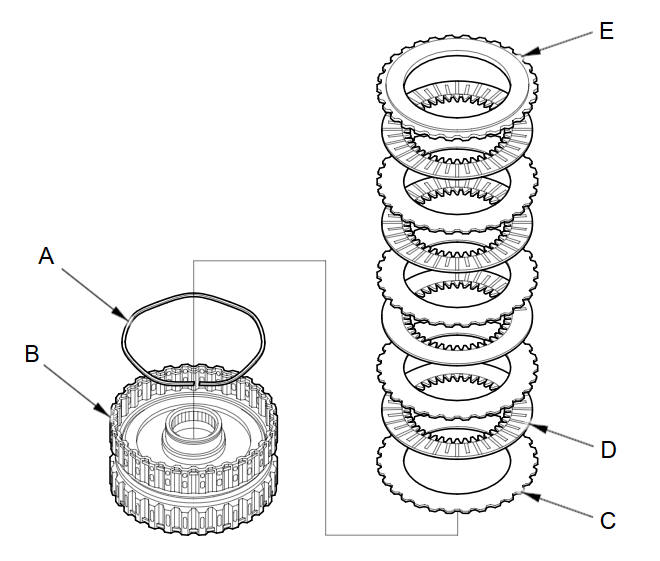
Install the wave spring (A) in the 1st clutch drum (B). Starting with the clutch wave-plate, alternately install the wave-plates (C) (6) and discs (D) (6). Install the clutch end-plate (E) with the flat side down on the top disc.
-
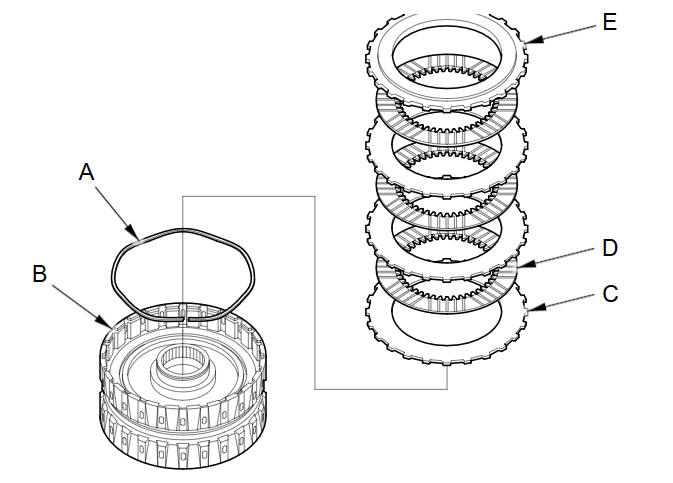
Install the wave spring (A) in the 2nd clutch drum (B). Starting with the clutch flat-plate, alternately install the flat-plates (C) (3) and the discs (D) (3). Install the clutch end-plate (E) with the flat side down on the top disc.
-
Install the wave spring (A) in the 4th clutch drum (B). Starting with the clutch flat-plate, alternately install the flat-plates (C) (4) and the discs (D) (4). Install the clutch end-plate (E) with the flat side down on the top disc.
-
Install the wave spring (A) in the 3rd clutch drum (B). Starting with the clutch wave-plate, alternately install the wave-plates (C) (3) and the discs (D) (3). Install the clutch end-plate (E) with the flat side down on the top disc.
-
Install the wave spring (A) in the 5th clutch drum (B). Starting with the clutch wave-plate, alternately install the wave-plates (C) (3) and the discs (D) (3). Install the clutch end-plate (E) with the flat side down on the top disc.
-
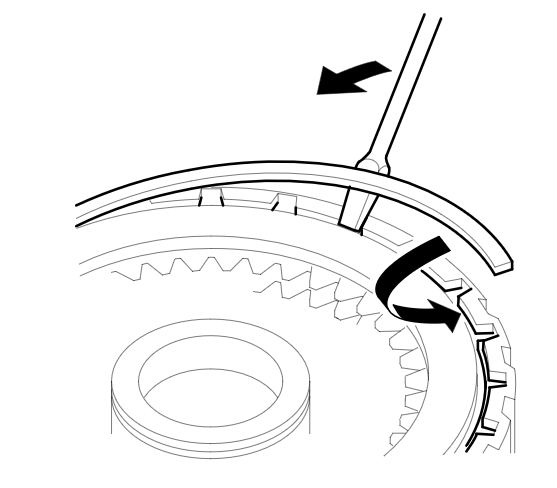
Install the snap ring with a screwdriver to secure the clutch end-plate.
-
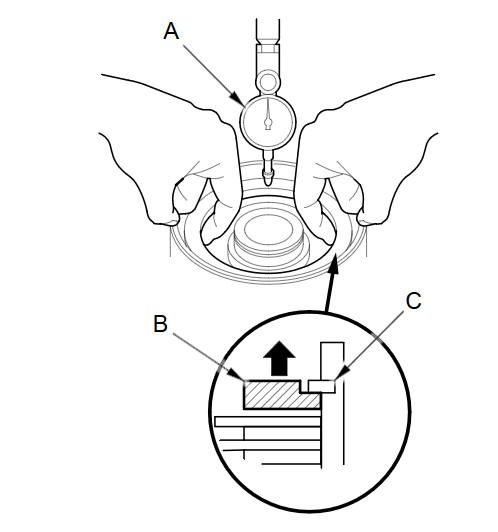
Set a dial indicator (A) on the clutch end-plate (B).
-
Zero the dial indicator with the clutch end-plate lifted up to the snap ring (C).
-
Release the clutch end-plate to lower it, then put the clutch compressor attachment on the end-plate (A).

-
For the 1st, 3rd, and 5th clutches:
Press the clutch compressor attachment down with 150пјЌ160 N (15пјЌ16 kgf, 33пјЌ35 lbf) (B) using a force gauge, and read the dial indicator (C). The dial indicator reads the clearance (D) between the clutch end-plate and top disc (E). Take measurements in at least three places, and use the average as the actual clearance. -
For 2nd and 4th clutches:
Press the clutch compressor attachment down with 39 N (4 kgf, 9 lbf) (B) using a force gauge, and read the dial indicator (C). The dial indicator reads the clearance (D) between the clutch end-plate and top disc (E). Take measurements in at least three places, and use the average as the actual clearance.Clearance between Clutch End-Plate and Top Disc
Service Limit
1st clutch:
1.62пјЌ1.82 mm (0.064пјЌ0.072 in)
2nd clutch:
0.5пјЌ0.7 mm (0.020пјЌ0.028 in)
3rd clutch:
0.73пјЌ0.93 mm (0.029пјЌ0.037 in)
4th clutch:
0.7пјЌ0.9 mm (0.028пјЌ0.035 in)
5th clutch:
0.73пјЌ0.93 mm (0.029пјЌ0.037 in)
-
If the clearance of the 1st, 3rd, or 5th clutch is out of the service limit, select a new clutch end-plate from the following table.
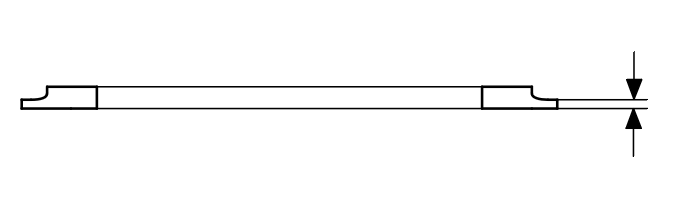
1ST, 3RD and 5TH CLUTCH END-PLATES
|
Mark |
Thickness |
|
1 |
2.1 mm (0.083 in) |
|
2 |
2.2 mm (0.087 in) |
|
3 |
2.3 mm (0.091 in) |
|
4 |
2.4 mm (0.094 in) |
|
5 |
2.5 mm (0.098 in) |
|
6 |
2.6 mm (0.102 in) |
|
7 |
2.7 mm (0.106 in) |
|
8 |
2.8 mm (0.110 in) |
|
9 |
2.9 mm (0.114 in) |
-
If the clearance of the 2nd or 4th clutch is out of the service limit, remove the clutch end-plate and check the clutch end-plate mark. Select a new clutch end-plate from the following tables by the mark on the old clutch end-plate. Use the AC-AL Plates table when the old clutch end-plate is marked with between AC and AL. Use the AM-AV Plates table when the old clutch end-plate is marked with between AM and AV.
-
Install the new clutch end-plate, and recheck the clearance. If the thickest clutch end-plate is installed but the clearance is still over the service limit, replace the clutch discs and plates.
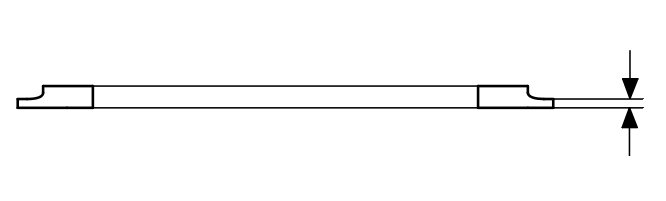
2ND and 4TH CLUTCH END-PLATES AC-AL Plates
|
Mark |
Thickness |
|
AC |
2.1 mm (0.083 in) |
|
AD |
2.2 mm (0.087 in) |
|
AE |
2.3 mm (0.091 in) |
|
AF |
2.4 mm (0.094 in) |
|
AG |
2.5 mm (0.098 in) |
|
AH |
2.6 mm (0.102 in) |
|
AJ |
2.7 mm (0.106 in) |
|
AK |
2.8 mm (0.110 in) |
|
AL |
2.9 mm (0.114in) |
AM-AV Plates
|
Mark |
Thickness |
|
AM |
2.1 mm (0.083 in) |
|
AN |
2.2 mm (0.087 in) |
|
AP |
2.3 mm (0.091 in) |
|
AQ |
2.4 mm (0.094 in) |
|
AR |
2.5 mm (0.098 in) |
|
AS |
2.6 mm (0.102 in) |
|
AT |
2.7 mm (0.106 in) |
|
AU |
2.8 mm (0.110 in) |
|
AV |
2.9 mm (0.114in) |
See also:
Heating and Cooling System Maintenance
Dust and Pollen Filter
The heating and cooling system is equipped with a dust and pollen filter that
collects
pollen, dust, and other debris in the air. The Maintenance Minder message will
let
...
Output Shaft (Countershaft) Speed Sensor Replacement (M/T)
M/T
Raise the vehicle on a lift.
Disconnect the output shaft (countershaft) speed sensor connector (A).
Remove the output shaft (countershaft) speed sensor (B).
...
Using Speed Dial
PHONE button
► Speed Dial 1 or Speed Dial 2
1. Select a speed dial entry.
2. Select Call to begin dialing.
To make a call using speed dial, you need to
create speed dial entries.
More S ...
Categories
