Honda Fit: Intake Manifold Chamber Removal and Installation
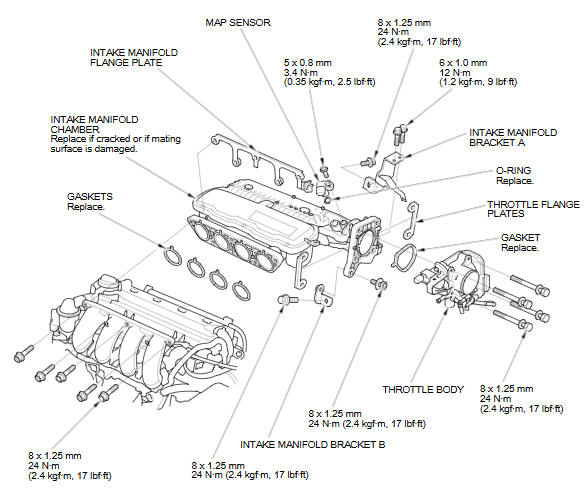
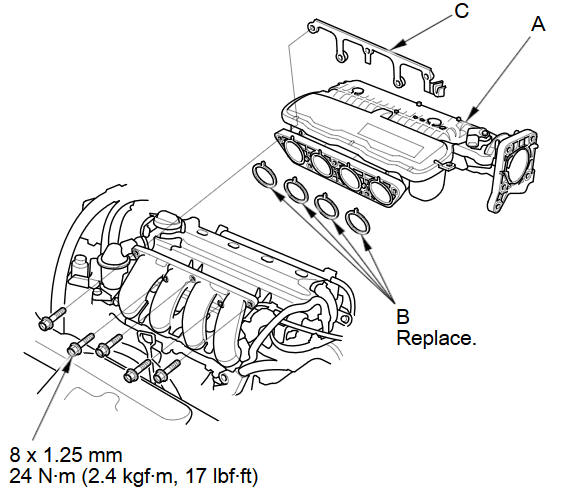
Exploded View
Removal
-
Remove the under-cowl panel.
-
Remove the air cleaner.
-
Disconnect the engine wire harness connectors, and remove the wire harness clamps from the intake manifold chamber:
-
Throttle actuator connector
-
MAP sensor connector
-
-
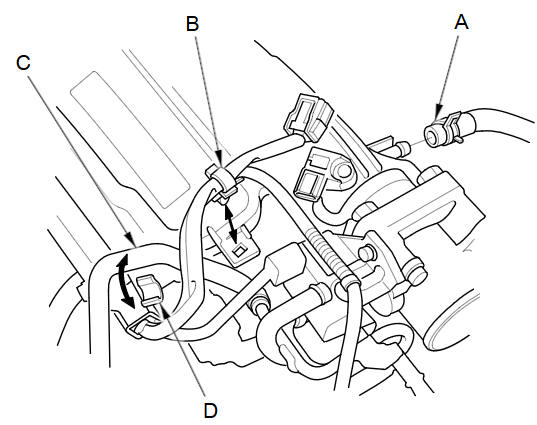
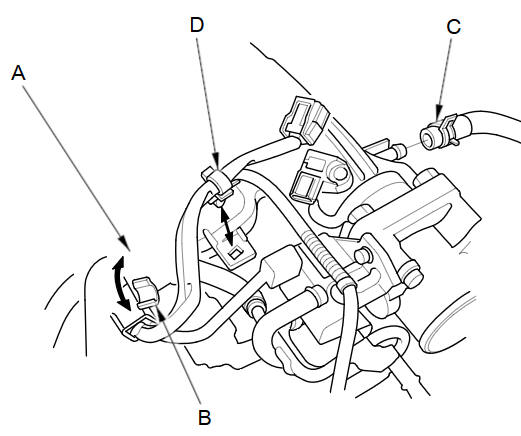
Disconnect the brake booster vacuum hose (A) and remove the harness clamp (B).
-
Remove the water bypass hose (C) from the clamp (D).
-
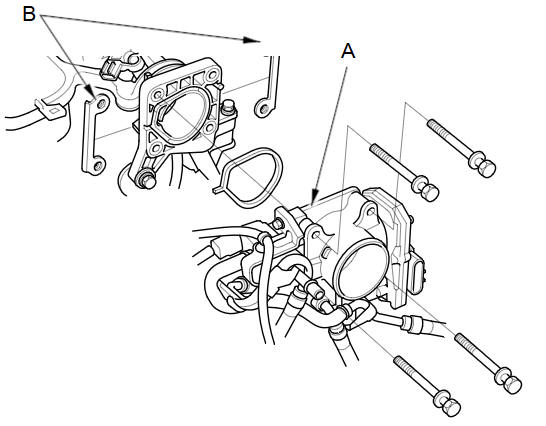
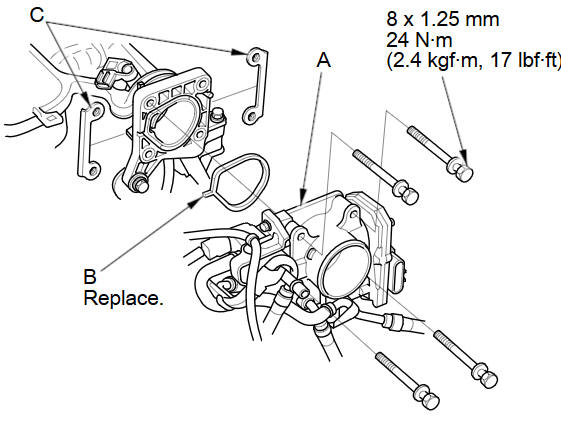
Remove the throttle body (A) without disconnecting the water bypass hoses.
-
Remove the throttle flange plates (B).
-
Remove the intake manifold bracket mounting bolts.

-
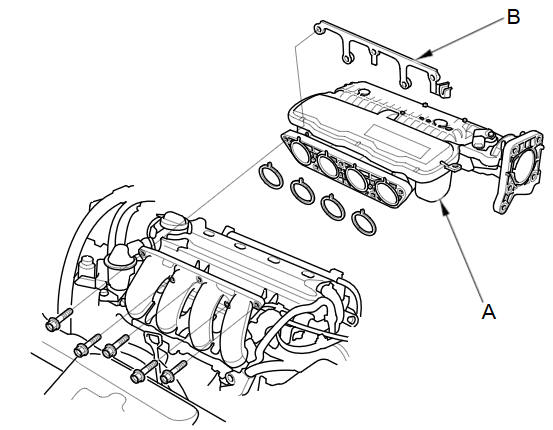
Remove the intake manifold chamber (A) and the intake manifold flange plate (B).
-
Disassemble the intake manifold chamber.
NOTE: Refer to the Exploded View if needed during this procedure.
Installation
-
Reassemble the intake manifold chamber.
NOTE: Refer to the Exploded View if needed during this procedure.
-
Install the intake manifold chamber (A) with new gaskets (B), and the intake manifold flange plate (C).
NOTE: Tighten the bolts in a crisscross pattern in three steps, beginning with the inner bolt.
-
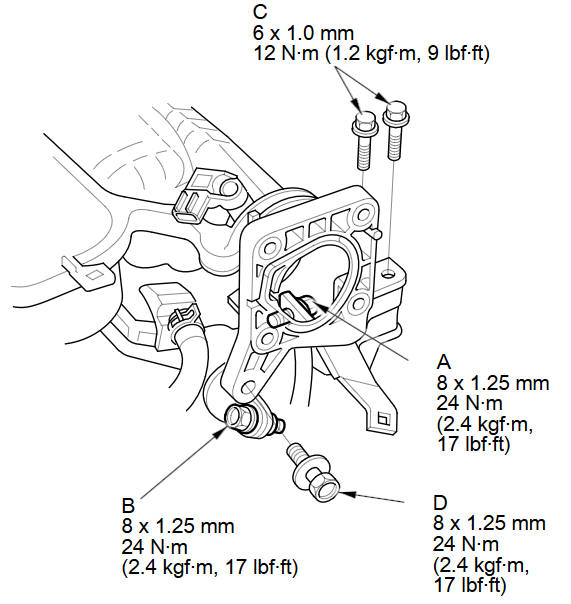
Loosen the intake manifold bracket mounting bolts (A, B), then loosely install the intake manifold bracket mounting bolts (C, D).
-
Tighten the intake manifold bracket mounting bolts in the numbered sequence shown.
-
Install the throttle body (A) with a new gasket (B), and the throttle flange plates (C).
-
Install the water bypass hose (A) to the clamp (B).
-
Connect the brake booster vacuum hose (C) and install the harness clamp (D).
-
Connect the engine wire harness connectors, and install the wire harness clamps to the intake manifold chamber:
-
Throttle actuator connector
-
MAP sensor connector
-
-
Install the air cleaner.
-
Install the under-cowl panel.
See also:
Jump Starting
Although this seems like a simple procedure, you should take several precautions.
A battery can explode if you do not follow the correct procedure, seriously
injuring anyone nearby.
Keep all spa ...
Start-up
The navigation system starts automatically when you turn the ignition to
ACCESSORY (I) or ON (II). At start-up, the following Confirmation screen is
displayed.
1. Select Change Language.
► ...
Categories
