Honda Fit: M/T Differential Carrier/Final Driven Gear Replacement (M/T)
-
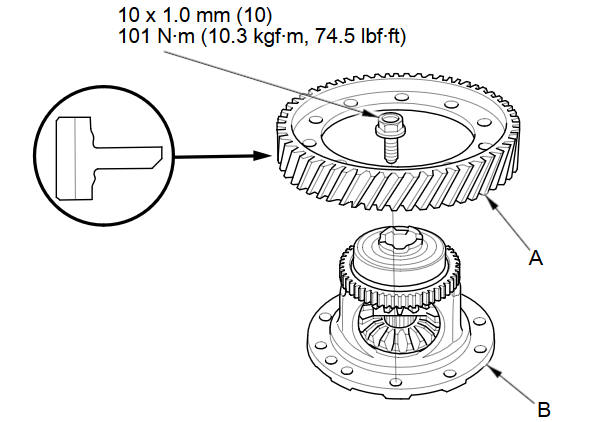
Loosen the bolts in a crisscross pattern in several steps, then remove the final driven gear (A) from the differential carrier (B).
-
Install the final driven gear with the chamfer on the inside diameter facing the carrier. Tighten the bolts in a crisscross pattern in several steps.
See also:
Armrest
■Using the Driver’s Seat Armrest*
Pull down the armrest. ...
Emergency Towing
Call a professional towing service if you need to tow your vehicle.
■ Flat bed equipment
The operator loads your vehicle on the back of a truck.
This is the best way to transport your veh ...
Output Shaft (Countershaft) Speed Sensor Replacement (M/T)
M/T
Raise the vehicle on a lift.
Disconnect the output shaft (countershaft) speed sensor connector (A).
Remove the output shaft (countershaft) speed sensor (B).
...
Categories
