Honda Fit: Transmission Mount Bracket Replacement
-
Do the battery removal procedure.
-
Remove the air cleaner.
-
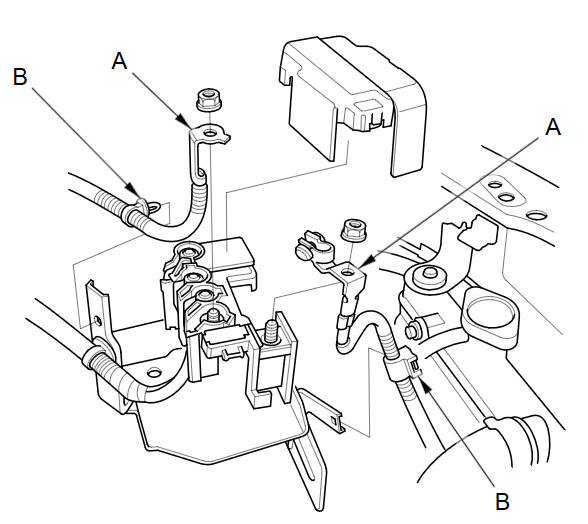
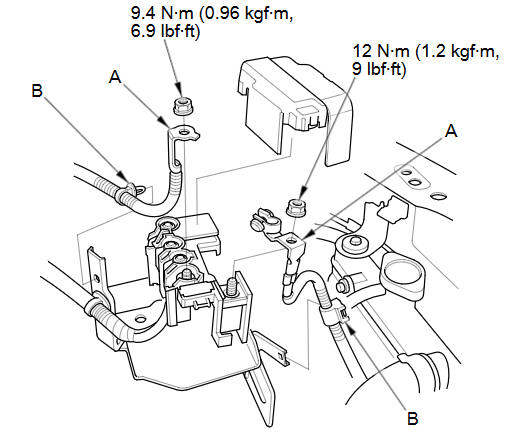
M/T model: Remove the battery cables (A) from the battery terminal fuse box.
-
M/T model: Remove the harness clamps (B).
-
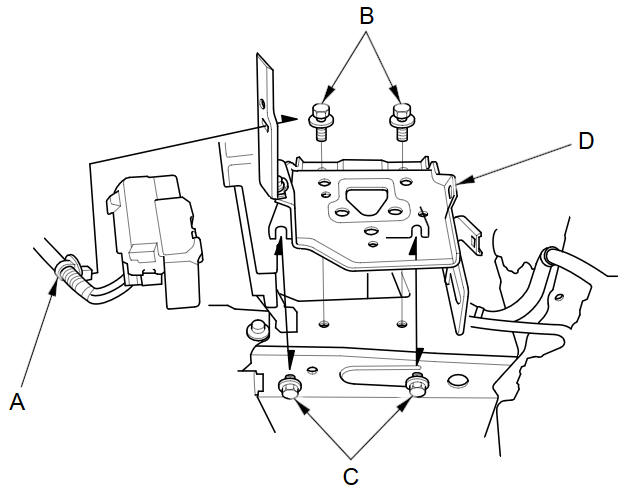
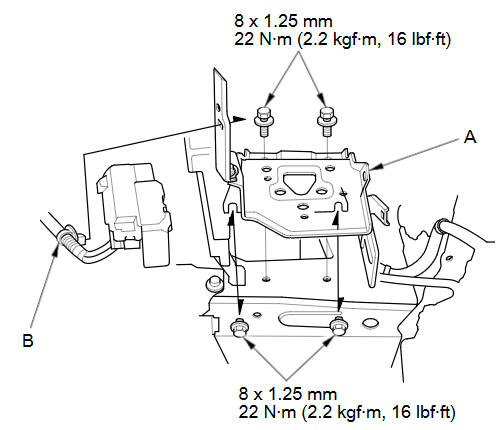
M/T model: Remove the harness clamp (A). Remove the two bolts (B) and loosen the two bolts (C), then remove the battery base (D).
-
Support the transmission with a jack and a wood block under the transmission.
-
Remove the ground cable (A), then remove the transmission mount bracket (B).

-
Install the transmission mount bracket, and loosely install new transmission mount bracket mounting bolts and nuts (C).
-
Install the ground cable.
-
Remove the jack and the wood block from under the transmission.
-
Raise the vehicle on the lift.
-
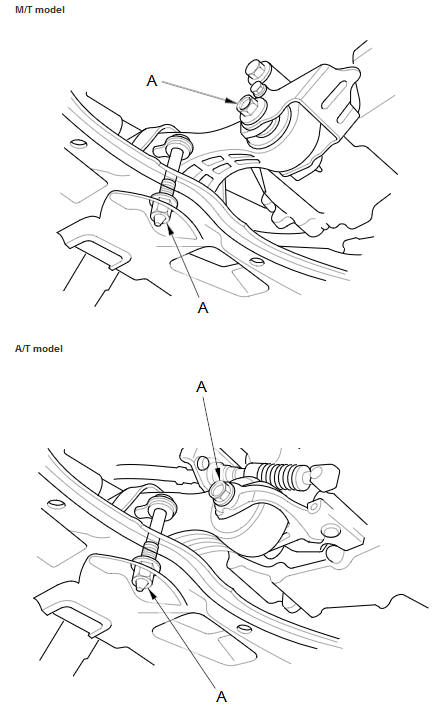
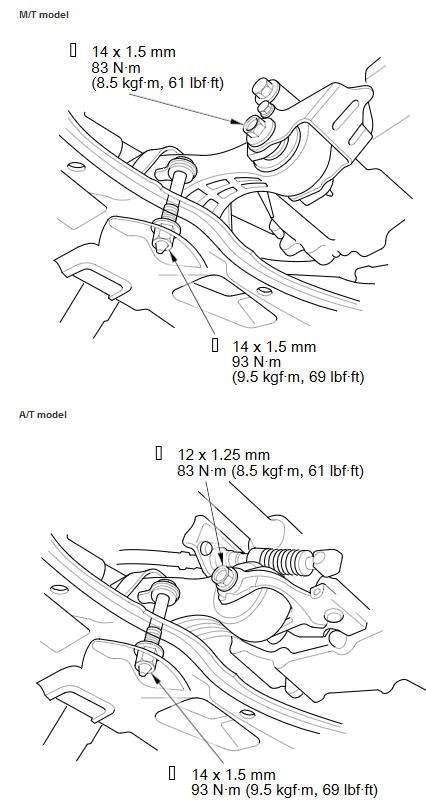
Loosen the torque rod mounting bolt and nut (A).
- Lower the vehicle on the lift.
-
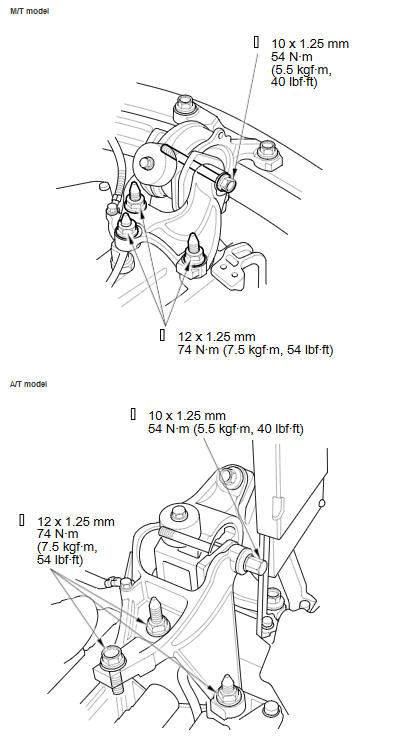
Tighten the transmission mount mounting bolts and nuts in the numbered sequence shown.
-
Raise the vehicle on the lift.
-
Tighten the torque rod mounting bolt and nut in the numbered sequence shown.
-
Lower the vehicle on the lift.
-
M/T model: Install the battery base (A), then install the harness clamp (B).
-
M/T model: Install the battery cables (A) to the battery terminal fuse box.
-
M/T model: Install the harness clamps (B).
-
Do the battery installation procedure.
-
Install the air cleaner.
See also:
Breather Line and Suction Line Inspection (Page-1)
Special Tools Required
Fuel Pressure Gauge Attachment Set 07AAJ-S6MA150
Vacuum Pump/Gauge, 0-30 inHg Snap-on YA4000A or equivalent, commercially
available
Vacuum/Pressure Gauge, 0-4 inHg 07 ...
Adding Engine Oil
1. Unscrew and remove the engine oil fill cap.
2. Add oil slowly.
3. Reinstall the engine oil fill cap, and tighten
it securely.
4. Wait for three minutes and recheck the
engine oil dipstick.
...
Headlight Bulbs
When replacing, use the following bulbs.
High/Low beam headlight: 60/55 W (HB2)
NOTICE
Halogen bulbs get very hot when lit.
Oil, perspiration, or a scratch on the glass can cause
the bulb to ov ...
Categories
