Honda Fit: Exploded View - Transmission Housing
NOTE: Place the clutch housing on two pieces of wood thick enough to keep the mainshaft from hitting the workbench.
-
Remove the release bearing and the release fork.
-
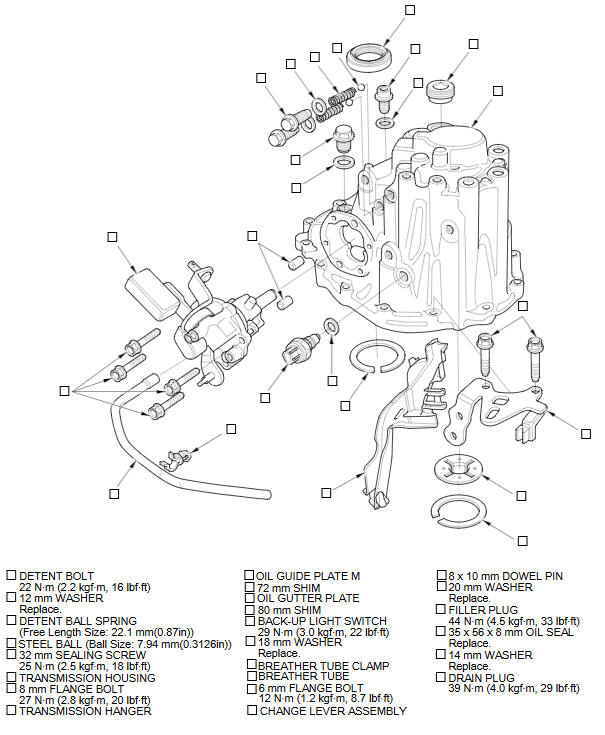
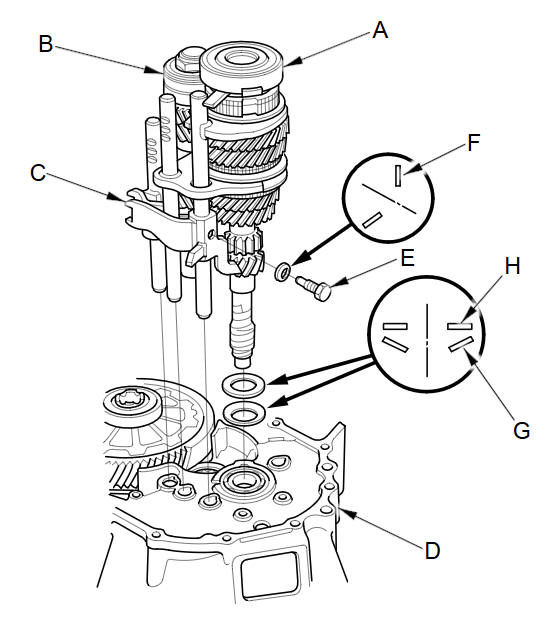
Remove the detent bolts (A), the 12 mm washers (B), the detent ball springs (C), the steel balls (D), and the back-up light switch (E).
-
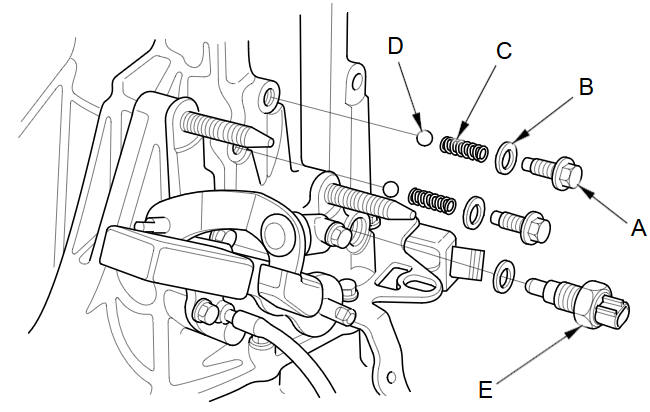
Remove the change lever assembly (A) and the 8 x 10 mm dowel pins (B).
-
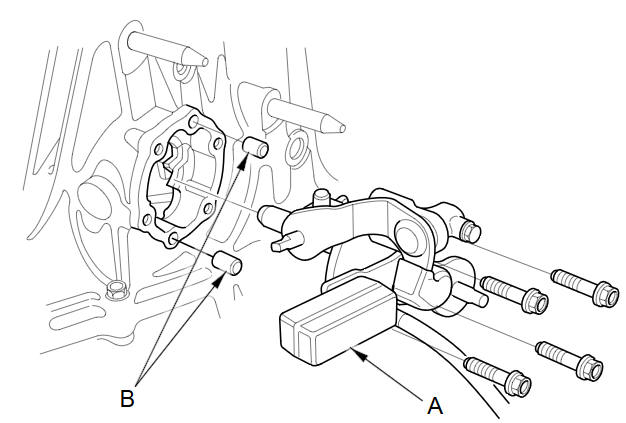
Remove the drain plug (A), the filler plug (B), the sealing washers (C), the output shaft (countershaft) speed sensor (D), and the O-ring (E).
-
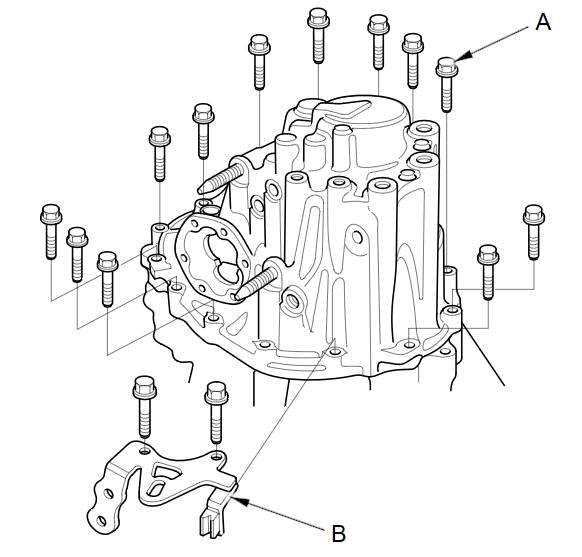
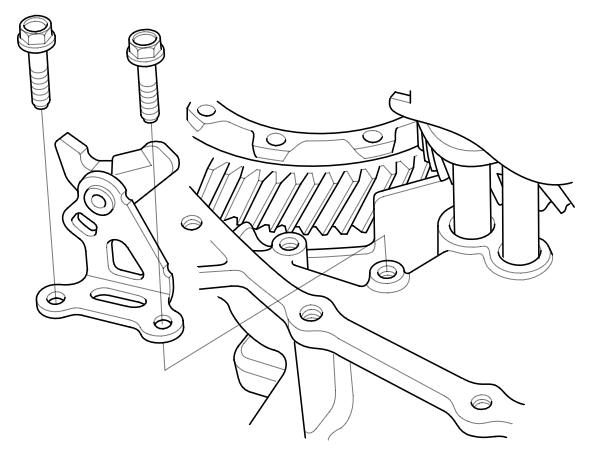
Remove the 8 mm flange bolts (A) and transmission hanger (B) in a crisscross pattern in several steps.
-
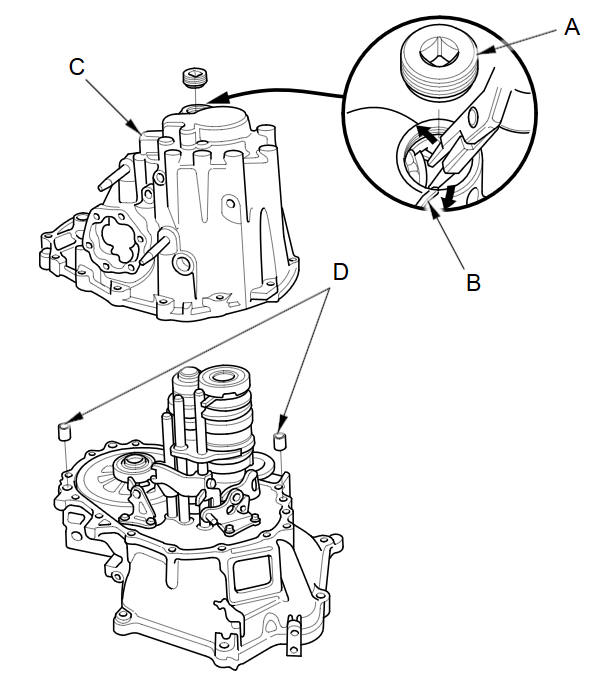
Remove the 32 mm sealing screw (A).
-
Expand the 52 mm snap ring (B) on the countershaft ball bearing, and remove it from the groove using a pair of snap ring pliers.
-
Remove the transmission housing (C) and 14 x 20 mm dowel pins (D).
-
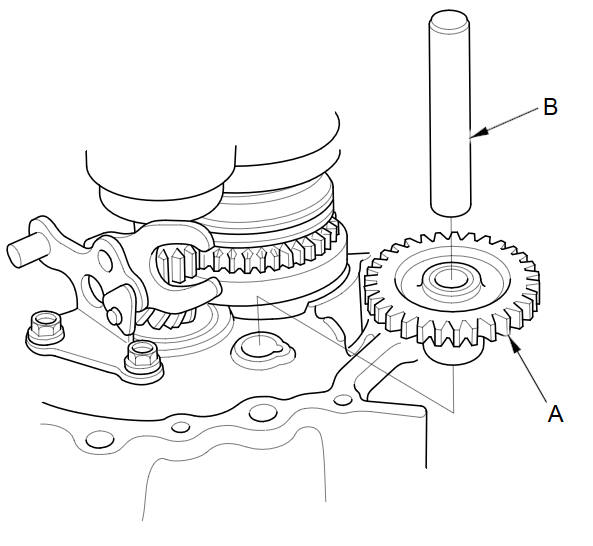
Remove the reverse idler gear (A) and the reverse gear shaft (B).
-
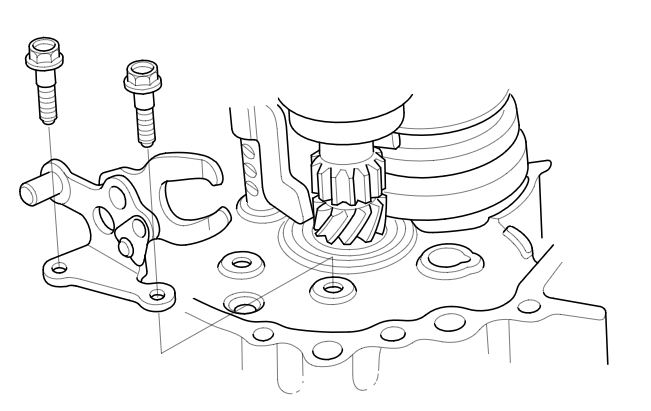
Remove the reverse shift fork.
-
Remove the reverse lock cam.
-
Apply tape to the mainshaft splines to protect the seal, then remove the mainshaft assembly (A) and the countershaft assembly (B) with the shift fork assembly (C) from the clutch housing (D).
NOTE: Do not apply tape so thick that it damages the oil seal.
-
Remove the 8 mm special bolt (E) and the 8 mm spring washer (F).
-
Remove the 36 mm spring washer (G) and the 26 mm washer (H).
-
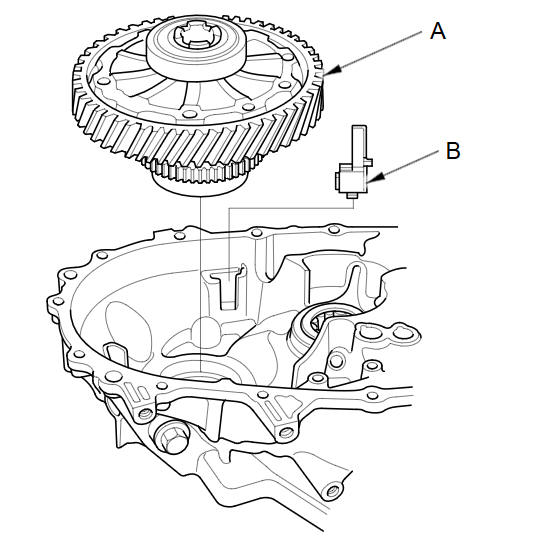
Remove the differential assembly (A) and the magnet (B).
-
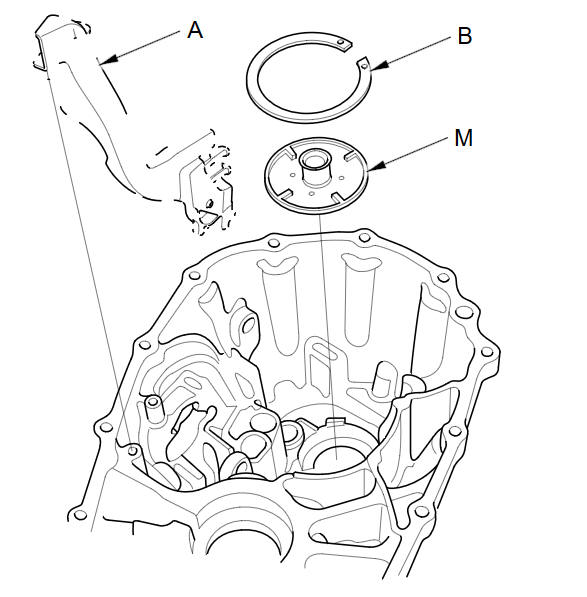
Remove the oil gutter plate (A), the oil guide plate M, and the 72 mm shim (B).
See also:
Synchro Ring and Gear Inspection (M/T)
Inspect the synchro rings for scoring, cracks, and damage (A).
Inspect the inside of each synchro ring (B) for wear. Inspect the teeth
(C) on each synchro ring for wear (round ...
Identification Numbers
Your vehicle has several identifying numbers in various places.
The vehicle identification number (VIN) is the 17-digit number your dealer uses
to register your vehicle for warranty purposes. It is ...
Taillight Replacement
Open the tailgate and remove the maintenance lid.
Disconnect the connectors (A) from the taillights (B).
@font-face{font-family:
"Honda_SymbolMar ...
Categories
