Honda Fit: Countershaft Disassembly (M/T)
NOTE: Refer to the Exploded View in the countershaft reassembly, as needed, when removing components pressed onto the countershaft.
-
Securely clamp the countershaft assembly in a bench vise with wood blocks.
-
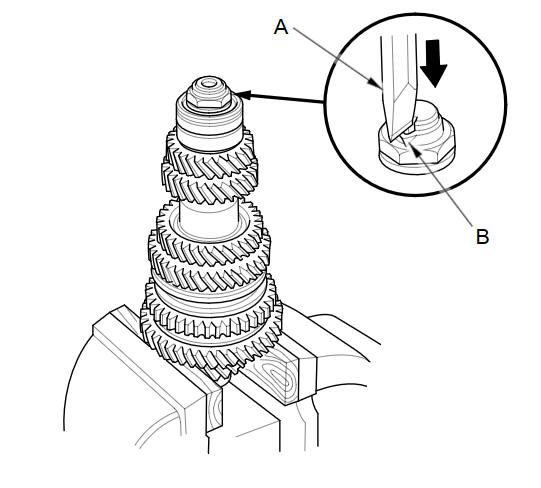
Use a chisel (A) to raise the locknut tab (B) from the groove in the countershaft.
-
Remove the locknut (left-hand threads) (A) and the spring washer (B).

-
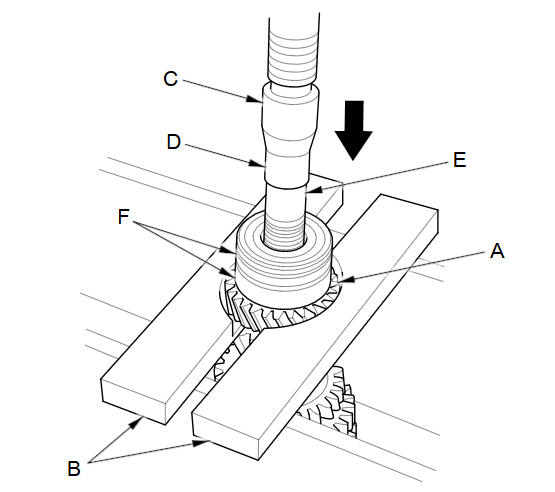
Support 5th gear (A) on steel blocks (B), then use a press (C) and an attachment (D) to press the countershaft (E) out of the bearings (F).
-
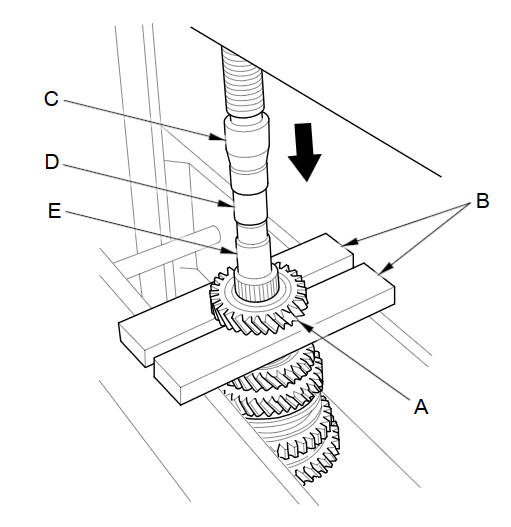
Support 4th gear (A) on steel blocks (B), then use a press (C) and an attachment (D) to press the countershaft (E) out of 4th gear.
-
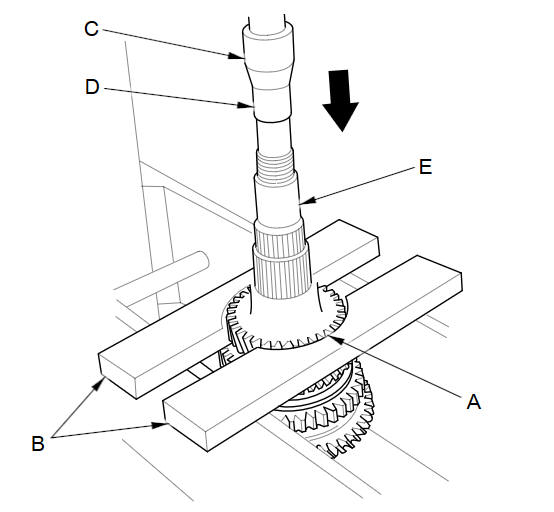
Support 3rd gear (A) on steel blocks (B), then use a press (C) and an attachment (D) to press the countershaft (E) out of 3rd gear.
See also:
Place Category
DEST button
►Place Category
Select the category of a place (e.g., Banking, Lodging, Restaurant) stored in
the map
database to search for the destination.
1. Select a category.
2. Sel ...
Installing a Child Seat
After selecting a proper child seat and a good place to install the seat, there
are three main steps in installing the seat:
1. Properly secure the child seat to the vehicle. All child seats must
...
Accessories
...
Categories
