Honda Fit: Fuel Tank Replacement
-
Drain the fuel tank until it is less than half full.
-
Reinstall the fuel tank unit without connecting the fuel tank unit 4P connector and the quick-connect fitting (feed line).
-
Raise the vehicle on a lift.
-
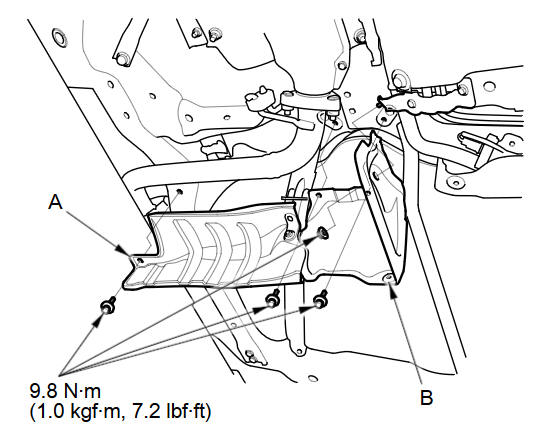
Remove the fuel tank guard (A), and the fuel tank protector (B).
-
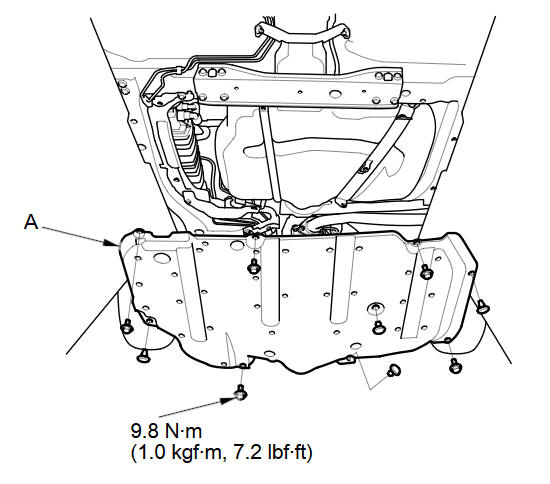
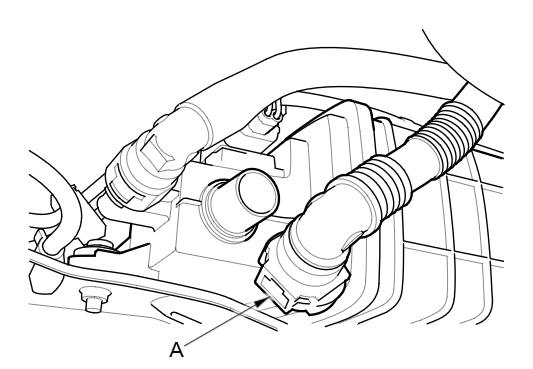
Except LX (A/T model): Remove the fuel tank cover (A).
-
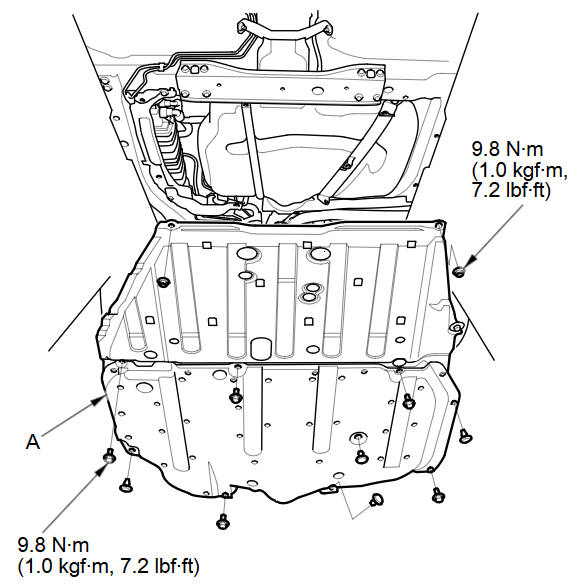
LX (A/T model): Remove the floor under cover assembly (A).
-
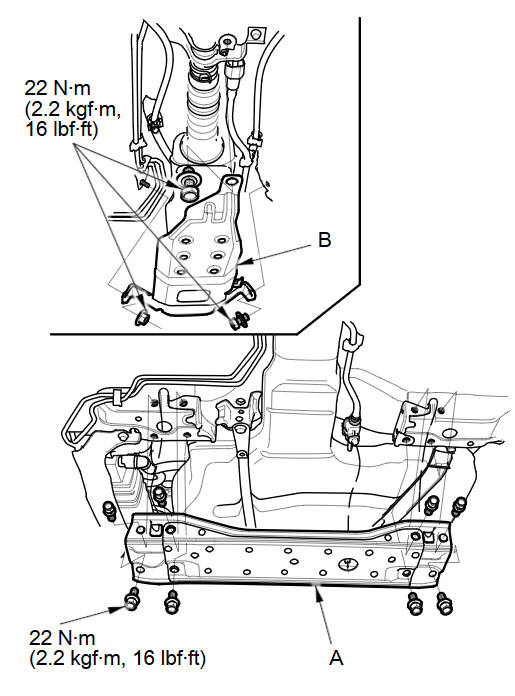
Remove the front floor cross beam (A), and the tank mount bracket (B).
-
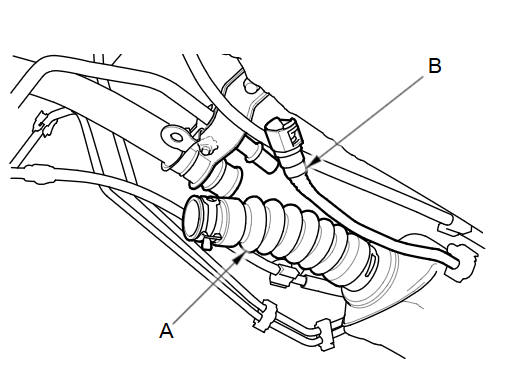
Disconnect the fuel fill hose (A), and the quick-connect fitting (fuel suction tube) (B).
-
Disconnect the fuel tank vapor control valve hose (A).
-
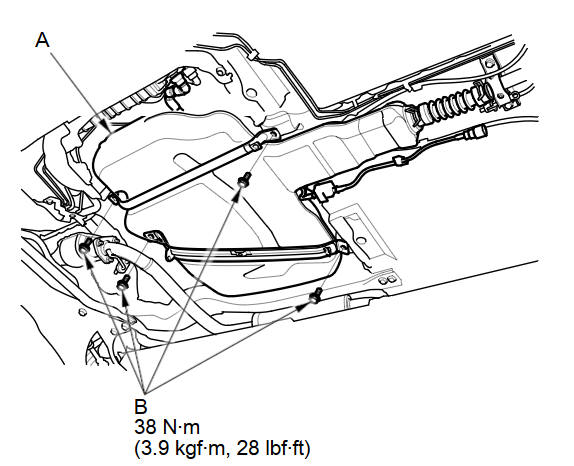
Place a jack or other support under the fuel tank (A), then remove the strap bolts (B).
-
Remove the fuel tank.
-
Install the parts in the reverse order of removal.
NOTE: When you replacing the fuel tank with a new one, make sure you remove the ring pull upwards after you confirm the connection is secure.
See also:
Compatible iPod® and USB Flash Drives
iPod® Model Compatibility
This system may not work with all software versions
of these devices.
USB Flash Drives
• Use a recommended USB flash drive of 256 MB or higher.
• Some digital aud ...
Calculating the Route on the Destination Map
Calculate the route from the map of the destination address.
Select Calculate the Route.
► The system calculates and displays
the route line on the map screen.
“Display Destination Mapâ ...
Breather Line and Suction Line Inspection (Page-1)
Special Tools Required
Fuel Pressure Gauge Attachment Set 07AAJ-S6MA150
Vacuum Pump/Gauge, 0-30 inHg Snap-on YA4000A or equivalent, commercially
available
Vacuum/Pressure Gauge, 0-4 inHg 07 ...
Categories
