Honda Fit: Rear Axle Beam Replacement
-
Raise and support the vehicle.
-
Remove the rear wheels.
-
Remove the rear hub bearing unit.
-
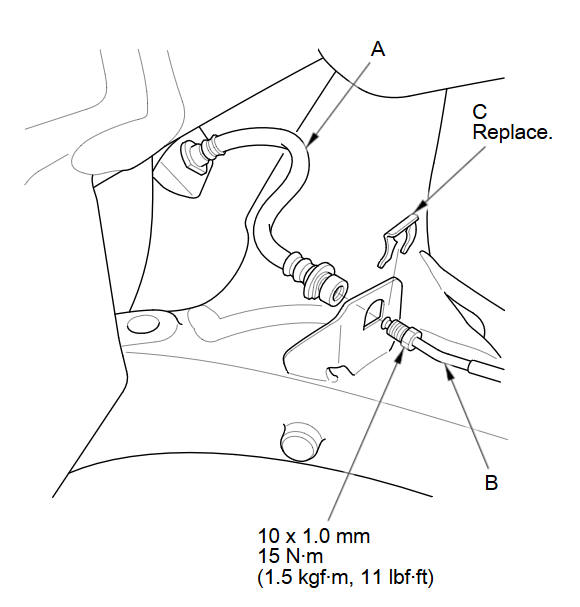
Remove the parking brake cable bracket (left side) (A), the brake line bracket (right side), and the parking brake cable (B) from the axle beam.
-
Disconnect the brake line (A) from the wheel cylinder (B), and plug the line with a shop towel.
-
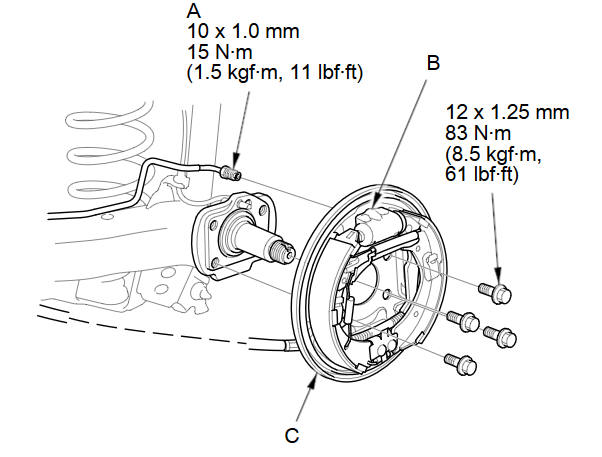
Remove the backing plate (C) with the brake shoes assembly from the spindle.
-
Remove the wheel speed sensor (A) and the wire guide grommet (B) from the axle beam (C). Do not disconnect the wheel speed sensor connector.

-
Remove the rear spring.
-
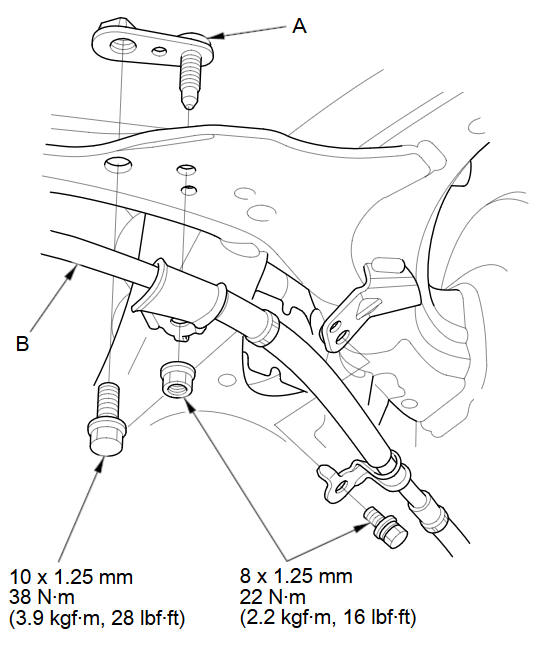
Disconnect the brake hose (A) from both sides of the brake line (B), then remove the brake hose by removing the brake hose clip (C).
NOTE:
-
Do not spill brake fluid on the vehicle; it may damage the paint; if brake fluid gets on the paint, wash it off immediately with water.
-
Plug the end of a hose and joints to prevent spilling brake fluid.
-
Use the new brake hose clip during reassembly.
-
-
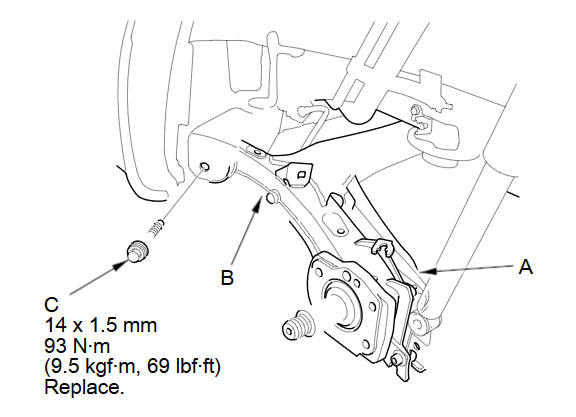
Place a floor jack under the lower spring seat (A) on both sides of the axle beam (B), and support it by raising the floor jack. Do not place the floor jack under the center of the axle beam.
-
Remove the axle beam mounting bolts (C) on both sides.
NOTE: Use new axle beam mounting bolts during reassembly.
-
Lower the jack slowly, then remove the axle beam.
-
Install the axle beam in the reverse order of removal, and note these items:
-
First install all of the components, and lightly tighten the bolts, and place a jack under the lower spring seat of the axle beam on both sides, then raise the suspension to load it with the vehicle's weight before fully tightening to the specified torque.
-
After installing the brake hose, the brake line, and the parking brake cable, check for interference and twisting of other parts.
-
Before installing the brake drum, clean the mating surfaces between the hub bearing unit and the inside of the brake drum.
-
After installing, fill the reservoir with new brake fluid, and bleed the brake system.
-
Check the brake hose and line joint for leaks, and tighten if necessary.
-
Before installing the wheel, clean the mating surfaces between the brake drum and the inside of the wheel.
-
-
Check the wheel alignment, and adjust it if necessary.
See also:
Security System
On Sport model
The security system helps to protect your vehicle and valuables from theft.
The horn sounds and a combination of headlights, position lights, side marker
lights and taillights flash ...
Previous Destinations
INFO button
► Setup
►Personal Information►Previous Destinations
The navigation system maintains a list of your previously routed destinations
as a
shortcut for entering the s ...
Ignition Switch
The ignition switch has four positions: LOCK (0), ACCESSORY (I), ON (II), and
START (III).
LOCK (0) - You can insert or remove the key only in this position.
To turn the key, push it in slightly ...
Categories
