Honda Fit: M/T Differential Carrier/Final Driven Gear Replacement (M/T)
-
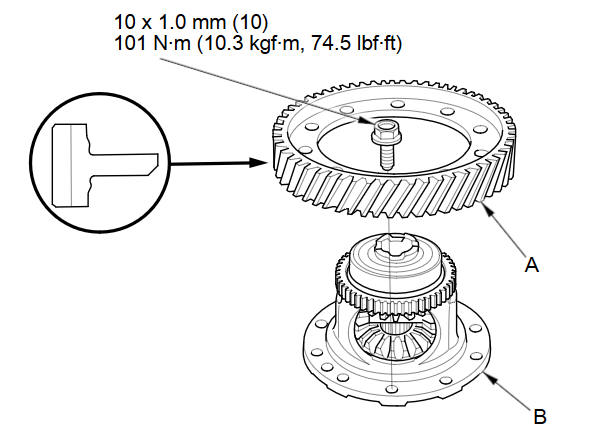
Loosen the bolts in a crisscross pattern in several steps, then remove the final driven gear (A) from the differential carrier (B).
-
Install the final driven gear with the chamfer on the inside diameter facing the carrier. Tighten the bolts in a crisscross pattern in several steps.
See also:
Manual Transmission
Release the parking brake.
Shift the transmission to neutral.
Leave the ignition switch in ACCESSORY (I) so the steering wheel does not
lock.
Make sure all accessories ar ...
DOT Tire Quality Grading (U.S. Vehicles)
The tires on your vehicle meet all U.S. Federal Safety Requirements. All
tires are
also graded for treadwear, traction, and temperature performance according
to Department of Transportation (DOT) ...
Carrying Cargo
Your vehicle has several convenient storage areas:
• Glove box
• Front door pockets
• Seat-back pocket
• Center pocket
• Cargo area side pocket
• Cargo area, including the rear sea ...
Categories
