Honda Fit: Viewing the Route
Map Screen

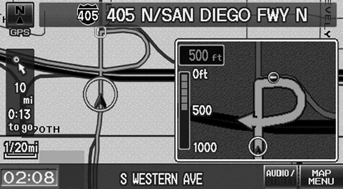
After calculating the route to your destination, the route is displayed on the map screen.
As you drive, the system tracks your position on the map in real time and provides guidance as you approach each guidance point on the route.
 “Display Map”
You can change the map scale using voice control commands (e.g., say d “Display 2 mile scale”).
You can also change the map scale by using the ZOOM button.
You can control the icons displayed on the map
screen using voice control commands (e.g., say
 “Display post office”).
You can obtain information about the route
using voice control commands (e.g., say

“How long to the destination?”).
You can display the next guidance point on the
map screen by saying  “Display Map
Guide”
(when en route).
If you scroll the map while en route, the time and distance to destination indicators are replaced with an indicator showing distance from the current vehicle position.
The map screen can be viewed in single-screen or split-screen mode.
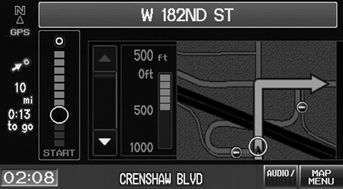
Guidance Screen
The guidance screen offers an alternative way to view your route.

► In single-screen mode, press the MAP/GUIDE button to switch between the map and guidance screens.
► In split-screen mode, press the MAP/GUIDE button to switch between the next guidance direction and a list of guidance directions.
A visual guide helps you check the guidance screen.
Route Line
When driving on verified streets, the route line is light blue. The route line display changes when driving on unverified streets:

► If Unverified Area Routing is Off, the route line uses verified streets only (when possible). A dotted “vector line” pointing directly towards your destination is also displayed.

► If Unverified Area Routing is On, the route line changes to a dashed blue-pink line to indicate that the route line uses unverified streets.
You can set Unverified Area Routing to Off to follow your own route to the destination. If Unverified Area Routing is On, be aware that unverified streets may not be displayed accurately.
You can always view the entire route by simply
saying  “Display entire route.”
Deviating From the Planned Route
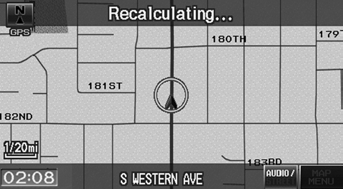
If you leave the calculated route, the system automatically recalculates a route to the desired destination based on your current location and direction.

If Rerouting is set to Manual and you go off route, the system waits for you to manually initiate recalculation. Select Recalc.
Driving Off-road
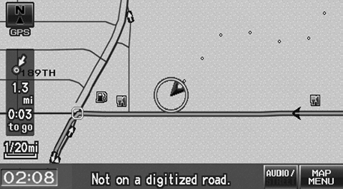
If you leave all mapped (digitized) roads, the system automatically starts displaying a series of dots (breadcrumbs) to track the path you are taking. If needed, you can follow the dots back to the mapped road you originally left.

A message “Not on a digitized road” may appear when you drive half a mile away from a mapped road.
Breadcrumbs may occasionally be displayed in urban areas, such as large parking lots in shopping malls, in new subdivisions where the roads are not yet in the database, or in areas where a GPS signal is unavailable, such as in a parking garage.
Off-road tracking breadcrumbs are limited to approximately 150 miles. Breadcrumbs at the beginning of the trail are deleted if you exceed that distance.
Breadcrumbs are displayed only at 1/20, 1/8, 1/4, and 1/2 mile map scales.
See also:
A/T Housing Reverse Idler Gear Installation (A/T)
Lightly coat the reverse idler gear shaft (A), the needle bearing (B),
and new O-rings (C) with lithium grease.
Assemble the new O-rings and the needle bearing on the reverse ...
Selecting FM/AM Mode
1. Press the FM/AM button.
► Press the FM/AM button again,
if necessary, to select the
frequency band (FM1, FM2,
AM).
► The band and frequency are
displayed.
2. Select AUD ...
Exterior Care
Dust off the vehicle body after you drive.
Regularly inspect your vehicle for scratches on painted surfaces. A scratch on a
painted surface can result in body rust. If you find a scratch, promptly ...
