Honda Fit: Intake Manifold Chamber Removal and Installation
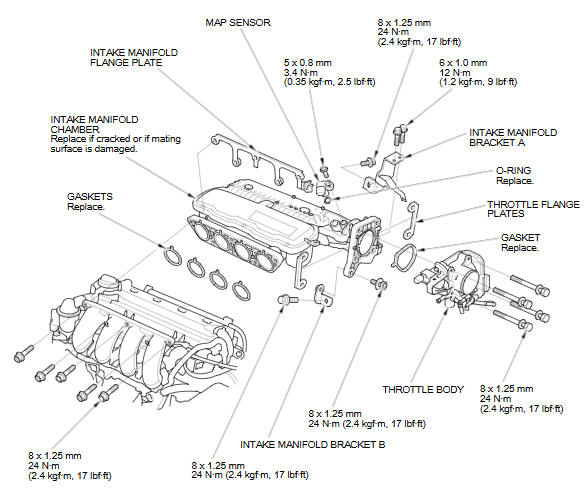
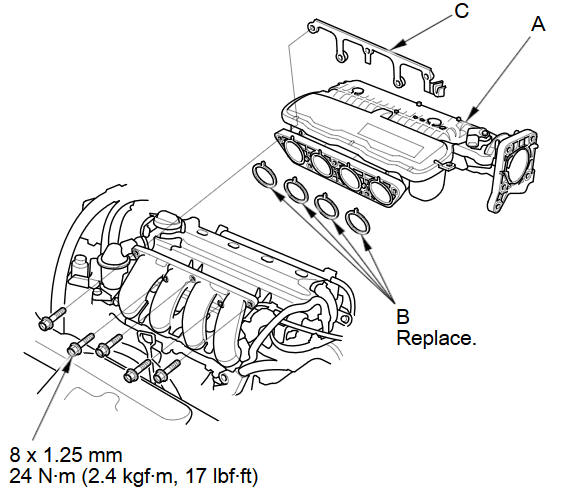
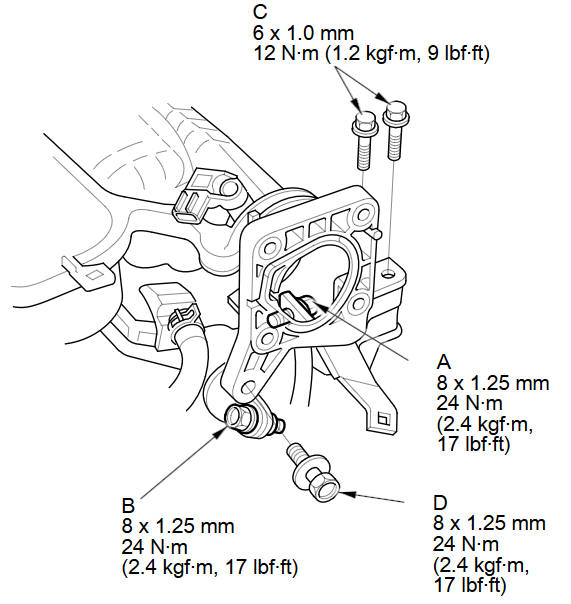
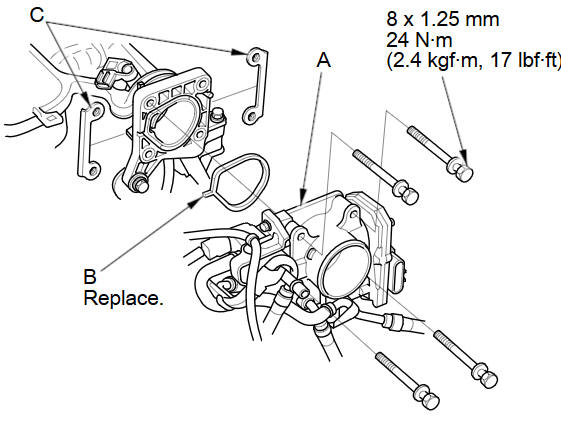
Exploded View
Removal
-
Remove the under-cowl panel.
-
Remove the air cleaner.
-
Disconnect the engine wire harness connectors, and remove the wire harness clamps from the intake manifold chamber:
-
Throttle actuator connector
-
MAP sensor connector
-
-
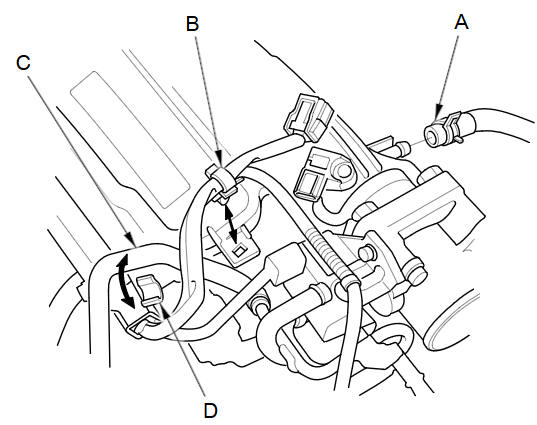
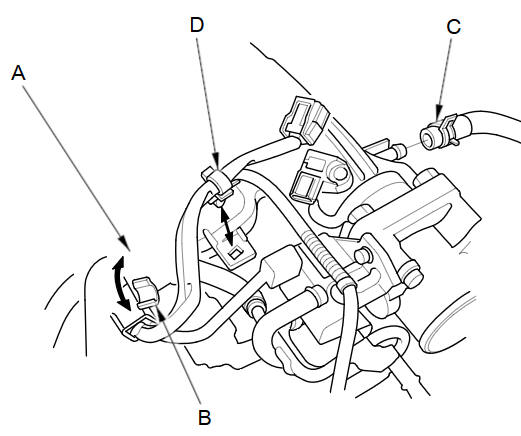
Disconnect the brake booster vacuum hose (A) and remove the harness clamp (B).
-
Remove the water bypass hose (C) from the clamp (D).
-
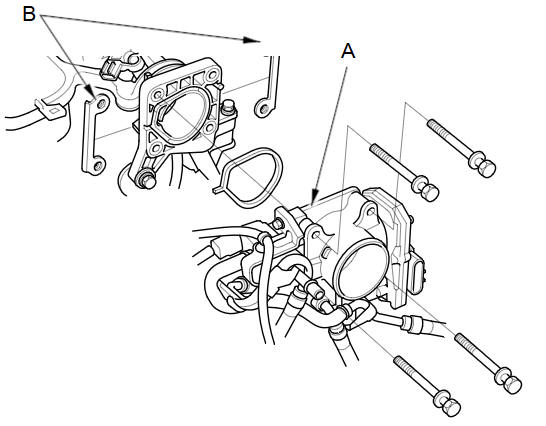
Remove the throttle body (A) without disconnecting the water bypass hoses.
-
Remove the throttle flange plates (B).
-
Remove the intake manifold bracket mounting bolts.

-
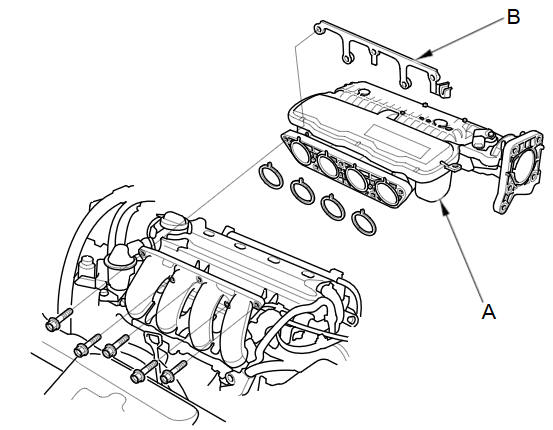
Remove the intake manifold chamber (A) and the intake manifold flange plate (B).
-
Disassemble the intake manifold chamber.
NOTE: Refer to the Exploded View if needed during this procedure.
Installation
-
Reassemble the intake manifold chamber.
NOTE: Refer to the Exploded View if needed during this procedure.
-
Install the intake manifold chamber (A) with new gaskets (B), and the intake manifold flange plate (C).
NOTE: Tighten the bolts in a crisscross pattern in three steps, beginning with the inner bolt.
-
Loosen the intake manifold bracket mounting bolts (A, B), then loosely install the intake manifold bracket mounting bolts (C, D).
-
Tighten the intake manifold bracket mounting bolts in the numbered sequence shown.
-
Install the throttle body (A) with a new gasket (B), and the throttle flange plates (C).
-
Install the water bypass hose (A) to the clamp (B).
-
Connect the brake booster vacuum hose (C) and install the harness clamp (D).
-
Connect the engine wire harness connectors, and install the wire harness clamps to the intake manifold chamber:
-
Throttle actuator connector
-
MAP sensor connector
-
-
Install the air cleaner.
-
Install the under-cowl panel.
See also:
Engine Does Not Start
Checking the Engine
If the engine does not start, turn the ignition switch to START
and check the
starter.
If you must start the vehicle immediately, use an
assisting vehicle to jump start it. ...
Place Name
DEST button
► Place Name
Enter the name of a place (e.g., business, hotel, restaurant) stored in the
map
database to use as the destination.
1. Enter a place name.
2. Select List to di ...
Audio Remote Controls
Steering Wheel Controls
Control basic audio system functions using the controls mounted on the
steering
wheel.
■MODE Button
Cycles through the audio modes as follows:
DISC mode appear ...
Categories
