Honda Fit: Synchro Ring and Gear Inspection (M/T)
-
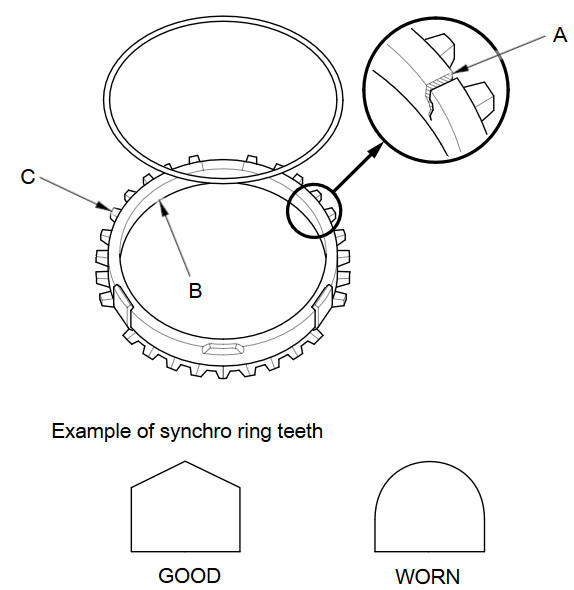
Inspect the synchro rings for scoring, cracks, and damage (A).
-
Inspect the inside of each synchro ring (B) for wear. Inspect the teeth (C) on each synchro ring for wear (rounded off).
-
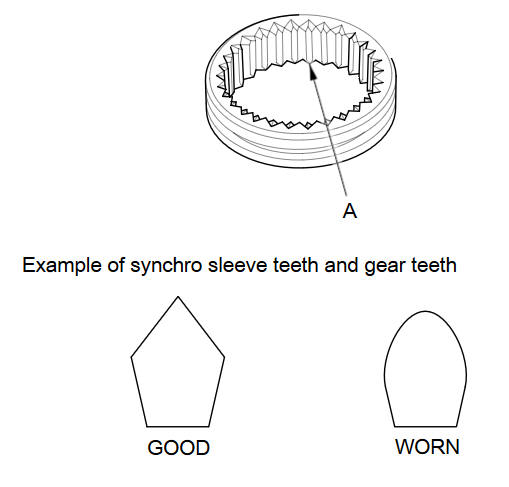
Inspect the teeth (A) on each synchro sleeve and the matching teeth on each gear for wear (rounded off).
-
Inspect the synchro teeth on gear for scoring, cracks, and damage (A).

-
Inspect the thrust surface (B) on each gear hub for wear.
-
Inspect the cone surface (C) on each gear hub for wear and roughness.
-
Inspect the teeth on all gears (D) for uneven wear, scoring, and cracks.
-
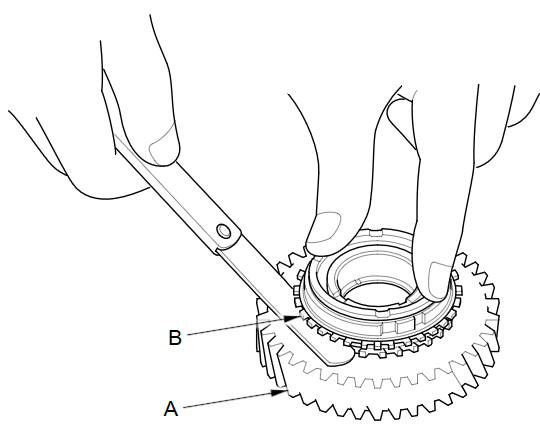
Coat the cone surface of each gear with MTF, and place its synchro ring on it. Rotate the synchro ring, making sure that it does not slip.
-
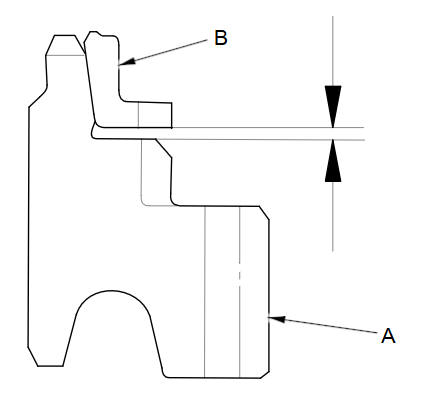
Measure the clearance between each gear (A) and its synchro ring (B) all around the gear. Hold the synchro ring against the gear evenly while measuring the clearance. If the clearance is less than the service limit, replace the synchro ring and gear.
Synchro Ring-to-Gear Clearance
Standard:
0.85пјЌ1.10 mm (0.034пјЌ0.043 in)
Service Limit:
0.4 mm (0.016 in)
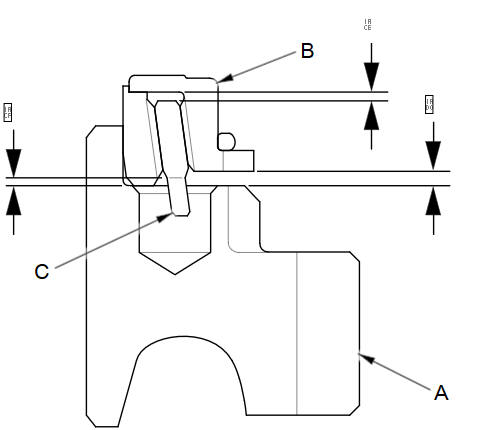
Double Cone Synchro-to-Gear Clearance
Standard:
:
Outer Synchro Ring (B) to Synchro Cone (C) 0.5пјЌ1.0 mm (0.020пјЌ0.039 in)
:
Synchro Cone (C) to Gear (A) 0.5пјЌ1.0 mm (0.020пјЌ0.039 in)
:
Outer Synchro Ring (B) to Gear (A)
0.95пјЌ1.68 mm (0.038пјЌ0.066 in)
Service Limit:
:
0.3 mm (0.012 in)
:
0.3 mm (0.012 in)
:
0.6 mm (0.024 in)
Synchro ring-to-gear
Double cone synchro-to-gear
See also:
Fuel Economy
Actual Mileage and EPA Fuel Economy Estimates Comparison.
Fuel economy is not a fixed number.
It varies based on driving conditions, driving habits and vehicle condition.
Therefore, it is not possi ...
Horn Test/Replacement
'09-11 models
Remove the front grille cover.
Disconnect the 1P connector (A) from the horn (B).
@font-face{font-family:
"Honda_SymbolMark ...
Side Airbags
The side airbags help protect the upper torso of the driver or a front
passenger
during a moderate-to-severe side impact.
Do not attach accessories on or near the side airbags.
They can interfe ...
Categories
