Honda Fit: Transmission Housing and Shaft Assembly Removal (A/T)
Special Tools Required
- Housing Puller 07HAC-PK40102
-
Remove the dipstick (A).

-
Remove the shift solenoid valve cover (B), the dowel pins (C), and the gasket (D).
-
Disconnect the connectors from the shift solenoid valves, and remove the solenoid harness connector (E).
-
Remove the transmission housing mounting bolts (F) (19).
-
Align the spring pin (A) on the selector control shaft (B) with the transmission housing groove (C) by turning the selector control shaft end on the torque converter housing side.
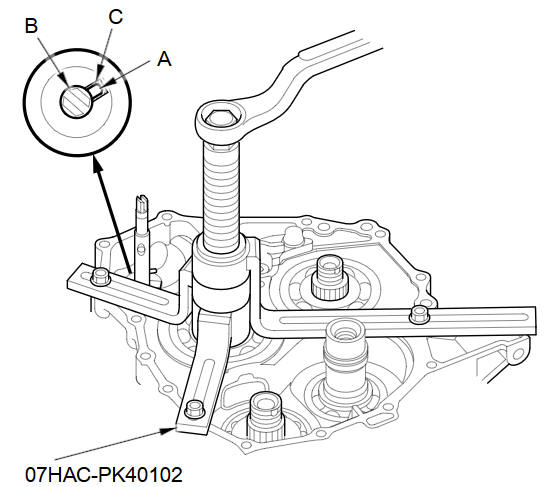
NOTE: Do not squeeze the end of the selector control shaft tips together when turning the control shaft.
-
Install the housing puller over the mainshaft, then remove the transmission housing, the dowel pins, and the gasket.
NOTE: If the top arm of your housing puller is too short, replace it with the 205 mm housing puller arm, 07SAC-P0Z0101.
-
Remove the countershaft reverse gear and needle bearing.
-
Remove the lock bolt securing the shift fork, then remove the shift fork with the reverse selector together.
-
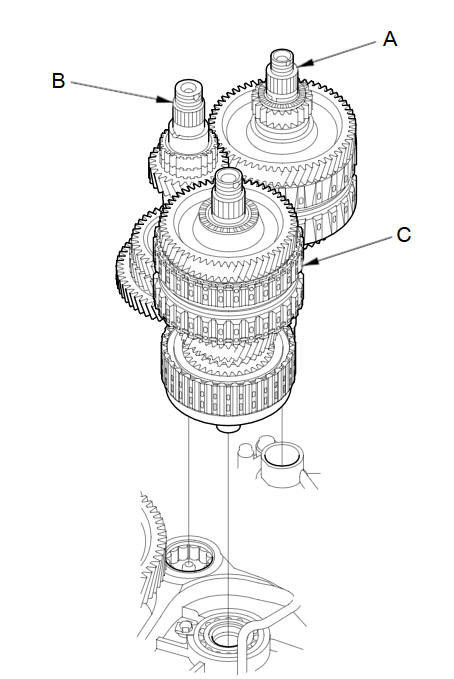
Remove the mainshaft subassembly (A), the countershaft subassembly (B), and the secondary shaft subassembly (C) together.
If the reverse selector hub is removed by hand, remove the 4th-5th gear and needle bearings, and remove the mainshaft subassembly, then the countershaft subassembly and secondary shaft subassembly together.
-
Remove the baffle plate.
-
Remove the differential assembly.
See also:
Navigation—Home Addresses and Going Home
The “Home” feature automatically routes you to your home address from any
location simply by selecting Go Home 1 or 2, or saying d “Go
Home.” You can store two home addresses as Home Addres ...
Throttle Body Cleaning
caution
Do not insert your fingers into the installed throttle body when you
turn the ignition switch to ON (II) or while the ignition switch is in
ON (II). If you d ...
Accessories
...
Categories
