Honda Fit: Shift Cable Adjustment (A/T)
-
Remove the center console.
-
Shift the transmission to N.
-
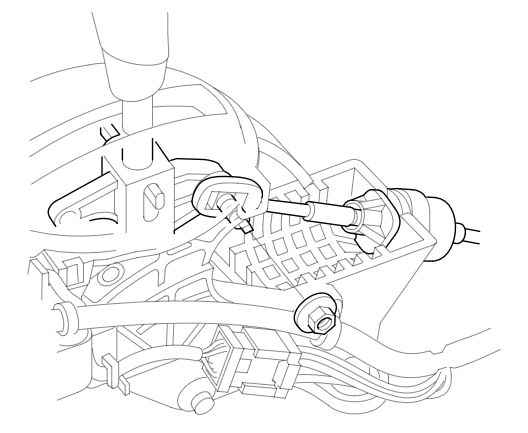
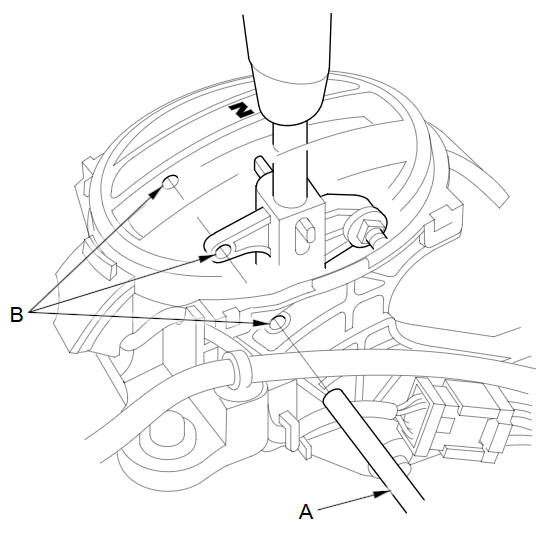
Remove the nut securing the shift cable end.
-
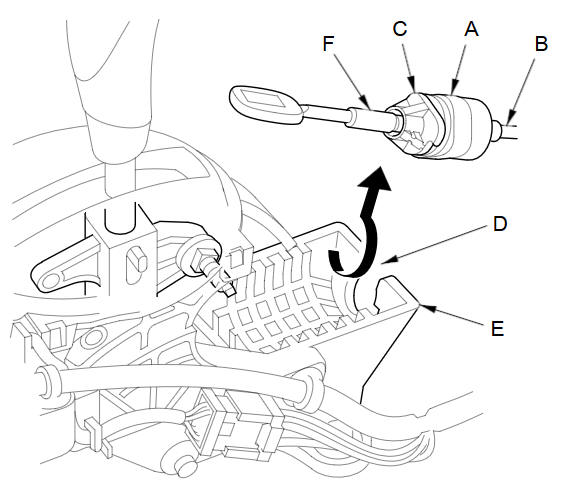
Rotate the socket holder (A) on the shift cable (B) a quarter turn; the corner (C) on the socket holder will be in the opening (D) of the shift lever bracket base (E). Then slide the holder to remove the shift cable from the bracket. Do not remove the shift cable by twisting the shift cable guide (F).
-
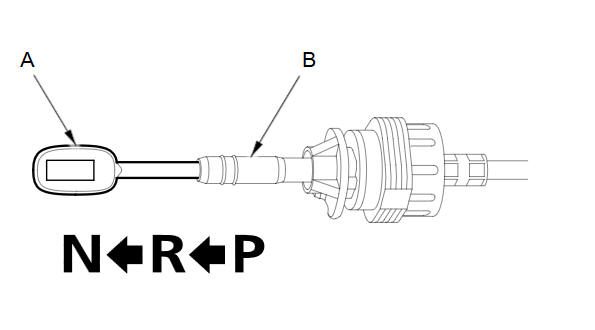
Push the shift cable (A) until it stops, then release it. Pull the shift cable back two steps so that the shift position is in N. Do not hold the shift cable guide (B) to adjust the shift cable.
-
Turn the ignition switch to ON (II), and check that the N indicator comes on.
-
Turn the ignition switch to LOCK (0).
-
Insert a 6.0 mm (0.24 in) pin (A) through the positioning holes (B) on the shift lever bracket base and into the positioning hole on the shift lever. Use only the 6.0 mm (0.24 in) pin.
-
Check that the shift lever is secured in N.
-
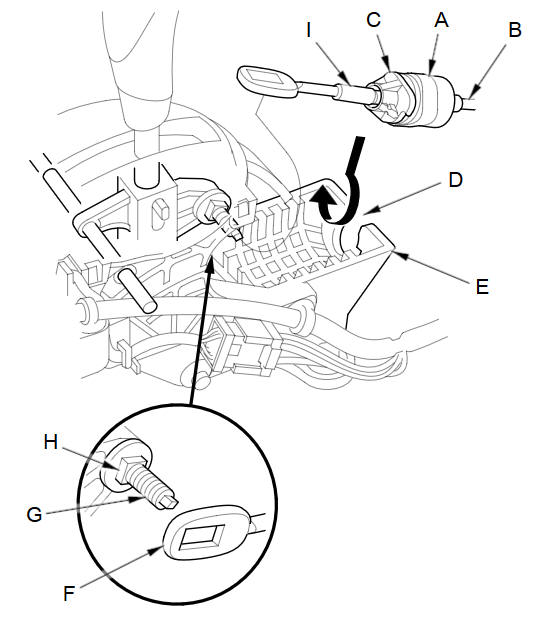
Rotate the socket holder (A) on the shift cable (B) to place the corner (C) on the holder opposite the opening (D) in the shift lever bracket base (E). Align the holder with the opening in the bracket, then slide the holder into the bracket. Install the shift cable end (F) over the mounting stud (G) by aligning its square hole with the square fitting (H) at the bottom of the stud. Rotate the holder a quarter turn until the holder stops to secure the shift cable. Do not install the shift cable by twisting the shift cable guide (I).
-
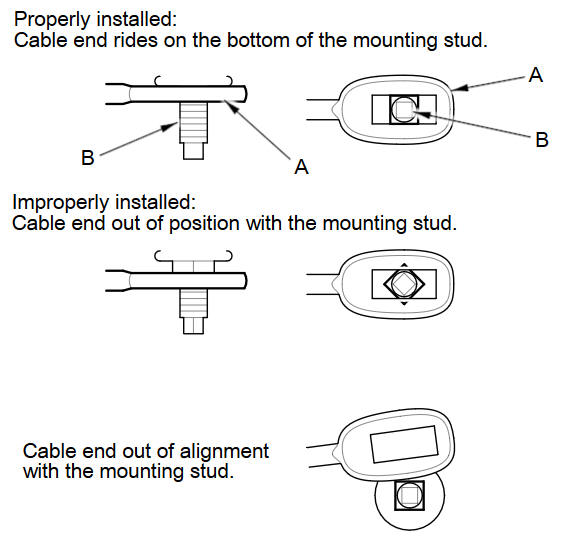
Make sure that the shift cable end (A) is properly installed on the mounting stud (B).
-
If the shift cable end is out of position with the mounting stud, remove the shift cable from the shift cable bracket, then reinstall the cable end over the mounting stud before reinstalling the shift cable to the shift cable bracket. Do not install the shift cable end on the mounting stud with the shift cable install on the shift cable bracket.
-
If the shift cable end does not ride at the bottom of the mounting stud, rotate the stud to align the square fitting with the hole.
-
-
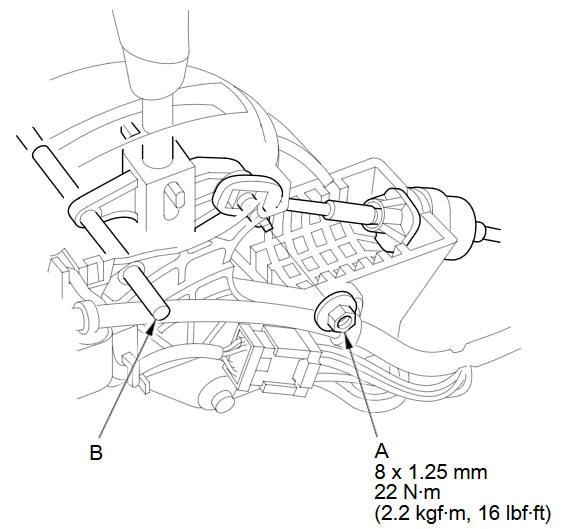
Secure the shift cable end with the nut (A).
-
Remove the 6.0 mm (0.24 in) pin (B) that was installed to hold the shift lever.
-
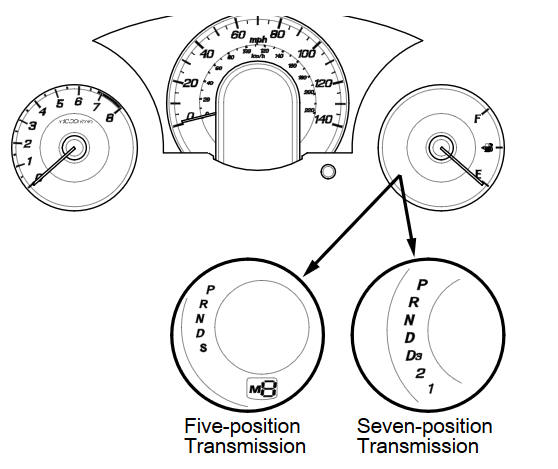
Turn the ignition switch to ON (II). Move the shift lever to each position, and check that the A/T gear position indicator follows the transmission range switch.
-
Shift to P, and check that the shift lock works properly. Push the shift lock release, and check that the shift lever releases, and also check that the shift lever locks when it is shifted back into P.
-
Reinstall the center console.
See also:
How to Enter Information
You can enter information (e.g., city names, street names, personal names,
and business names comprising letters, numbers, and symbols)
when prompted on input screens by two different methods. ...
Tire Pressure Monitoring System (TPMS) - Required Federal Explanation
U.S. models
Each tire, including the spare (if provided), should be checked monthly when
cold and inflated to the inflation pressure recommended by the vehicle
manufacturer on the vehicle placard o ...
Radio Commands
Radio*
Radio on
Radio off
Radio select FM1
Radio select FM2
Radio select AM
Radio tune to # FM (#: frequency,
e.g., 95.5)
Radio tune to # AM (#: frequency,
e.g., 1020)
Radio seek up
Radio s ...
Categories
