
Honda Fit: Valve Guide Replacement
Special Tools Required
- Valve Guide Driver, 5.35 x 9.7 mm 07742-0010100
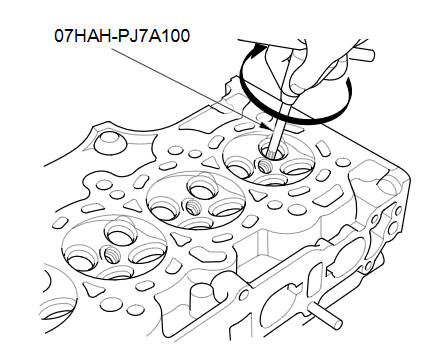
- Valve Guide Reamer, 5.5 mm 07HAH-PJ7A100
-
Inspect valve stem-to-guide clearance.
-
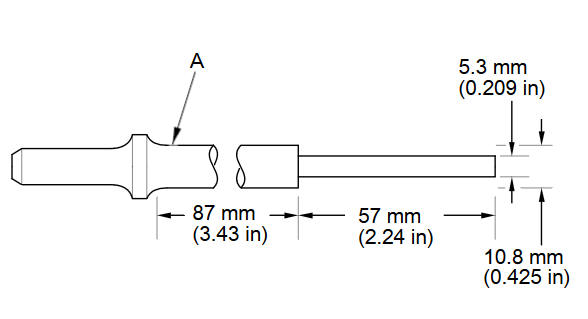
As illustrated, use a commercially available air-impact valve guide driver (A) modified to fit the diameter of the valve guides. In most cases, the same procedure can be done using the valve guide driver, 5.35 x 9.7 mm and a conventional hammer.
-
Select the proper replacement valve guides, and chill them in the freezer section of a refrigerator for at least an hour.
-
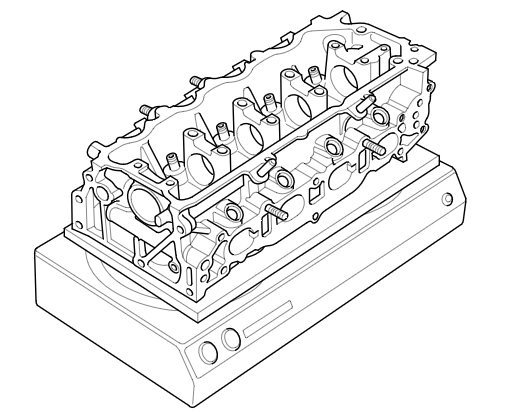
Use a hot plate or an oven to evenly heat the cylinder head to 300 В°F (150 В°C). Monitor the temperature with a cooking thermometer. Do not get the head hotter than 300 В°F (150 В°C); excessive heat may loosen the valve seats.
-
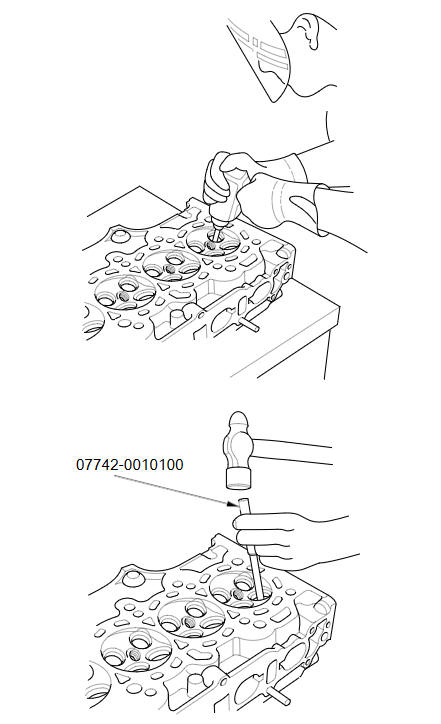
Working from the camshaft side, use the valve guide driver and an air hammer to drive the guide about 2 mm (0.08 in) towards the combustion chamber. This will knock off some of the carbon and make removal easier. Hold the air hammer directly in line with the valve guide to prevent damaging the driver. Wear safety goggles or a face shield.
-
Turn the head over, and drive the valve guide out toward the camshaft side of the head.
-
If a valve guide will not move, drill it out with an 8 mm (5/16 in) drill bit, then try again.
NOTE: Drill guides only in extreme cases; you could damage the cylinder head if the valve guide breaks.
-
Remove a new valve guide(s) from the freezer, one at a time, as you need them.
-
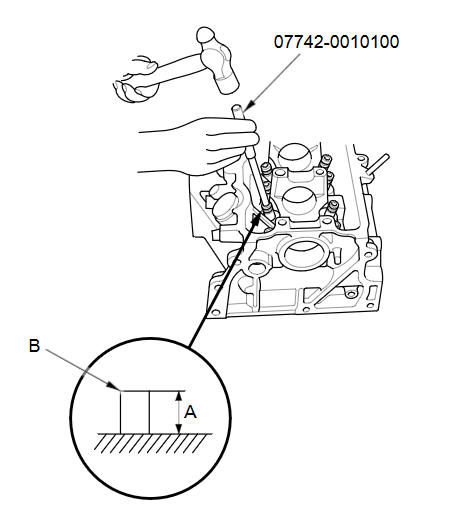
Apply a thin coat of new engine oil to the outside of a new valve guide. Install the valve guide from the camshaft side of the head; use the valve guide driver to drive the valve guide to the specified installed height (A) of the valve guide (B). If you have all 16 valve guides to do, you may have to reheat the head.
Valve Guide Installed Height
15.85пјЌ16.35 mm (0.6240пјЌ0.6437 in)
-
Coat both the valve guide reamer, 5.5 mm and the valve guide with cutting oil.
-
Rotate the reamer clockwise the full length of the valve guide bore.
-
Continue to rotate the reamer clockwise while removing it from the bore.
-
Thoroughly wash the valve guide in detergent and water to remove any cutting residue.
-
Check the clearances with a valve. Verify that a valve slides in the intake and exhaust valve guides without sticking.
-
Inspect the valve seating. If necessary renew the valve seat using a valve seat cutter.
See also:
Rear Inner Fender Replacement
NOTE:
Put on gloves to protect your hands.
Take care not to scratch the body.
Remove the screws (A) and the clips (B, C), then remove the rear inner fender
(D).
NOTE: T ...
Resolving Problems
If you run into a specific issue that you
cannot resolve, consult the following help
resources:
• For navigation system issues:
There are also FAQs available online at
automobiles.honda.com.
â ...
Maintenance
This section explains why it is important to keep your vehicle well maintained
and how to follow basic maintenance safety precautions.
This section also includes instructions on how to read the mai ...
Categories
