
Honda Fit: Driveshaft Removal
Special Tools Required
- Ball Joint Remover, 28 mm 07MAC-SL0A202
- Ball Joint Thread Protector, 14 mm 071AF-S3VA000
-
Raise and support the vehicle.
-
Remove the front wheel.
-
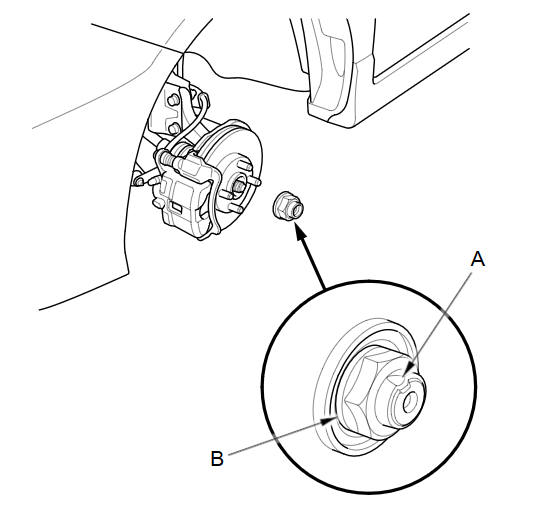
Pry up the stake (A) on the spindle nut (B), then remove the nut.
-
Drain the transmission fluid. Reinstall the drain plug using a new sealing washer:
-
Manual transmission
-
Automatic transmission
-
-
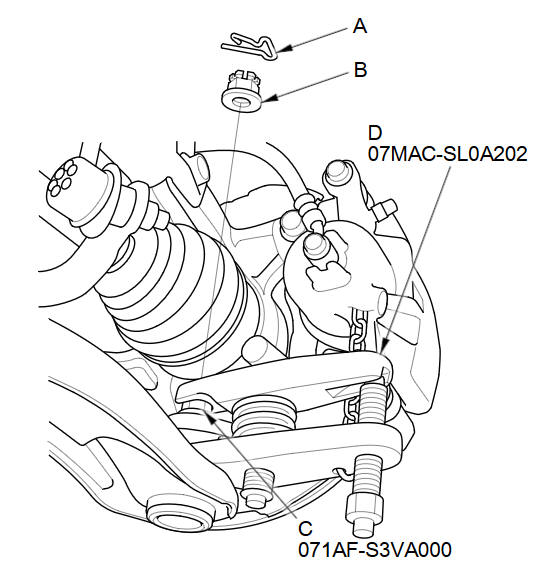
Remove the lock pin (A) from the lower arm ball joint, then remove the castle nut (B). Separate the ball joint from the knuckle using the 14 mm ball joint thread protector (C) and the 28 mm ball joint remover (D).
NOTE:
-
To avoid damaging the ball joint, install the ball joint thread protector onto the threads of the ball joint.
-
Be careful not to damage the ball joint boot when installing the remover.
-
Do not force or hammer on the lower arm, or pry between the lower arm and the knuckle. You could damage the ball joint.
-
-
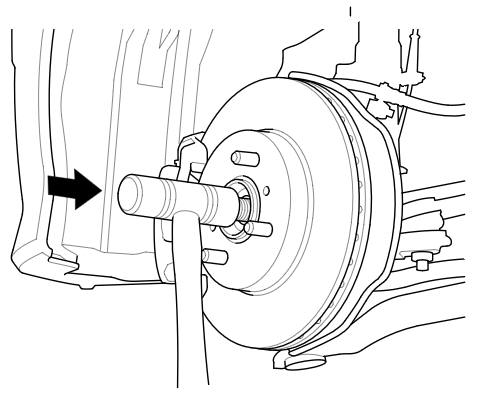
Pull the knuckle outward, and separate the outboard joint from the front hub using a soft face hammer.
-
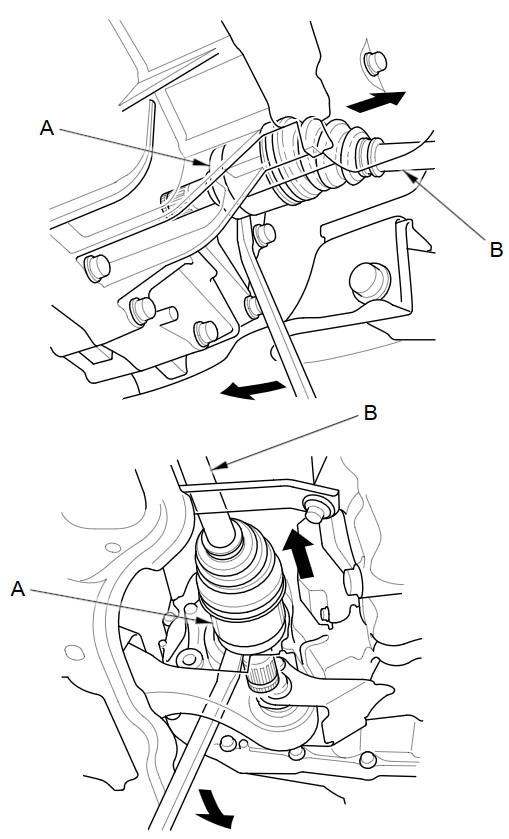
Left and right driveshaft (M/T model)/left driveshaft (A/T model): Pry the inboard joint (A) from the differential using a pry bar. Remove the driveshaft as an assembly.
NOTE:
-
Do not pull on the driveshaft (B), or the inboard joint may come apart. Pull the inboard joint straight out to avoid damaging the oil seal.
-
Be careful not to damage the oil seal or the end of the inboard joint with the pry bar.
-
-
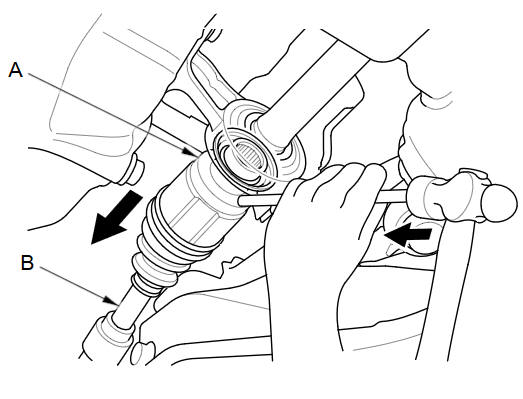
Right driveshaft (A/T model): Drive the inboard joint (A) off of the intermediate shaft using a drift punch and a hammer. Remove the driveshaft as an assembly.
NOTE:
-
Do not pull the assembly by the driveshaft (B), or the inboard joint may come apart.
-
Be careful not to damage the oil seal or the end of the inboard joint with the drift punch or the pry bar.
-
-
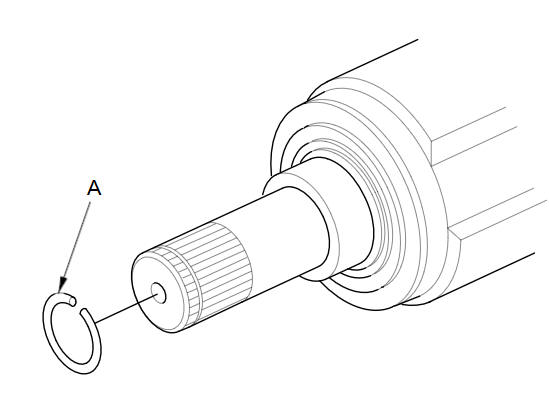
Remove the set ring (A) from the inboard joint (Except A/T model right driveshaft).
-
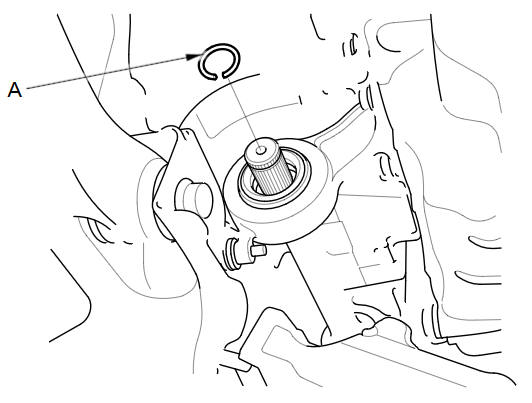
Remove the set ring (A) from the intermediate shaft (A/T model right driveshaft).
See also:
Under-Dash Fuse/Relay Box Removal and Installation (Canada models)
Canada models
NOTE: SRS components are located in this area.
Review the SRS component locations, and
precautions and procedures
before doing repairs or servicing.
Removal
NOTE: The ...
Engine Assembly Torque Rod Bracket Replacement
Raise the vehicle on the lift.
A/T model: Remove the shift cable cover.
Support the transmission with a transmission jack and a wood block under
the transmission a ...
How to Set Readiness Codes
Malfunction Indicator Lamp (MIL) Indication (In relation to Readiness
Codes)
The vehicle has certain readiness codes that are part of the on-board
diagnostics for the emissions systems. If the ve ...
Categories
