Honda Fit: M/T Differential Carrier/Final Driven Gear Replacement (M/T)
-
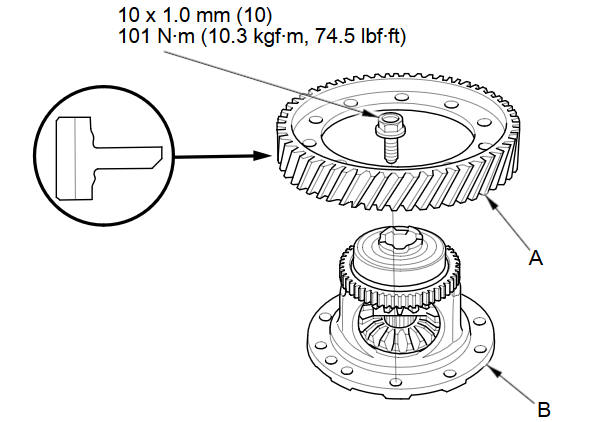
Loosen the bolts in a crisscross pattern in several steps, then remove the final driven gear (A) from the differential carrier (B).
-
Install the final driven gear with the chamfer on the inside diameter facing the carrier. Tighten the bolts in a crisscross pattern in several steps.
See also:
Power Door Mirrors
You can adjust the door mirrors when the
ignition switch is in ON .
■ Mirror position adjustment
L/R selector switch: Select the left or right
mirror. After adjusting the mirror, return th ...
TPMS (Tire Pressure Monitoring System)
U.S. models only
Monitors the tire pressure while you are
driving. If your vehicle’s tire pressure becomes
significantly low, the low tire pressure
indicator comes on.
Conditions such as low ...
Setting Up Speed Dialing
PHONE button
► Speed Dial 1 or Speed Dial 2
Create speed dial entries with voice tags for easy calling.
1. Select Add New.
2. Select a number entry option.
3. Select a number.>
4. ...
Categories
