Honda Fit: Manual Transmission Removal (M/T)
Special Tools Required
- Universal Lifting Eyelet 07AAK-SNAA120
- 1.8 Support Bolt 07AAK-SNAA500
- Engine Support Hanger, A and Reds AAR-T1256
*: Reds engine support hanger AAR-T1256 is available through the Honda Tool and Equipment Program 888-424-6857.
NOTE: Use fender covers to avoid damaging painted surfaces.
-
Secure the hood in the wide open position with the support strut.
-
Remove the wiper arms.
-
Remove the cowl covers and hood hinge cover.
-
Remove the wiper motor.
-
Remove the under-cowl panel.
-
Do the battery removal procedure.
-
Remove the air cleaner housing.
-
Remove the air cleaner bracket.
-
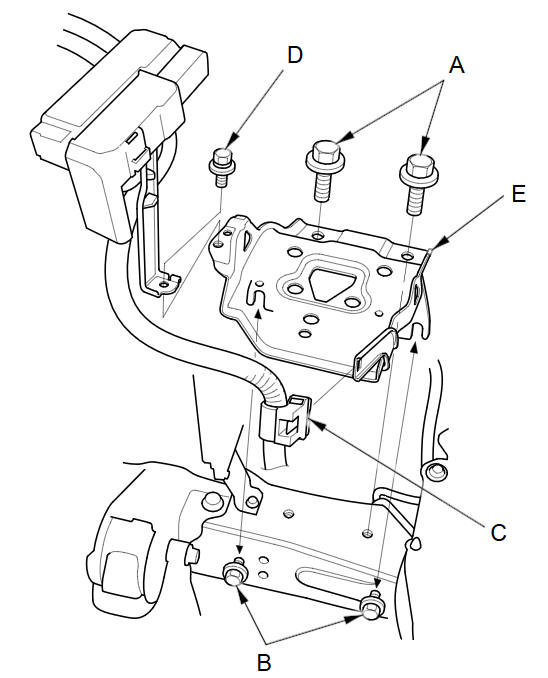
Remove the battery base bolts (A), loosen the two bolts (B), remove the battery harness clamp (C) and the bracket bolt (D), then remove the battery base (E).
-
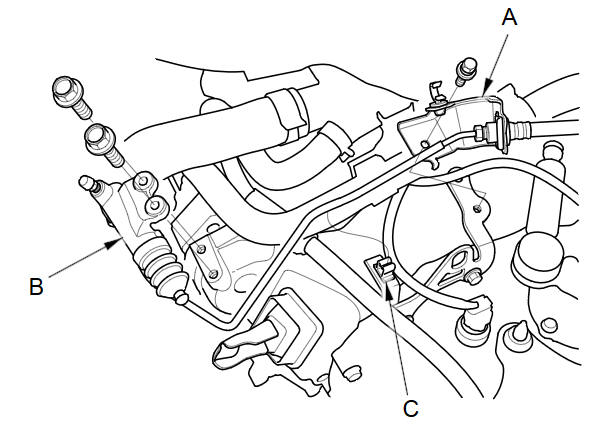
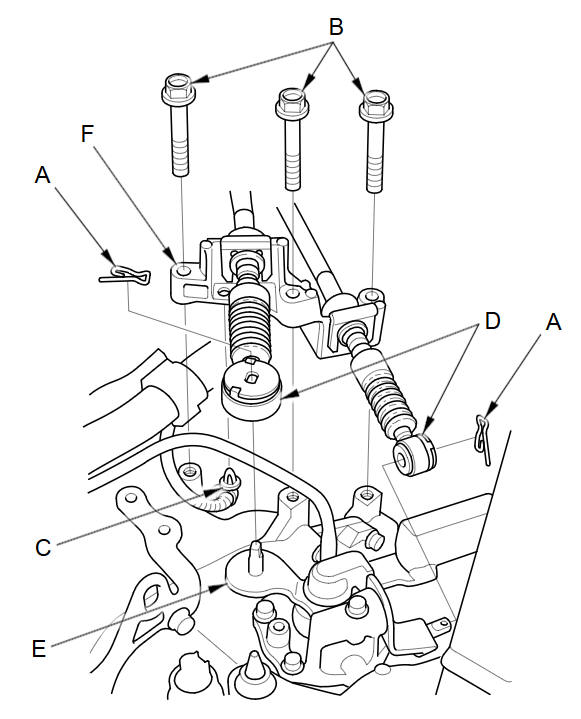
Remove the clutch hose bracket (A) and the slave cylinder (B). Remove the clutch line from the clip (C), then carefully move the slave cylinder out of the way to avoid bending the clutch line.
NOTE:
-
Do not disconnect the clutch line joints.
-
Do not press the clutch pedal after the slave cylinder has been removed.
-
-
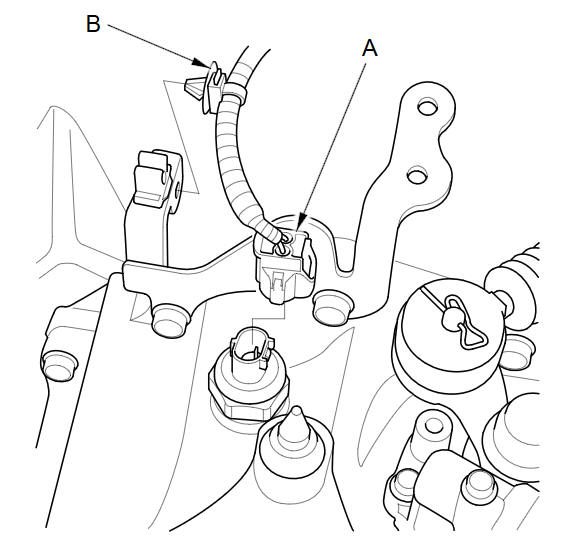
Disconnect the back-up light switch connector (A), then remove the harness clip (B).
-
Remove the lock pins (A), shift cable bracket bolts (B), and harness clip (C), then disconnect the shift cables (D) from the change lever assembly (E). Carefully remove both cables and the shift cable bracket (F) together to avoid bending the cables.
-
Disconnect the output shaft (countershaft) speed sensor 3P connector.
-
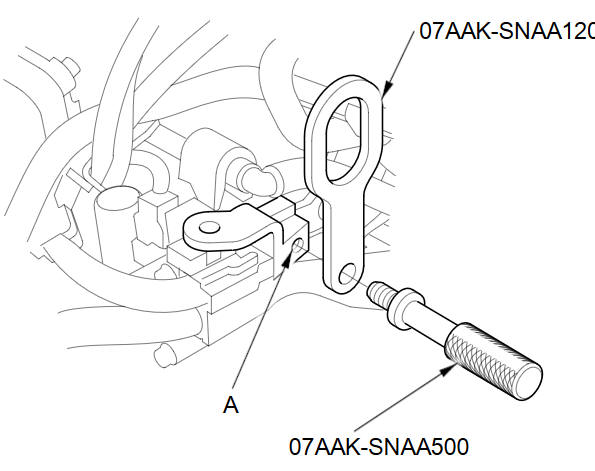
Install the universal lifting eyelet (07AAK-SNAA120) to the bolt hole (A) at the air cleaner housing mounting bracket with the 1.8 support bolt (07AAK-SNAA500).
-
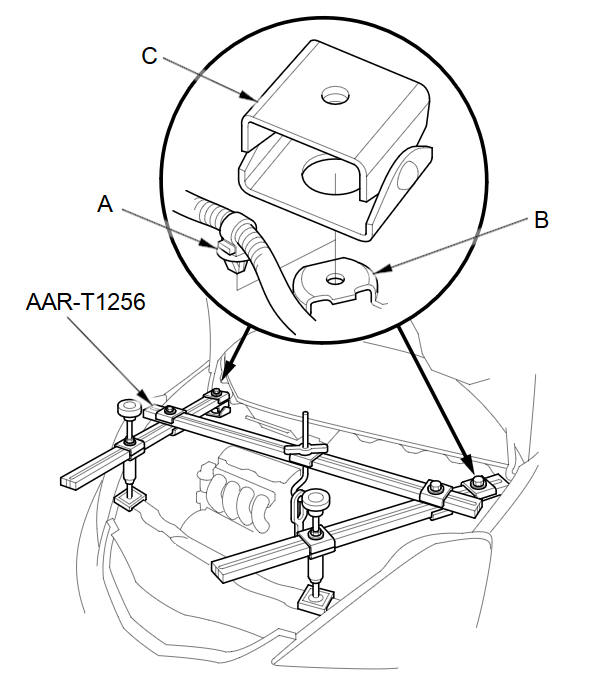
Remove the harness clamp (A) from its clamp bracket (B) located in front of the left damper top.
-
Set up the engine support hanger (AAR-T1256). Carefully position the engine support hanger to the vehicle; position both cross-arm foot bases (C) over the harness clamp brackets on both sides, and position both front stands on the front bulkhead. Attach the hook to the universal eyelet, tighten the wing nut by hand, and lift and support the engine.
-
Remove the one upper transmission mounting bolt.
-
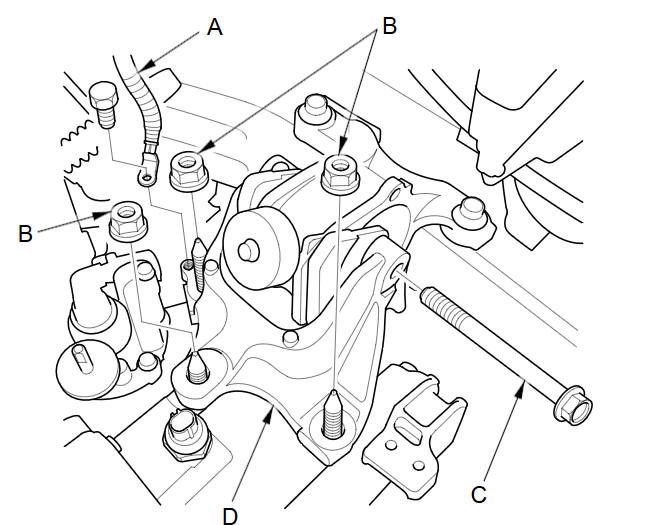
Remove the ground cable (A), the transmission mount nuts (B), and the transmission mount bolt (C) from the transmission bracket (D).
-
Raise the vehicle on a lift, and make sure it is securely supported.
-
Remove the splash shield.
-
Drain the transmission fluid. Reinstall the drain plug using a new sealing washer.
-
Remove the right and left driveshafts.
-
Remove the heat shield.
-
Remove the clutch case cover.
-
Securely support the transmission with a transmission jack.
-
Remove the torque rod.
-
Remove the torque rod bracket.
-
Remove the lower transmission mounting bolts.
-
Pull the transmission away from the engine until the transmission mainshaft clears the clutch pressure plate.
-
Slowly lower the transmission. Check once again that all hoses and wire harnesses are disconnected and free from the transmission, then lower it completely. Remove the two dowel pins.
See also:
Secondary Shaft Disassembly, Inspection, and Reassembly (A/T)
Inspect the thrust needle bearings and the needle bearings for galling
and rough movement.
Inspect the splines for excessive wear and damage.
Check the shaft bearing s ...
Accessories
When installing accessories, check the following:
• Do not install accessories on the windshield. They can obstruct your view and
delay your reaction to driving conditions.
• Do not install acc ...
Transmission Number
@font-face{font-family:
"Honda_SymbolMarkeng";src:url(/statics/ho_prod_2/txt/Honda_SymbolMark_enu3.txt);}@font-face{font-family:
"Honda_Sp ...
Categories
