Honda Fit: Countershaft Disassembly (M/T)
NOTE: Refer to the Exploded View in the countershaft reassembly, as needed, when removing components pressed onto the countershaft.
-
Securely clamp the countershaft assembly in a bench vise with wood blocks.
-
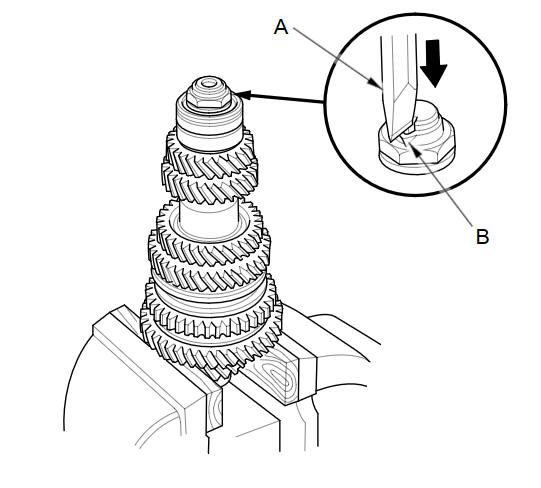
Use a chisel (A) to raise the locknut tab (B) from the groove in the countershaft.
-
Remove the locknut (left-hand threads) (A) and the spring washer (B).

-
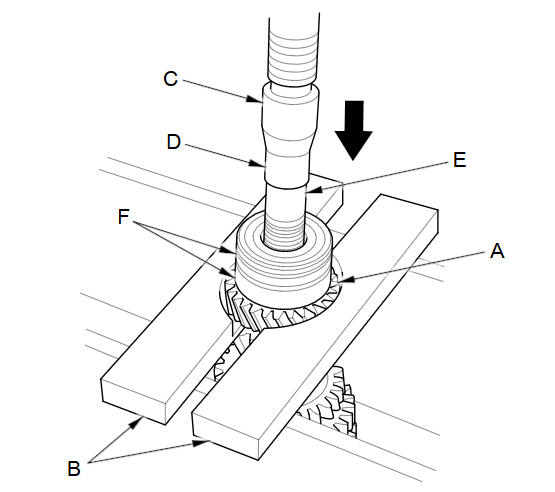
Support 5th gear (A) on steel blocks (B), then use a press (C) and an attachment (D) to press the countershaft (E) out of the bearings (F).
-
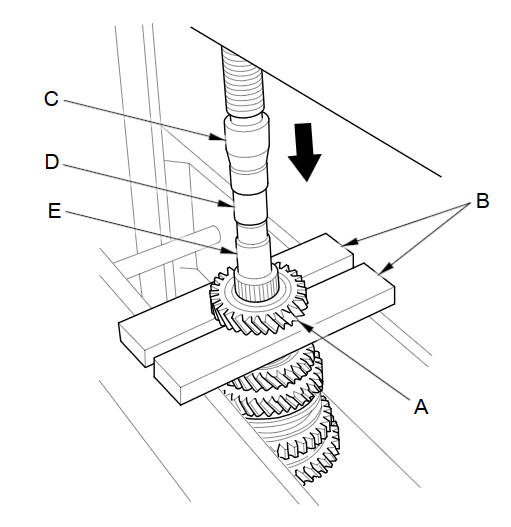
Support 4th gear (A) on steel blocks (B), then use a press (C) and an attachment (D) to press the countershaft (E) out of 4th gear.
-
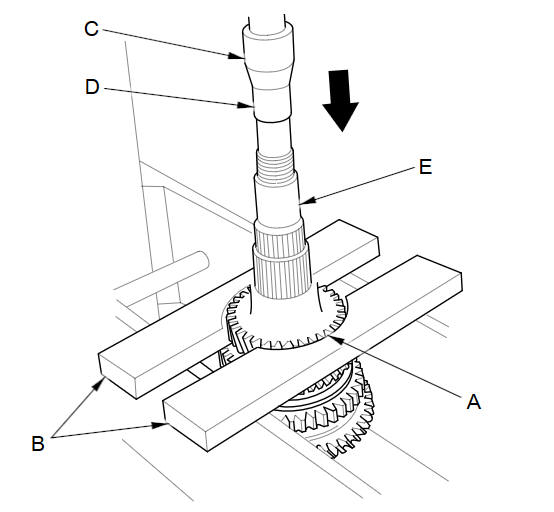
Support 3rd gear (A) on steel blocks (B), then use a press (C) and an attachment (D) to press the countershaft (E) out of 3rd gear.
See also:
Countershaft Reassembly (M/T)
Exploded View
Special Tools Required
Driver Handle, 40 mm I.D. 07746-0030100
Bearing Driver Attachment, 25 mm I.D. 07746-0030200
Bearing Driver Attachment, 30 mm I.D. 07746-0030300
Bear ...
Towing a Trailer
Your vehicle is not designed to tow a trailer. Attempting to do so can void your
warranties. ...
Interior Care
Use a damp cloth with a mixture of mild detergent and warm water to remove
dirt.
Use a clean cloth to remove detergent residue.
Do not spill liquids inside the vehicle.
Electrical devices and ...
Categories
