Honda Fit: Pressure Plate Inspection and Removal
-
Remove the transmission.
-
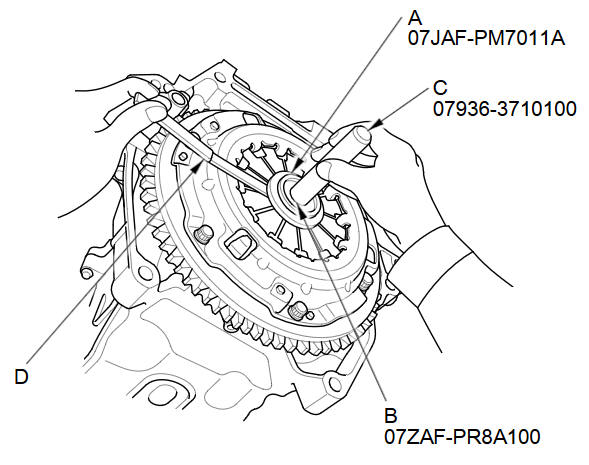
Check the evenness of the height of the diaphragm spring fingers using the clutch alignment disc (A), clutch alignment shaft (B), remover handle (C), and a feeler gauge (D). If the height difference is more than the service limit, replace the pressure plate.
Standard (New):
0.6 mm (0.024 in) max.
Service Limit:
1.0 mm (0.039 in)
-
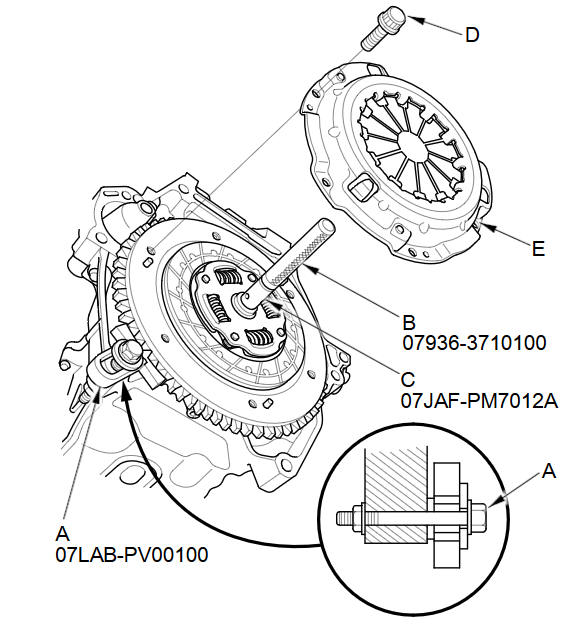
Install the ring gear holder (A), the remover handle (B), and the clutch alignment shaft (C).
-
To prevent warping, unscrew the pressure plate mounting bolts (D) in a crisscross pattern in several steps, then remove the pressure plate (E).
-
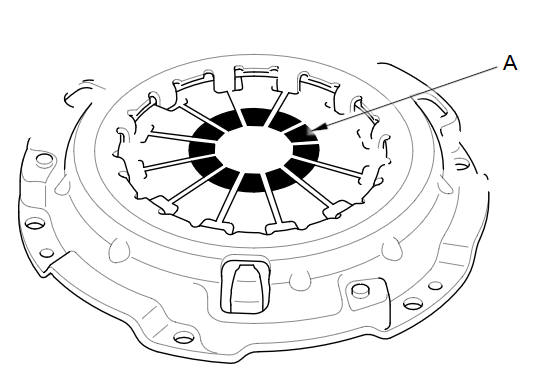
Inspect the fingers of the diaphragm spring (A) for wear at the release bearing contact area.
-
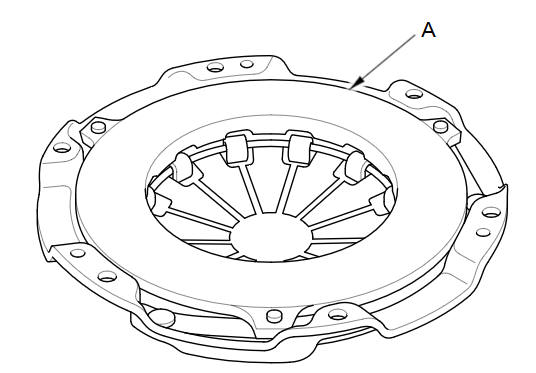
Inspect the pressure plate (A) surface for wear, cracks, and burning.
-
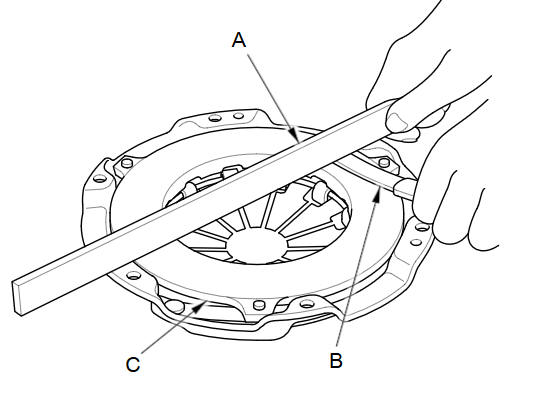
Inspect for warpage using a precision straight edge (A) and a feeler gauge (B). Measure across the pressure plate (C). If the measurement is greater than the service limit, replace the pressure plate.
Standard (New):
0.03 mm (0.001 in) max.
Service Limit:
0.15mm (0.005 in)
See also:
Regulator Valve Body Disassembly, Inspection, and Reassembly (A/T)
Clean all parts thoroughly in solvent, and dry them with compressed air.
Blow out all passages except the air check valve filter.
Inspect the regulator valve body for scoring and ...
Your Vehicle at a Glance
* 1: To use the horn, press the center pad of the steering wheel.
* 2: If equipped. ...
Countershaft Reassembly (M/T)
Exploded View
Special Tools Required
Driver Handle, 40 mm I.D. 07746-0030100
Bearing Driver Attachment, 25 mm I.D. 07746-0030200
Bearing Driver Attachment, 30 mm I.D. 07746-0030300
Bear ...
Categories
