
Honda Fit: Mainshaft Disassembly, Inspection, and Reassembly (A/T)
-
Inspect the thrust needle bearings and the needle bearings for galling and rough movement.
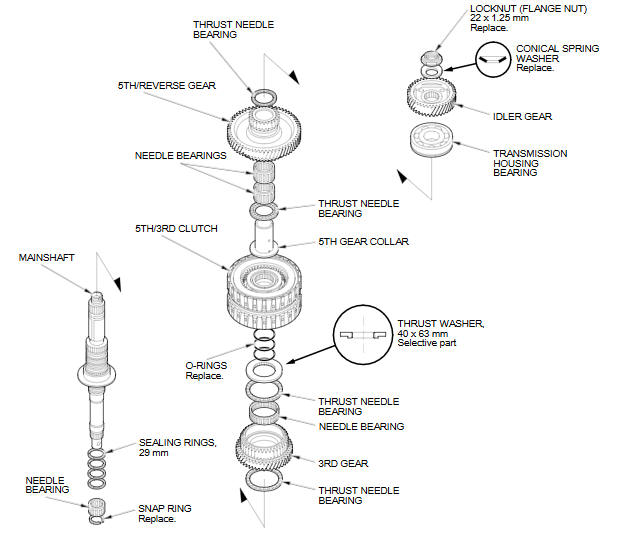
-
Inspect the splines for excessive wear and damage.
-
Check the shaft bearing surfaces for scoring and excessive wear.
-
Before installing the O-rings, wrap the shaft splines with tape to prevent O-ring damage.
-
Lubricate all parts with ATF during assembly.
-
Install the conical spring washer and the 40 x 63 mm thrust washer in the direction shown.
-
Replace the locknut and the conical spring washer with new ones when assembling the transmission.
-
Check the axial clearance of 3rd gear.
See also:
Front Passenger's Airbag Replacement (Removal)
NOTE:
If replacing the front passenger's airbag after deployment,
refer to Component Replacement/Inspection After Deployment
for a complete list of other parts that must also be r ...
Winter Tires
If driving on snowy or frozen roads, mount all season marked “M+S” tires,
snow
tires, or tire chains; reduce speed; and maintain sufficient distance between
vehicles
when driving.
Be part ...
Output Shaft (Countershaft) Speed Sensor Replacement (A/T)
Remove the air cleaner assembly.
Disconnect the output shaft (countershaft) speed sensor connector, and
remove the output shaft (countershaft) speed sensor (A).
...
Categories
