Honda Fit: M/T Differential Carrier/Final Driven Gear Replacement (M/T)
-
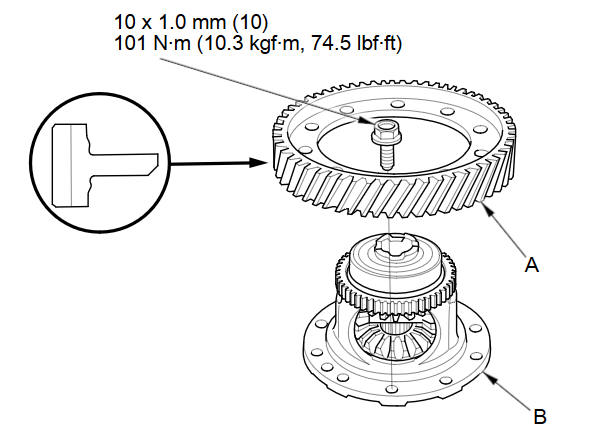
Loosen the bolts in a crisscross pattern in several steps, then remove the final driven gear (A) from the differential carrier (B).
-
Install the final driven gear with the chamfer on the inside diameter facing the carrier. Tighten the bolts in a crisscross pattern in several steps.
See also:
Front Door Glass Outer Weatherstrip Replacement
NOTE:
Put on gloves to protect your hands.
Take care not to scratch the door and related parts.
Lower the glass fully.
Remove the door sash outer trim.
...
Pilot Bearing Replacement
Remove the crankshaft pilot bearing (A) using the remover weight (B), and
the 15 mm bearing remover shaft set (C).
Install a new pilot bearing (A) into the crankshaft using th ...
FTP Sensor Replacement
Remove the EVAP canister.
Disconnect the FTP sensor connector (A).
Disconnect the hose (B), remove the retainer (C), and remove the FTP
sensor (D).
Ins ...
Categories
