Honda Fit: Pressure Plate Inspection and Removal
-
Remove the transmission.
-
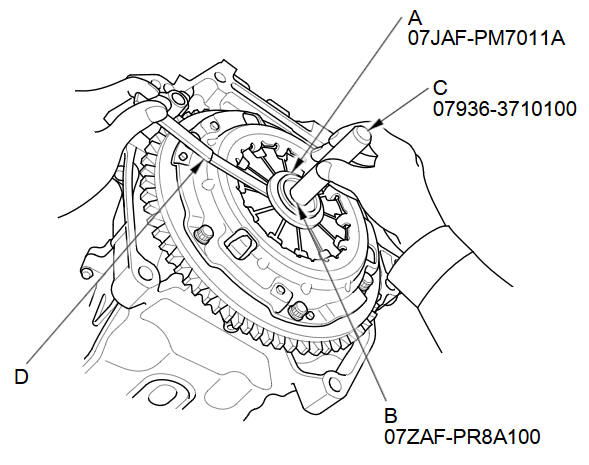
Check the evenness of the height of the diaphragm spring fingers using the clutch alignment disc (A), clutch alignment shaft (B), remover handle (C), and a feeler gauge (D). If the height difference is more than the service limit, replace the pressure plate.
Standard (New):
0.6 mm (0.024 in) max.
Service Limit:
1.0 mm (0.039 in)
-
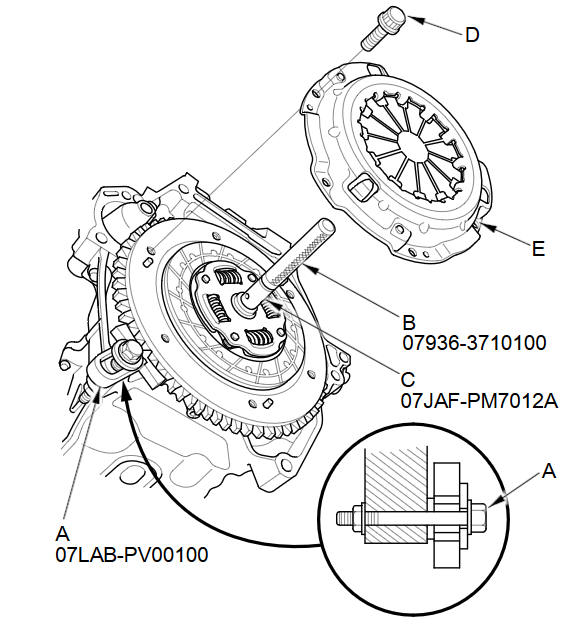
Install the ring gear holder (A), the remover handle (B), and the clutch alignment shaft (C).
-
To prevent warping, unscrew the pressure plate mounting bolts (D) in a crisscross pattern in several steps, then remove the pressure plate (E).
-
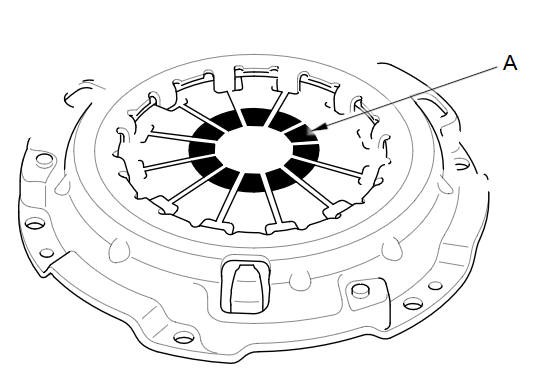
Inspect the fingers of the diaphragm spring (A) for wear at the release bearing contact area.
-
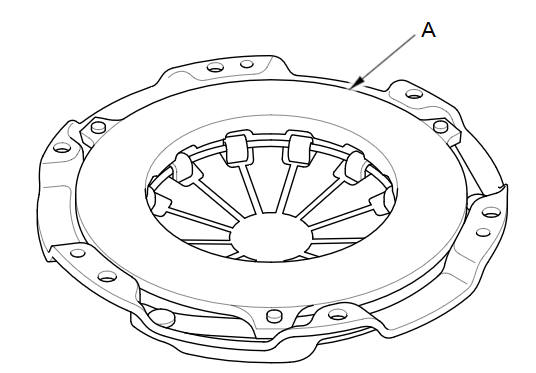
Inspect the pressure plate (A) surface for wear, cracks, and burning.
-
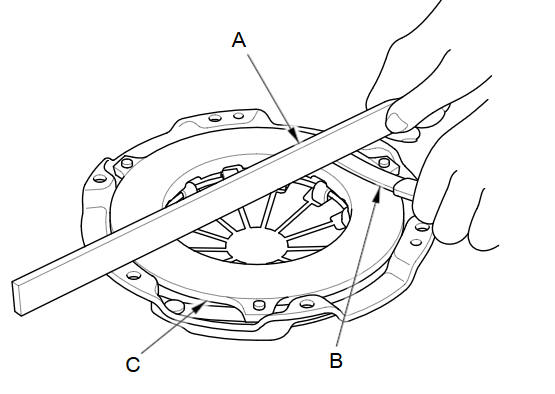
Inspect for warpage using a precision straight edge (A) and a feeler gauge (B). Measure across the pressure plate (C). If the measurement is greater than the service limit, replace the pressure plate.
Standard (New):
0.03 mm (0.001 in) max.
Service Limit:
0.15mm (0.005 in)
See also:
Gearshift Mechanism Replacement (M/T)
NOTE: Make sure not to get any silicone grease on the terminal part of the
connectors and switches, especially if you have silicone grease on your hands or
gloves.
...
TPMS System Description (USA models)
TPMS Control Unit Inputs and Outputs at the
20P Connector
@font-face{font-family:
"Honda_SymbolMarkeng";src:url(/statics/ho_prod_2/txt/Honda_SymbolM ...
Categories
