Honda Fit: Drive Belt Auto-Tensioner Inspection
-
Turn the ignition switch to ON (II), and make sure to turn the A/C switch OFF, then turn the ignition switch to LOCK (0).
-
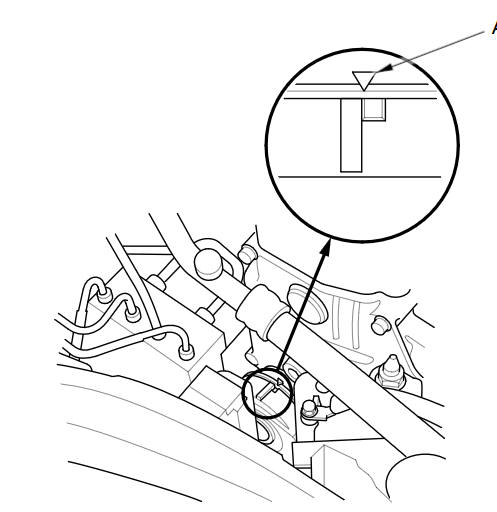
Check the position of the auto-tensioner indicator (A). Start the engine, then check the position again with the engine idling. If the position of the indicator moves or fluctuates a lot, replace the auto-tensioner.
-
Check for abnormal noise from the tensioner pulley. If you hear abnormal noise, replace the auto-tensioner pulley.
-
Remove the drive belt.
-
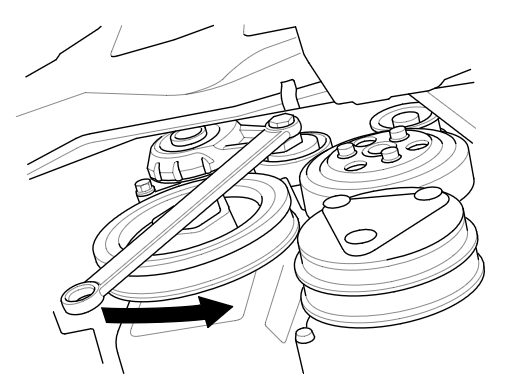
Move the auto-tensioner within its limit with a wrench in the direction shown. Check that the auto-tensioner moves smoothly and without any abnormal noise. If the tensioner does not move smoothly, or you hear abnormal noise, replace the auto-tensioner.
-
Remove the auto-tensioner.
-
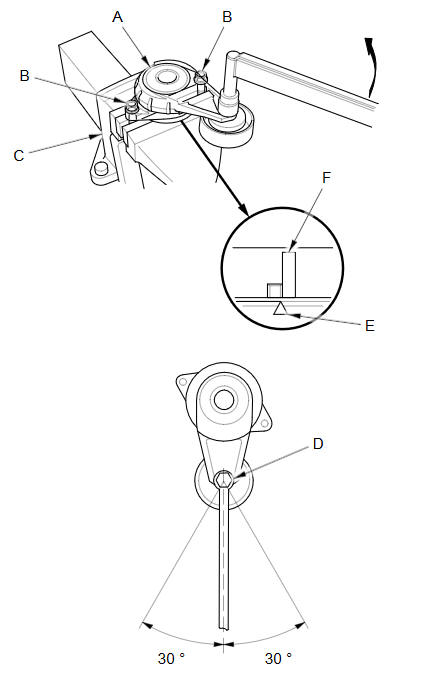
Clamp the auto-tensioner (A) by using two 8 mm bolts (B) and a vise (C) as shown. Do not clamp the auto-tensioner itself.
-
Attach the torque wrench (D) on the pulley bolt, and align it as shown.
-
Align the indicator (E) on the tensioner base with belt position mark (F) on the tensioner arm by using the torque wrench, and measure the torque. If the torque value is out of specification, replace the auto-tensioner.
NOTE: If the indicator exceeds the belt position mark, recheck the torque.
Auto-tensioner Spring Torque
20.6пјЌ25.2 NВ·m (2.10пјЌ2.25 kgfВ·m, 15.2пјЌ18.6 lbfВ·ft)
-
Install the auto-tensioner.
-
Install the drive belt.
See also:
Basic Settings
INFO button
► Setup ►Other
►Basic Settings
Set the map units to either miles or kilometers, and control the voice
feedback from
the navigation system.
Select an item.
The ...
Mirrors
Keep the inside and outside mirrors clean and adjusted for best visibility.
Be sure to adjust the mirrors before you start driving.
The inside mirror has day and night positions. The night positio ...
Evaporator Expansion Valve Replacement (With A/C)
Recover the refrigerant with a recovery/recycling/charging
station.
Remove the bolt from the A/C line clamp (A).
@font-face{font-family:
"H ...
Categories
