Honda Fit: Intake Manifold/Chamber Assembly Removal and Installation
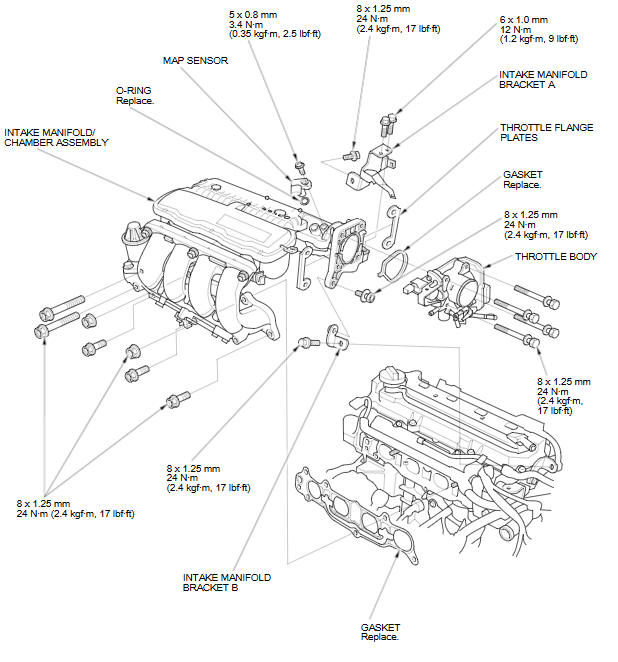
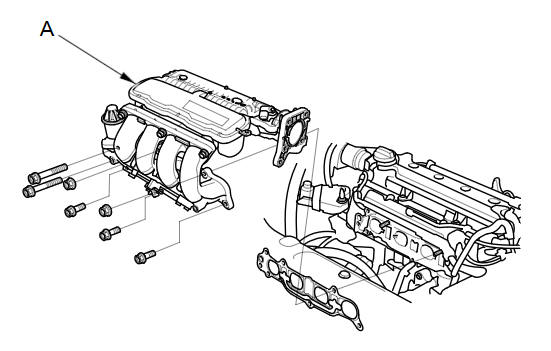
Exploded View
Removal
-
Remove the under-cowl panel.
-
Remove the air cleaner.
-
Disconnect the engine wire harness connectors, and remove the wire harness clamps from the intake manifold chamber:
-
Throttle actuator connector
-
MAP sensor connector
-
EGR valve connector
-
-
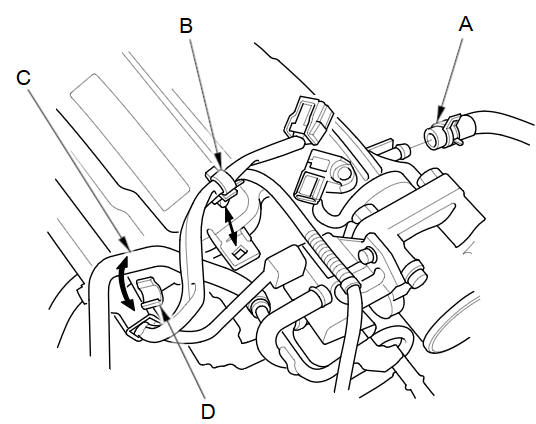
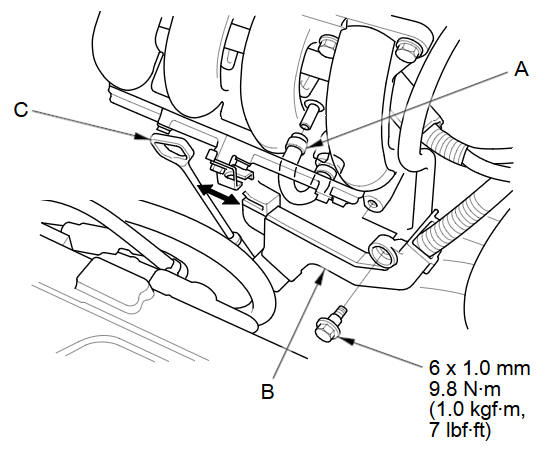
Disconnect the brake booster vacuum hose (A) and remove the harness clamp (B).
-
Remove the water bypass hose (C) from the clamp (D).
-
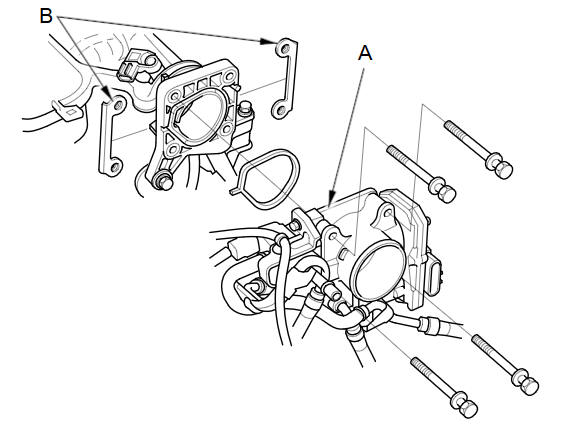
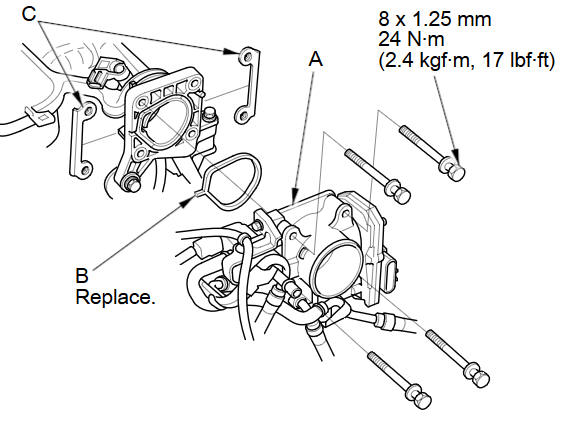
Remove the throttle body (A) without disconnecting the water bypass hoses.
-
Remove the throttle flange plates (B).
-
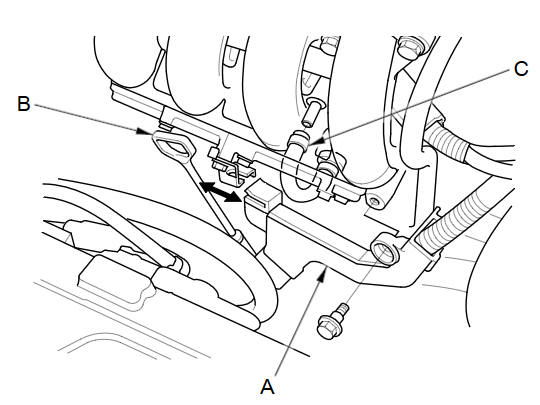
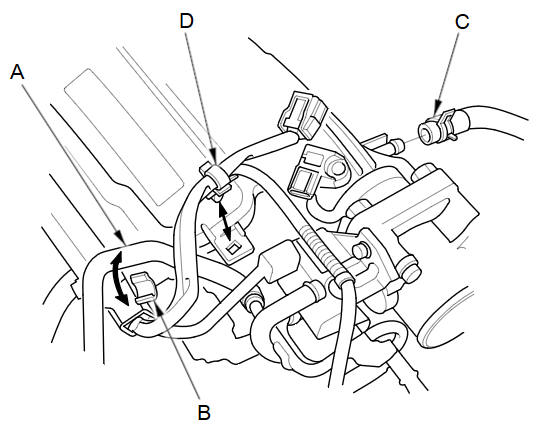
Remove the harness holder (A) and the dipstick (B).
-
Disconnect the PCV hose (C).
-
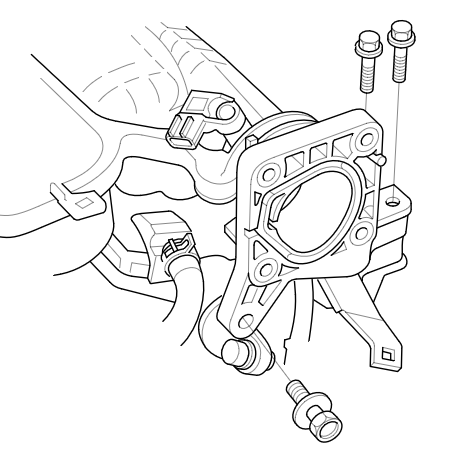
Remove the intake manifold bracket mounting bolts.
-
Remove the intake manifold/chamber assembly (A) from the cylinder head.
-
Disassemble the intake manifold/chamber assembly.
NOTE: Refer to the Exploded View if needed during this procedure.
Installation
-
Reassemble the intake manifold/chamber assembly.
NOTE: Refer to the Exploded View if needed during this procedure.
-
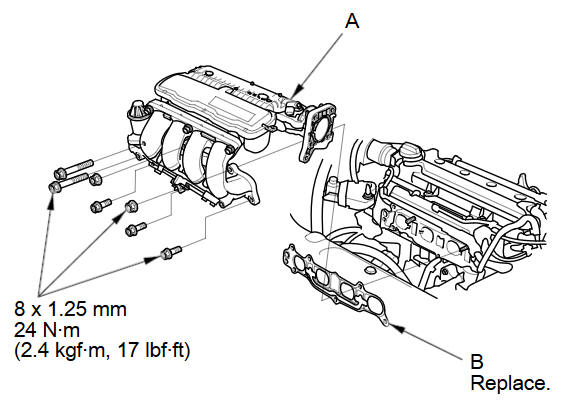
Install the intake manifold/chamber assembly (A) with a new gasket (B).
NOTE: Tighten the bolts and nuts in a crisscross pattern in three steps, beginning with the inner bolt.
-
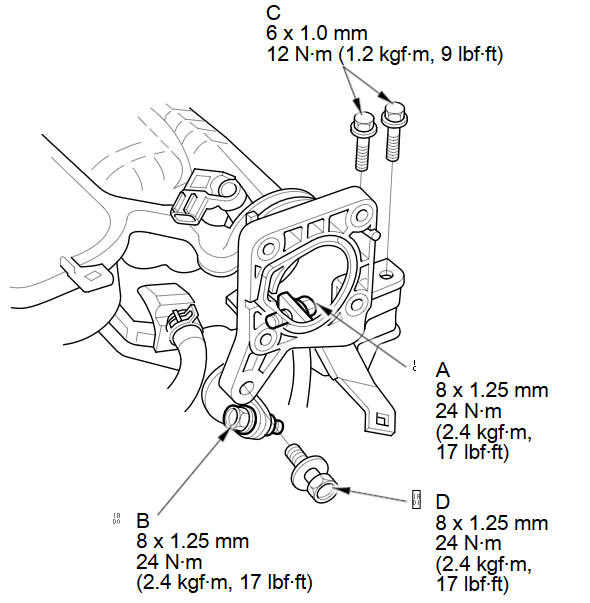
Loosen the intake manifold bracket mounting bolts (A, B), then loosely install the intake manifold bracket mounting bolts (C, D).
-
Tighten the intake manifold bracket mounting bolts in the numbered sequence shown.
-
Install the throttle body (A) with a new gasket (B), and the throttle flange plates (C).
-
Connect the PCV hose (A).
-
Install the harness holder (B) and the dipstick (C).
-
Install the water bypass hose (A) to the clamp (B).
-
Connect the brake booster vacuum hose (C) and install the harness clamp (D).
-
Connect the engine wire harness connectors, and install the wire harness clamps to the intake manifold chamber:
-
Throttle actuator connector
-
MAP sensor connector
-
EGR valve connector
-
-
Install the air cleaner.
-
Install the under-cowl panel.
See also:
Front Door Sash Outer Trim Replacement
NOTE: Take care not to scratch the door or related parts.
Remove the door sash outer trim (A).
Remove the screw from inside the door.
Release the lower edge of the tr ...
Accessories
...
Tires
To safely operate your vehicle, your tires must be the proper type and size,
in good condition with adequate tread, and correctly inflated.
The following pages give more detailed information on how ...
Categories
