
Honda Fit: Installation
-
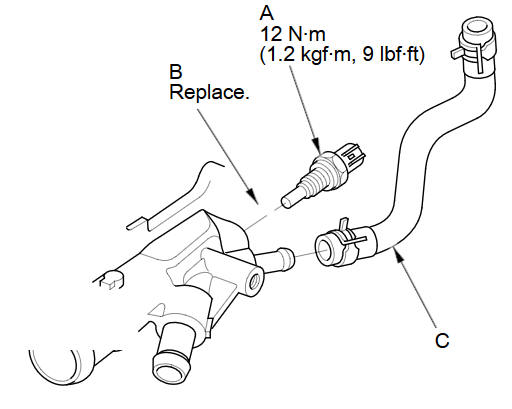
Install ECT sensor 1 (A) with a new O-ring (B).
-
Install the water bypass hose (C).
-
Remove all of the old liquid gasket from the water outlet mating surfaces, the bolts, and the bolt holes.
-
Clean and dry the water outlet mating surfaces.
-
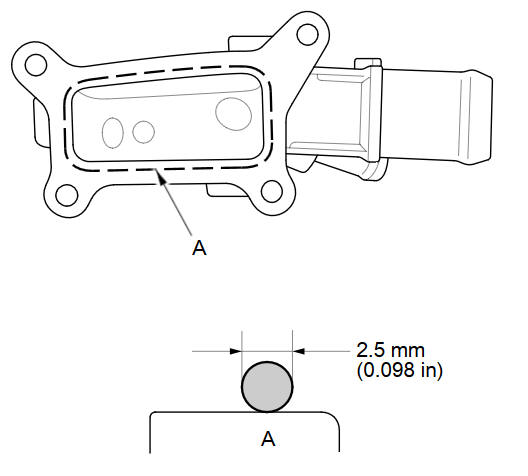
Apply liquid gasket (P/N 08717-0004, 08718-0003, 08718-0004, or 08718-0009) to the cylinder head mating surface of the water outlet and to the inside edge of the threaded bolts holes. Install the component within 5 minutes of applying the liquid gasket.
NOTE:
-
Apply a 2.5 mm (0.098 in) diameter dead of liquid gasket along the broken line (A).
-
If you apply liquid gasket P/N 08718-0012, the component must be installed within 4 minutes.
-
If too much time has passed after applying the liquid gasket, remove the old liquid gasket and residue, then reapply new liquid gasket.
-
-
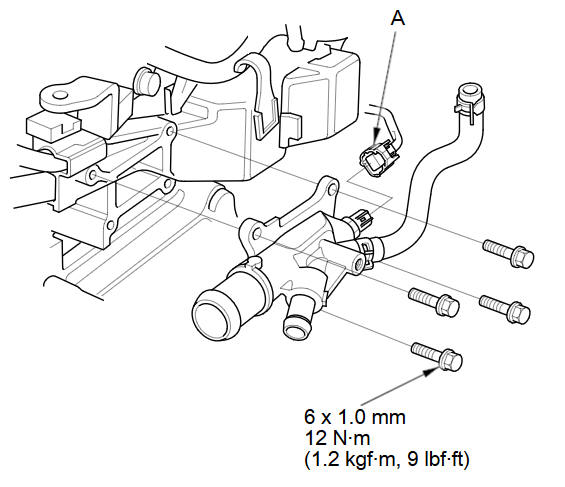
Install the water outlet, then connect the ECT sensor 1 connector (A).
NOTE:
-
After assembly, wait at least 30 minutes before filling the engine with coolant.
-
Do not run the engine for at least 3 hours after installing the water outlet.
-
-
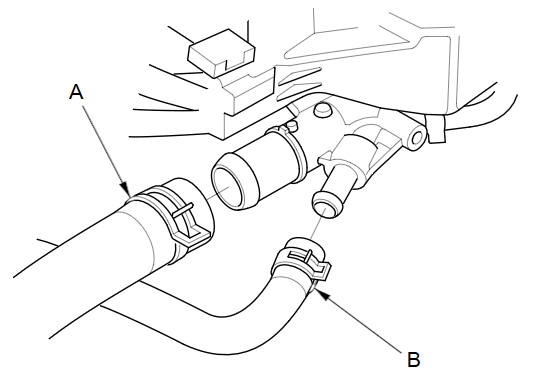
Connect the upper radiator hose (A) and the heater hose (B).
-
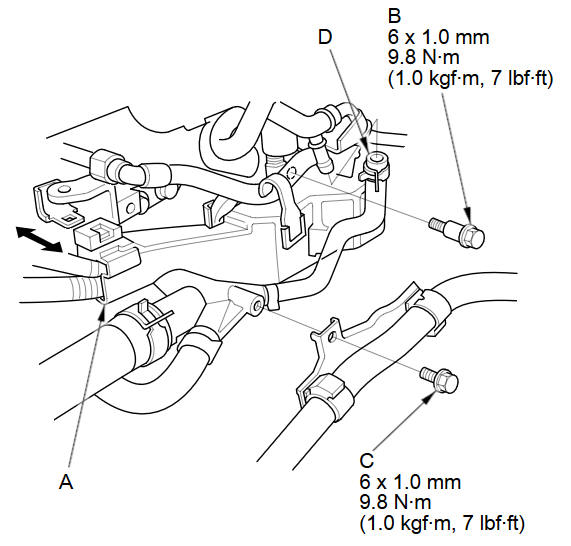
Install the harness holder (A) to the bracket, then tighten the harness holder mounting bolt (B) and the heater hose clamp bracket mounting bolt (C).
-
Connect the water bypass hose (D).
-
Install the air cleaner.
-
Refill the radiator with engine coolant, and bleed the air from the cooling system.
-
Clean up any spilled engine coolant.
See also:
Radio Theft Protection
Your vehicle’s audio system will disable itself if it is disconnected from electrical
power for any reason.
To make it work again, you must enter a specific five-digit code in the preset
button ...
Authorized Manuals
Purchasing Factory Authorized Manuals (U.S. onl
The publications shown below can be purchased from Helm Incorporated. You can
order by phone or online:
• Call Helm Inc. at 1-800-782-4356 (credit ...
Intake Manifold/Chamber Assembly Removal and Installation
Exploded View
Removal
Remove the under-cowl panel.
Remove the air cleaner.
Disconnect the engine wire harness connectors, and remove the wire
harness c ...
Categories
